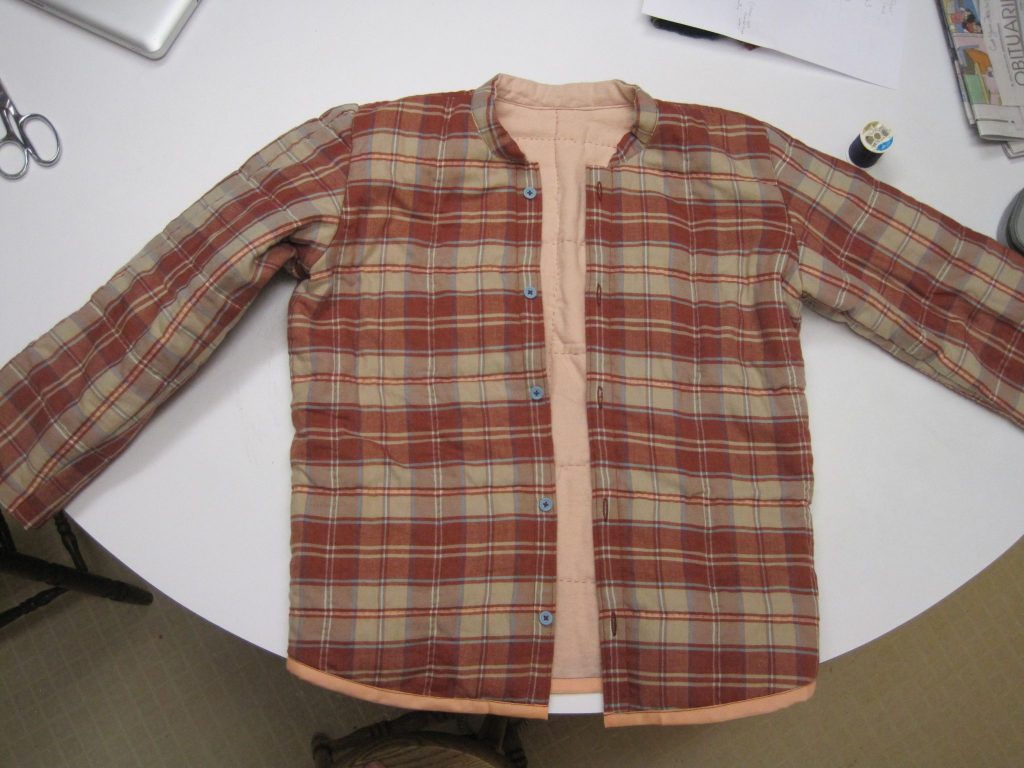
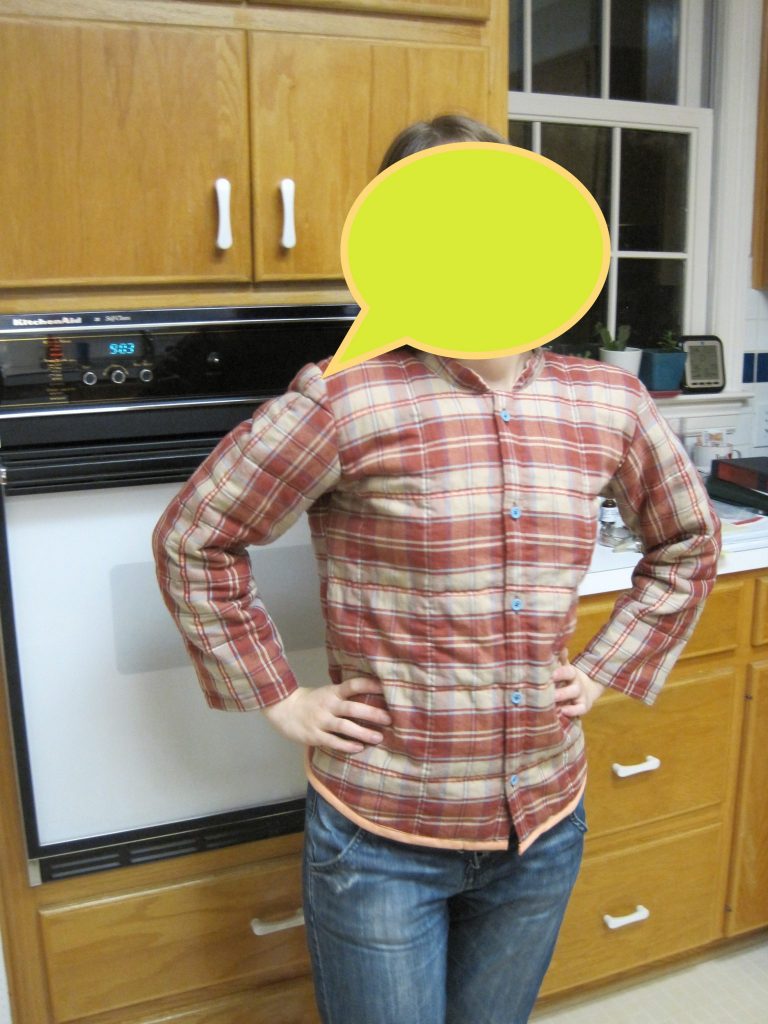
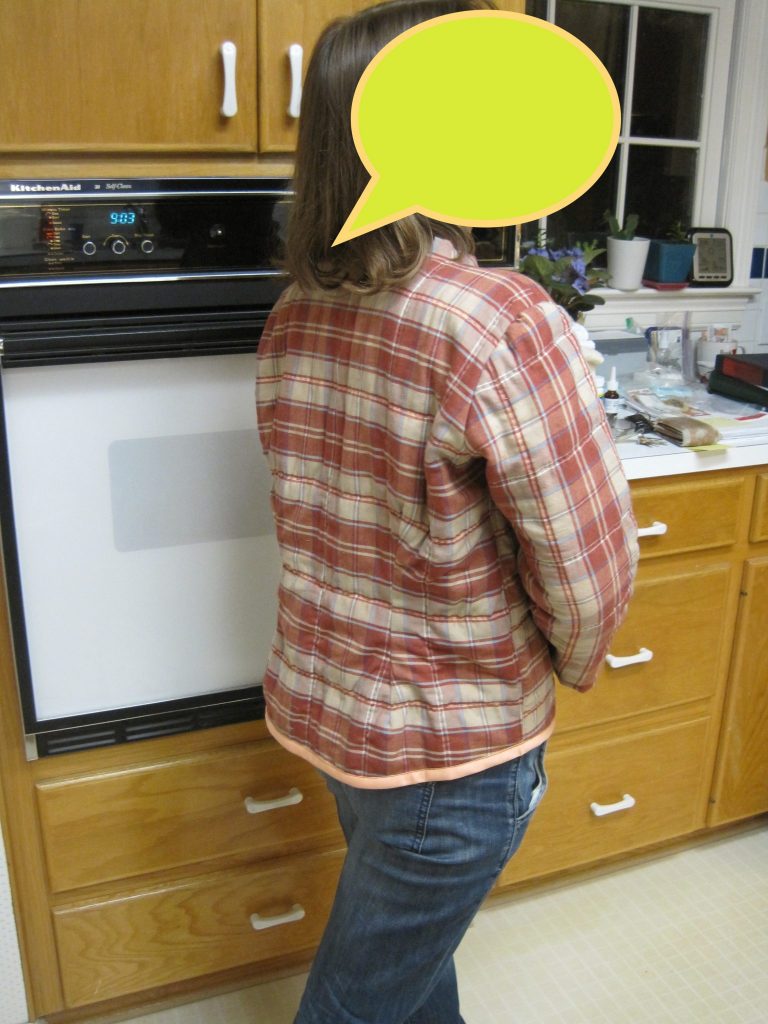
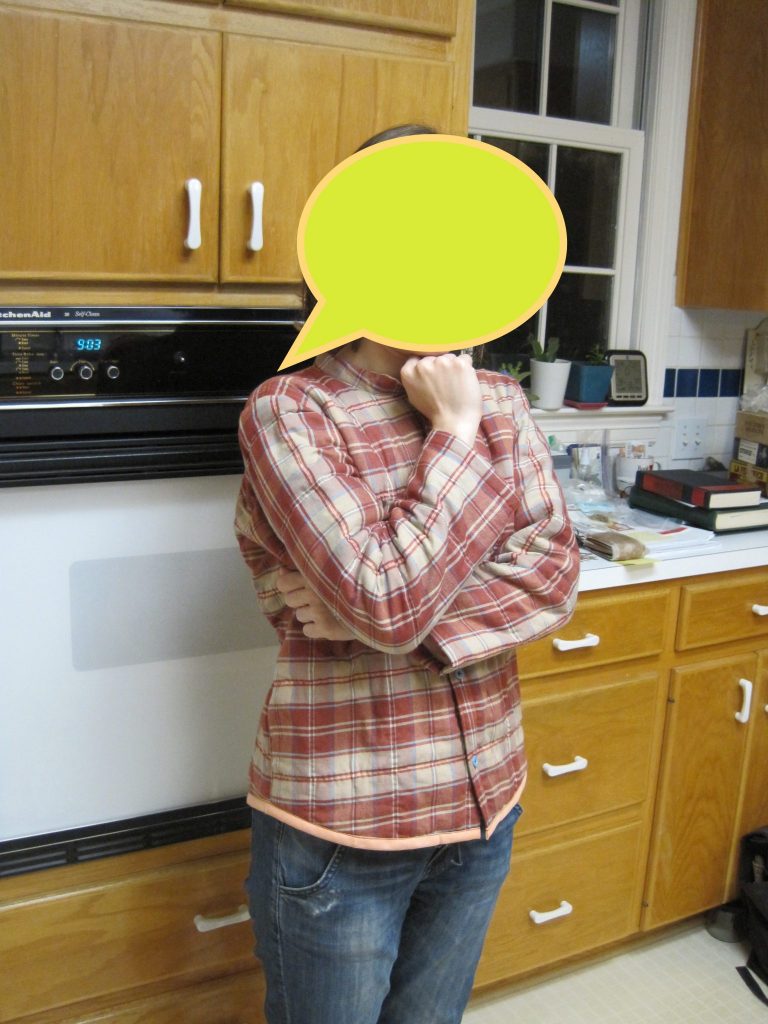
My sibling C is perpetually cold. She needed a new winter pajama top and requested that it be quilted, so I threw this together (it’s so much faster to make items for other people – I care much less about getting them perfect).
The pattern was made based on the previous pajama top (which I also made. It was based on commercial pajamas). Amazingly, we already had all the necessary materials. It took about a week to make, I think.
For future me, you already have a pajama top pattern! No need to make another 😭
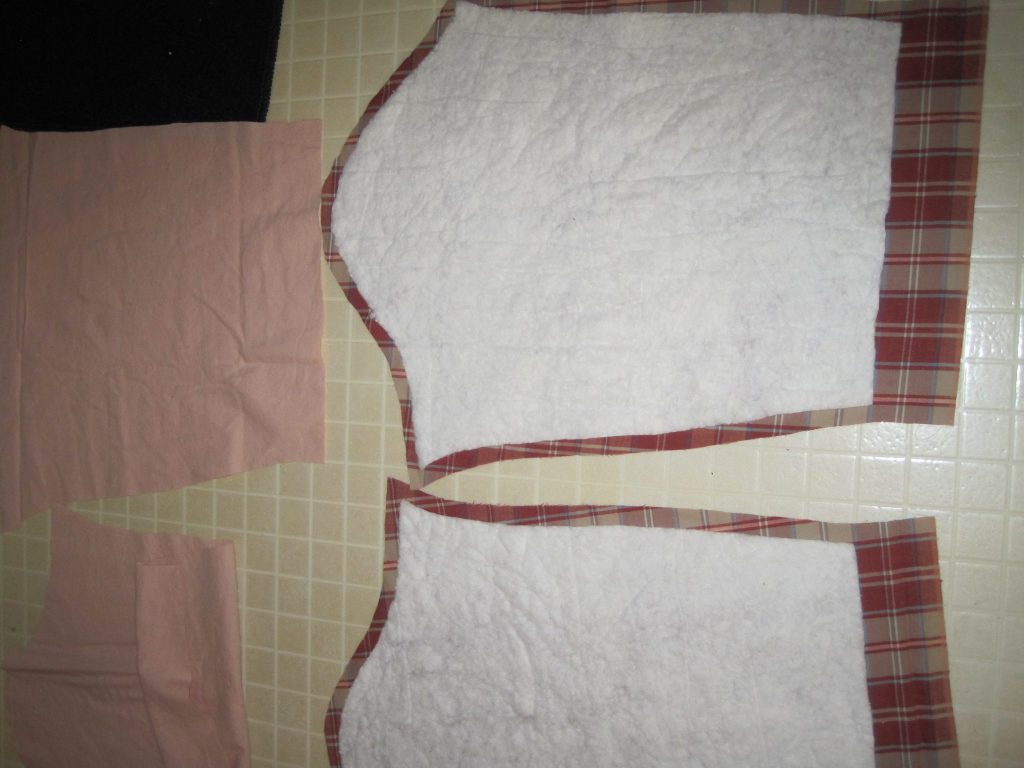
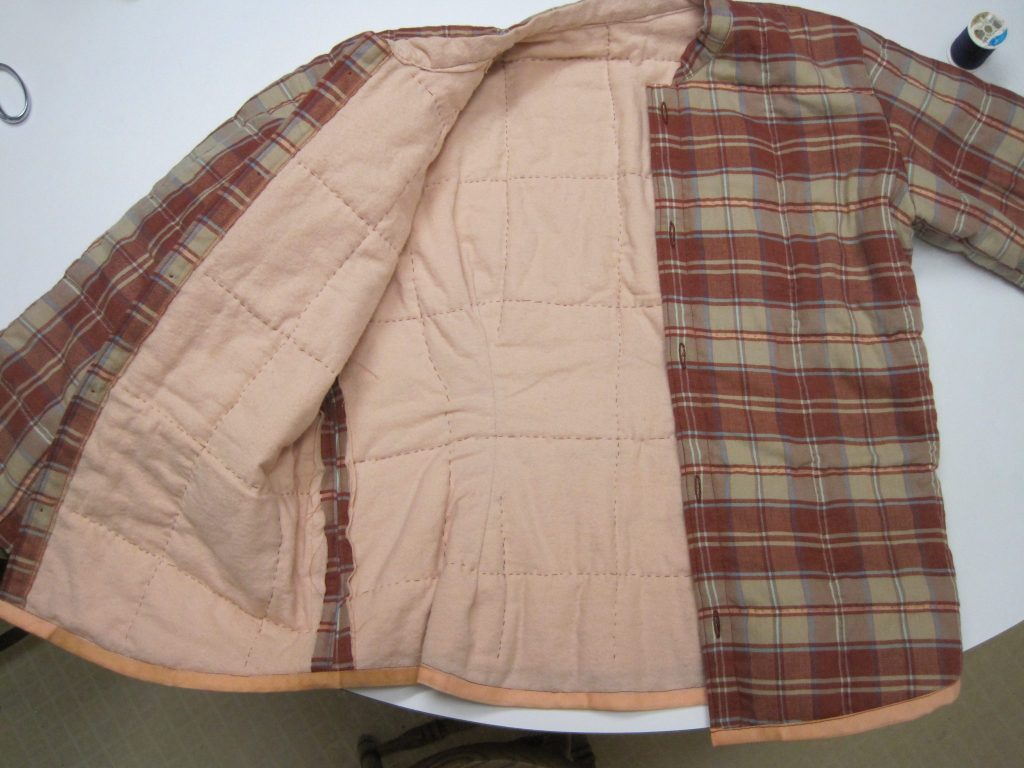
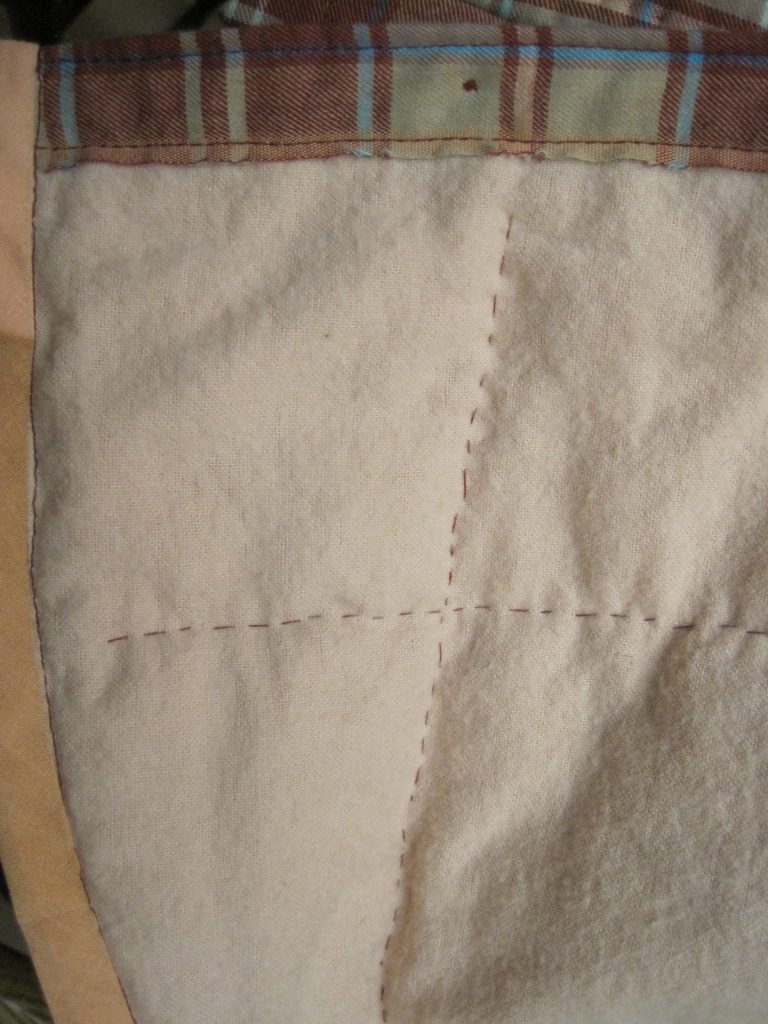
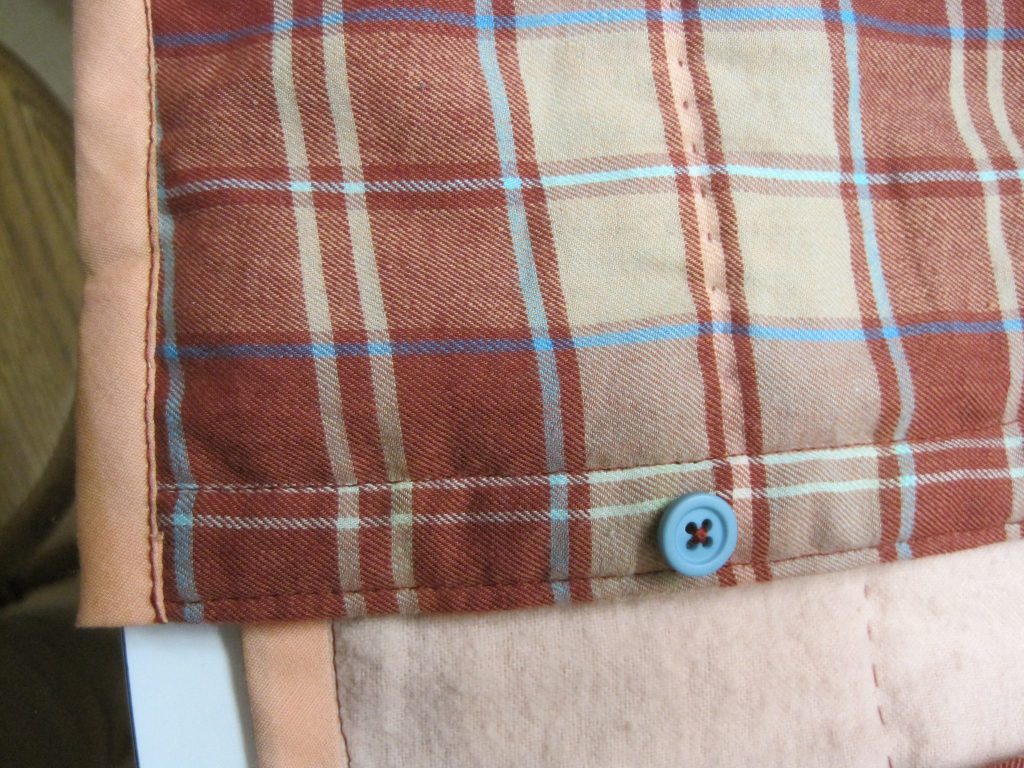
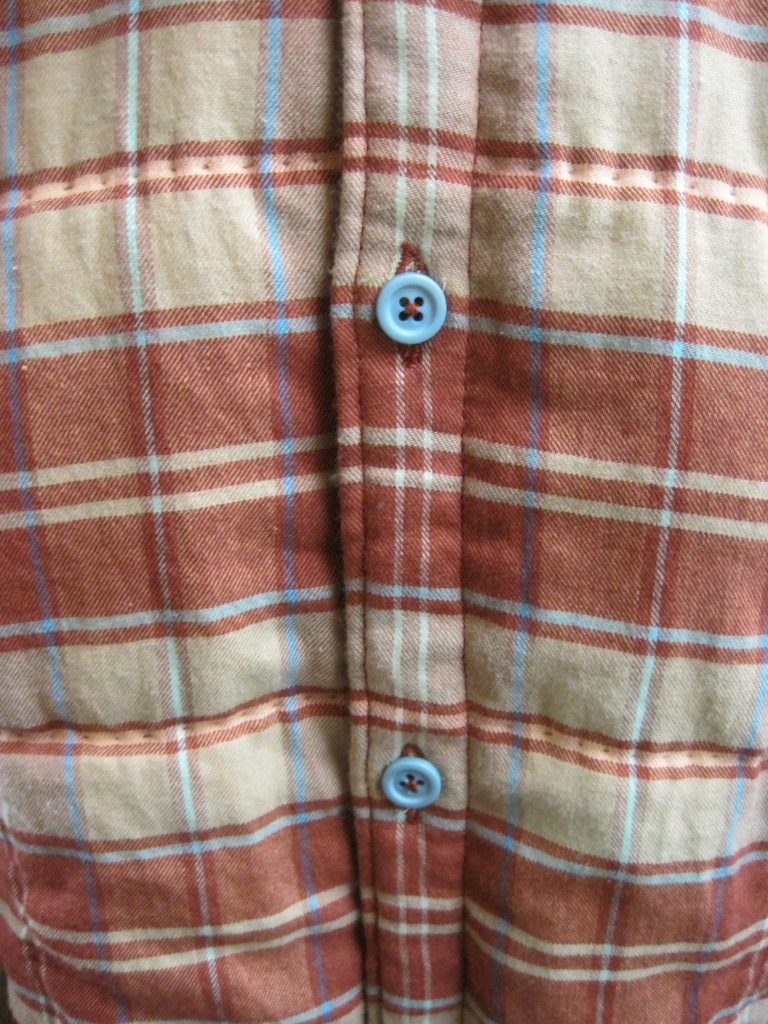
Batting was sandwiched between the lining and outside. Sibling C did the actual quilting (by hand), I cut the pieces and sewed the garment together. The batting is smaller so that it doesn’t make the seams bulky.Pink cotton flannel for lining, cotton batting for fluff, cotton plaid for the outside. The flannel and plaid were both previously purchased from creative reuse stores.Hand-quilting.The quilting gives a bit of a muscle-man effect… 💪The original top had darts on the back. Those didn’t turn out well with the extra-thick quilted fabric. I’d remove the darts and make the back piece a bit narrower next time.
Overall, it turned out really well! C says it is super warm. It is nicely color-coordinated and I even got some of the stripes to line up!
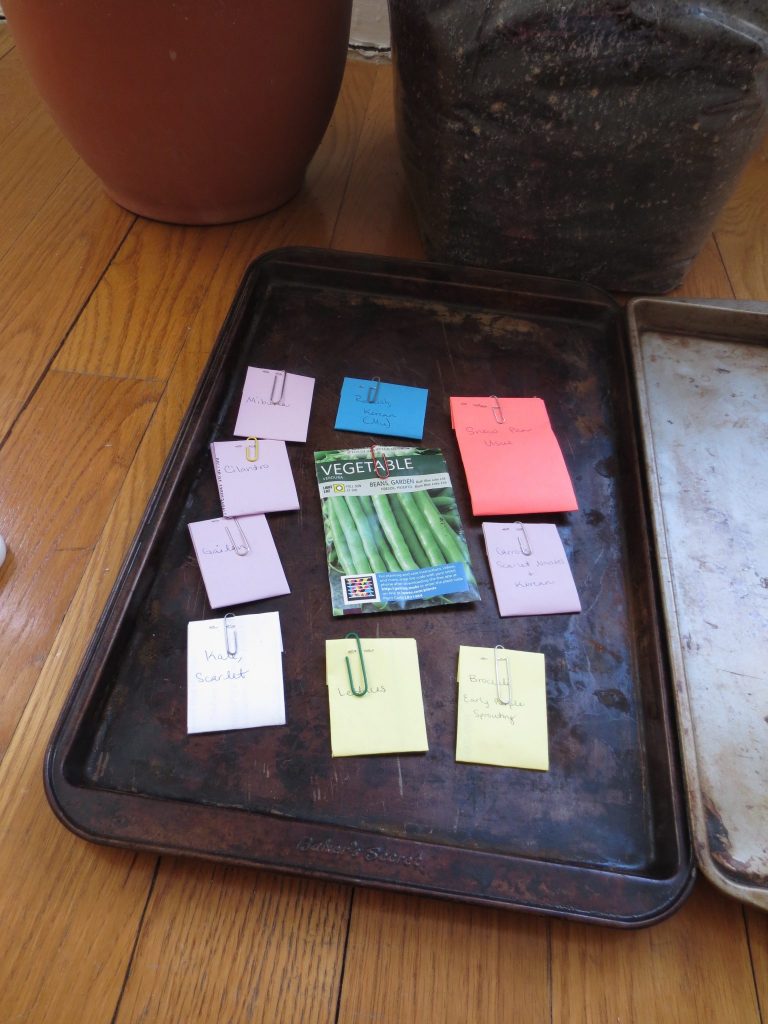
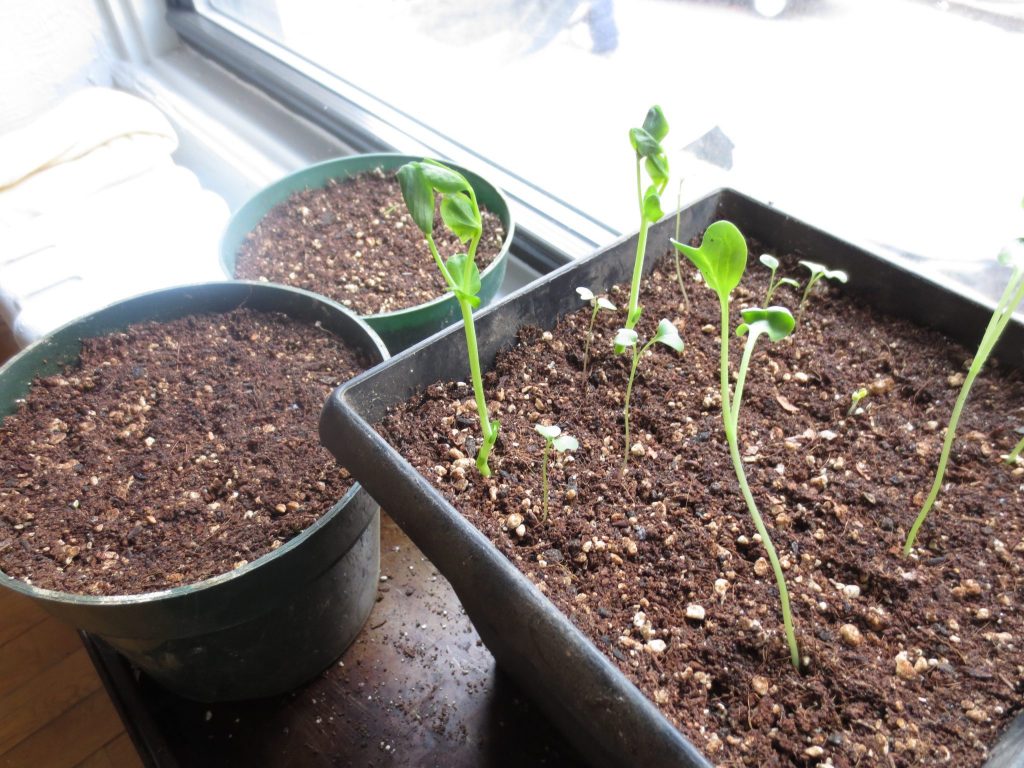
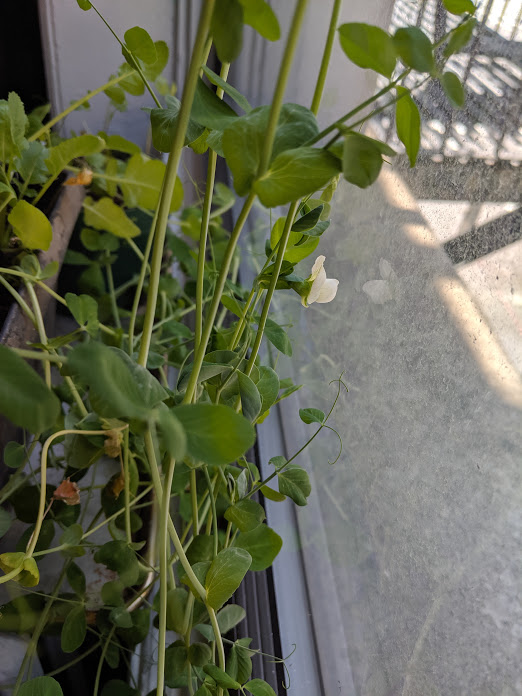
Our front windows are quite sunny – they face southwest – so I’d hoped to be able to grow some veggies. I planted lots of things, cilantro, peas (for pea shoots), various greens. Peas are the only thing that really took off, and (amazingly, considering they’re inside) actually made peas!
Various seeds from sibling C’s collection!Pea shoots, with some small crucifer sprouts in between.Pea flowers!
We got a handful of pods from the peas. Maybe I’ll save them to plant next year?
I also have a houseplant (Aglaonema) that I got for free! from work. It’s doing well. I might expand the houseplant collection. Ferns sound nice 🙂 It’s also possible to grow some tropical and more unusual foods indoors (see Growing Tasty Tropical Plants). I’m considering figs.
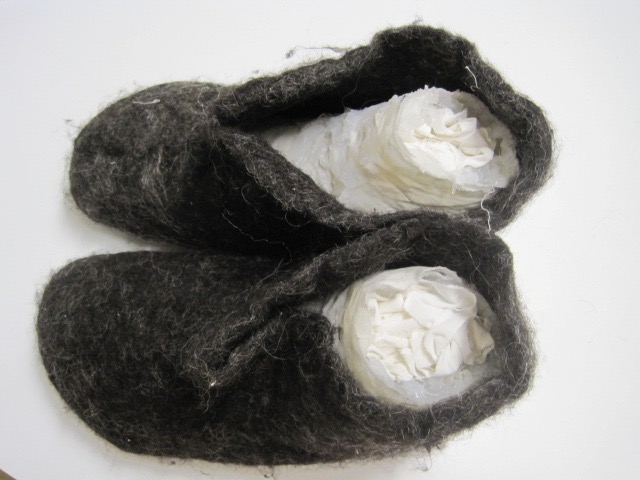
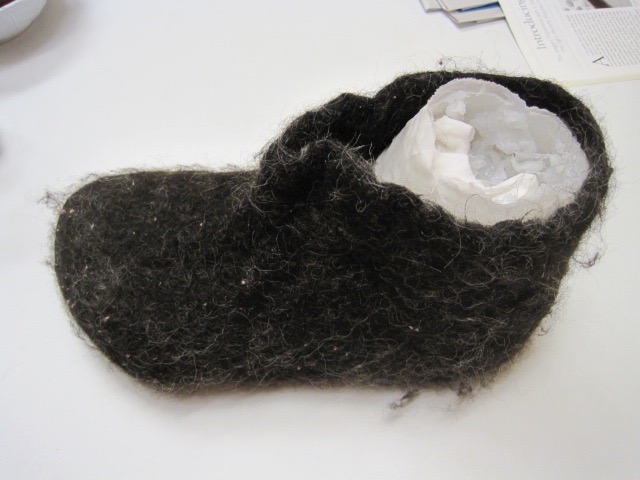
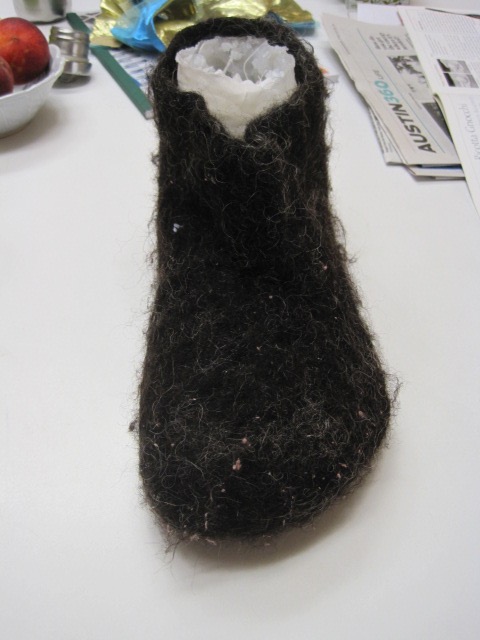
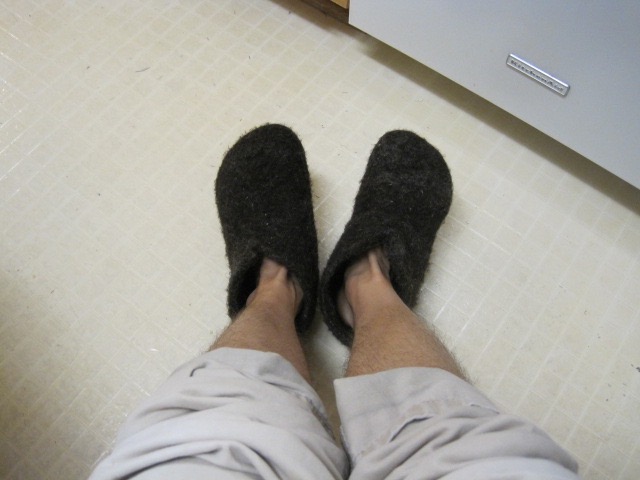
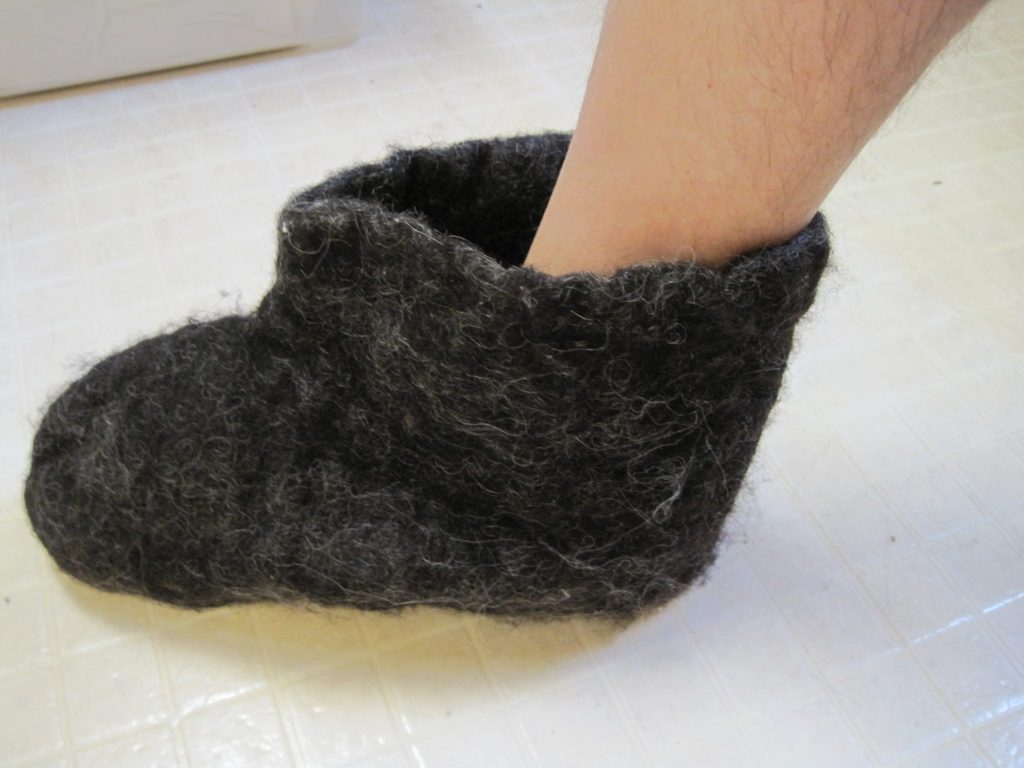
Original post here! I put the slippers around my foot casts (filled with scrap fabric to make them firm) then ran them through the washer and dryer.
Oooo, very nicely shaped.
Overall, they fit better but there’s still a bunch of extra felt around the ankle. As it turns out, positive molds (vs negative molds, i.e. casts) of your feet are bigger than your feet, so these are a bit loose. For actual shoes or other tightly-fitted footwear, I’d want to do some additional shaping via cutting/sewing. The instructions I followed (loosely) for this project were meant to be boots with a tongue and laces – hence where the extra felt was supposed to go.
In my new-spinner‘s excitement, I made a big batch of handspun yarn before realizing that it was waaay too loosely spun to wear well. It might’ve made a good hat, but certainly not the sweater I was aiming for. Sweaters and other items that get a lot of friction need tightly spun or lightly felted yarn to last a long time.
Fluffy but delicate.
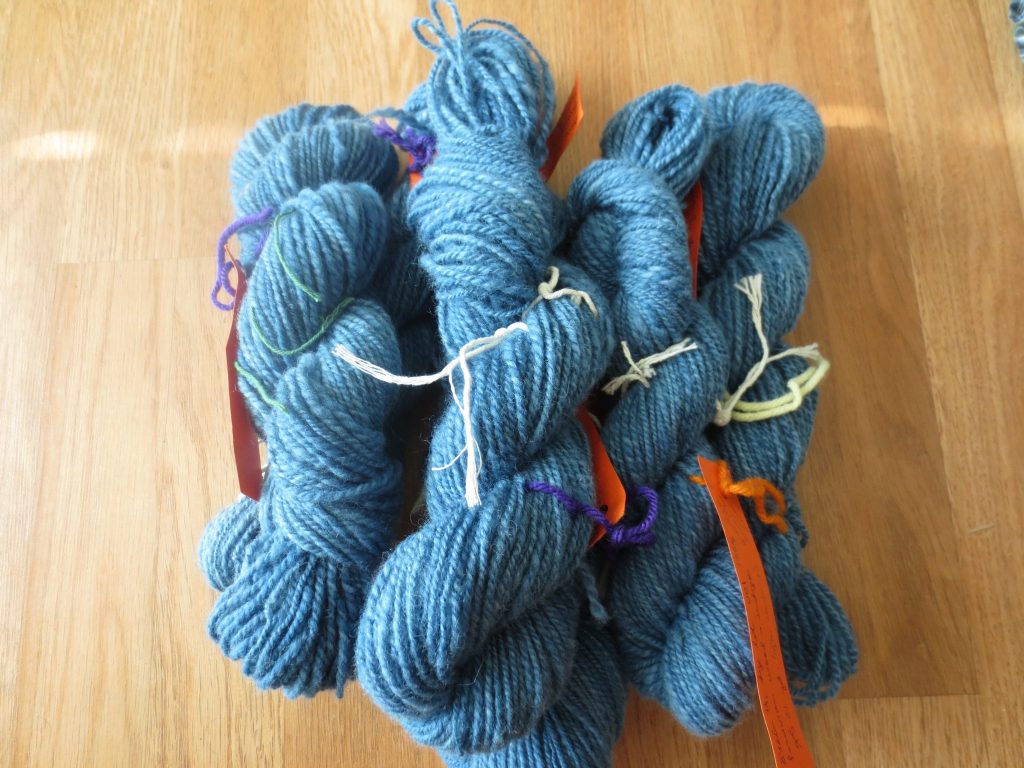
Sooo, I’ve been respinning the batch! The aim, of course, is to make the yarn more durable by spinning it more tightly. To do so, I had to un-ply the yarn, spin the singles more, then re-ply everything. The whole process for about 600 yards of yarn only took a few years.
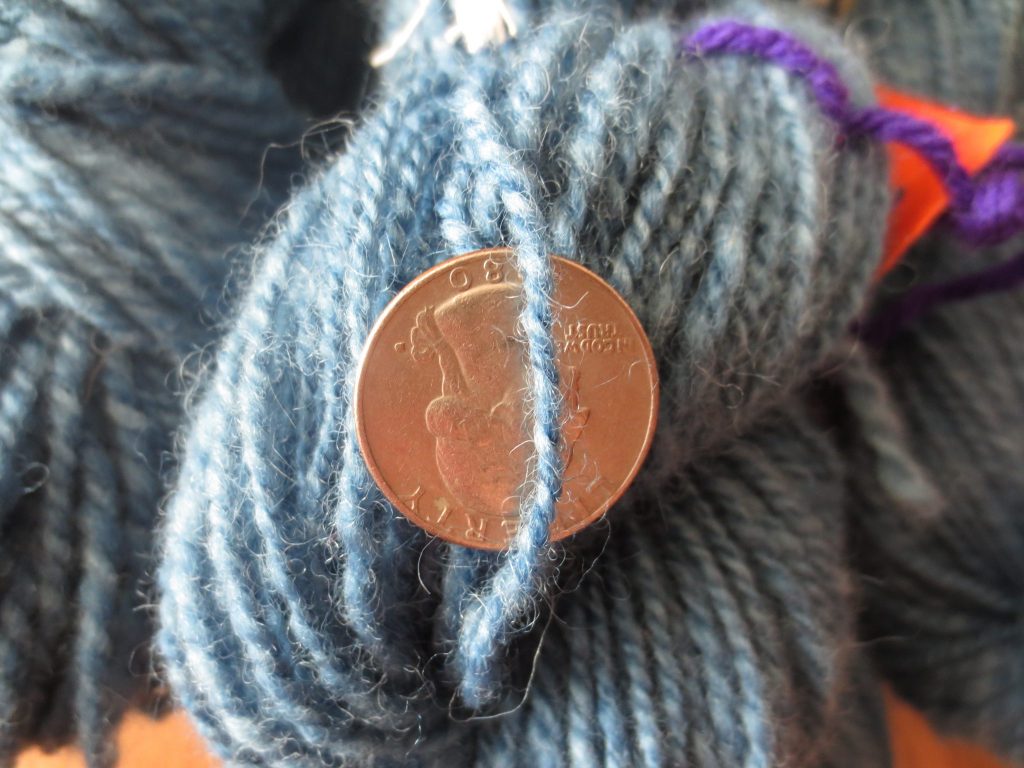
You can see that the yarn is now finer and more twisted.But there’s not quite enough to make a sweater…
I’m now unsure what to use the yarn for. I’ve been considering:
A hat for J (see draft below!), potentially with a matching scarf or cowl
A sweater vest for me
A sweater with a contrasting color for the sleeves or the bottom, color-block style.
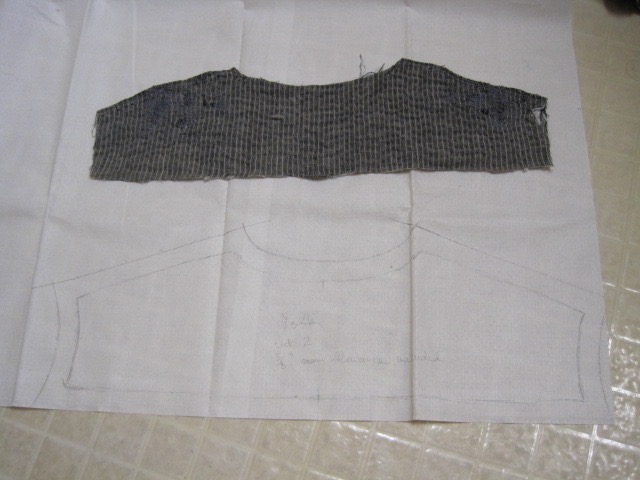
I gave up a while ago on my gray linen shirt, after extensive patching failed to halt its rate of degradation. I still really like it, though, and I’d like to recreate it in the future, so I’m trying to trace its pieces to make a pattern!
Tracing the yoke! The pattern paper is from my grandmother’s sewing collection (or, y’know, maybe it’s a really low quality tablecloth that I failed to identify correctly).
Cutting the garment apart wasn’t as easy or as clean as I would have hoped, so a copy-cat shirt might end up a little wonky… We’ll have to see. I also tore the sleeves into strips before deciding to make a pattern, so… I’ll have to wing those when the time comes.
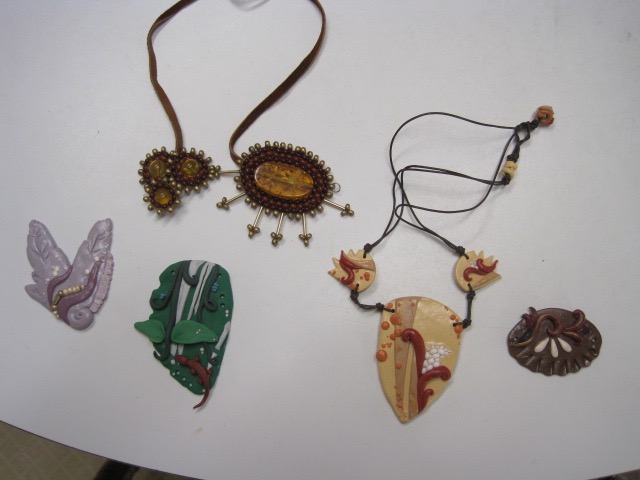
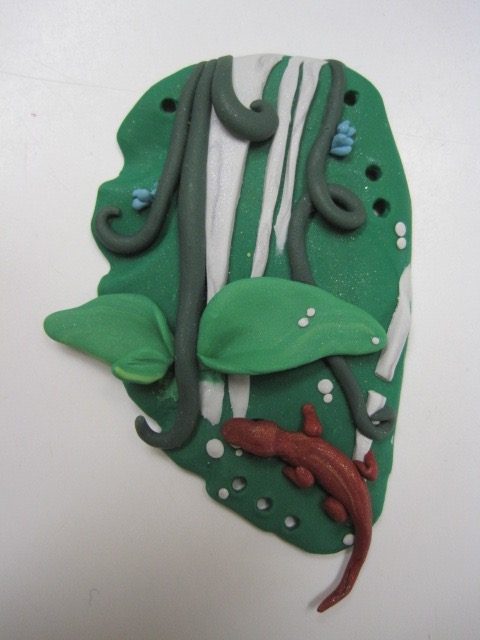
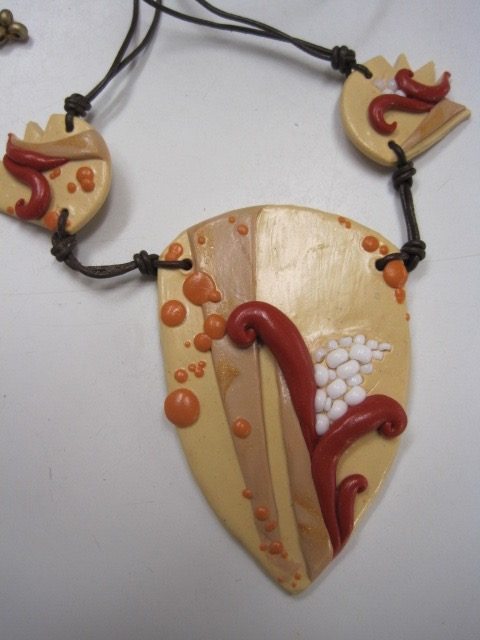
Here are some old projects I found. I think I made them in middle school – I was really into beading and jewelry then.
Collection of pendants made out of polymer clay!This is a waterfall jungle scene, complete with vines and reptiles. You’re supposed to hang dangly things from the bottom holes.Some abstract thing I actually turned into a necklace. It looks kinda like corn…My mom’s grade-school watercolor kit (we did not get rid of it), and her scientific drawing dip pen! Vintage~
Both of my siblings are strangely attached to crayons. Although they allowed many of our crayons to be given away, the compromise was that we had to keep the 96-color set. As sibling C said, “Who knows when the world will end and we realize we need crayons”.
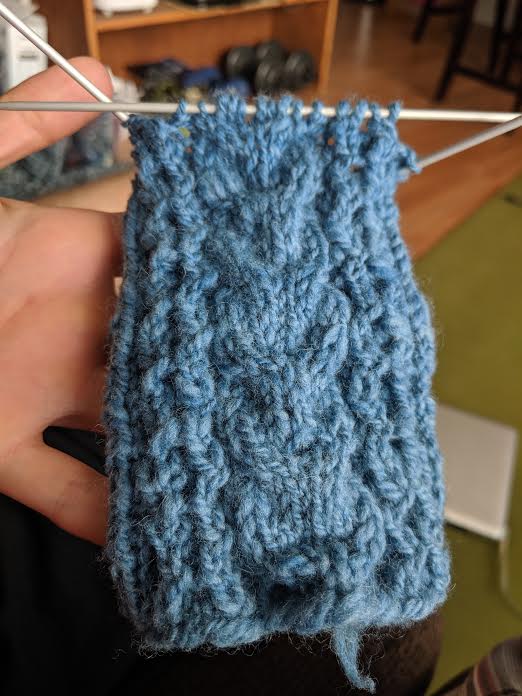
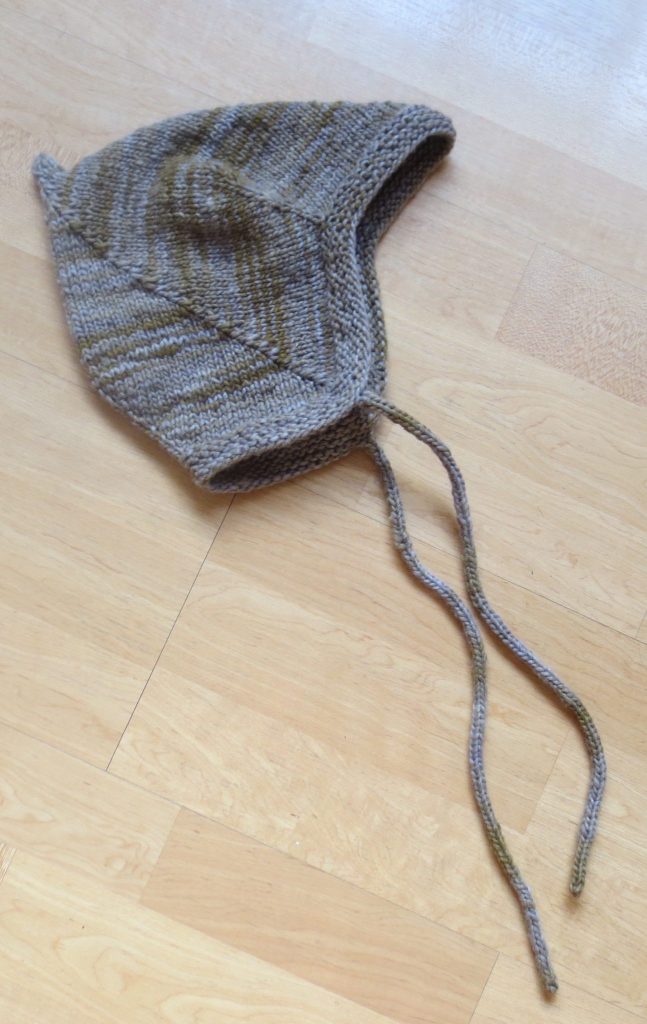
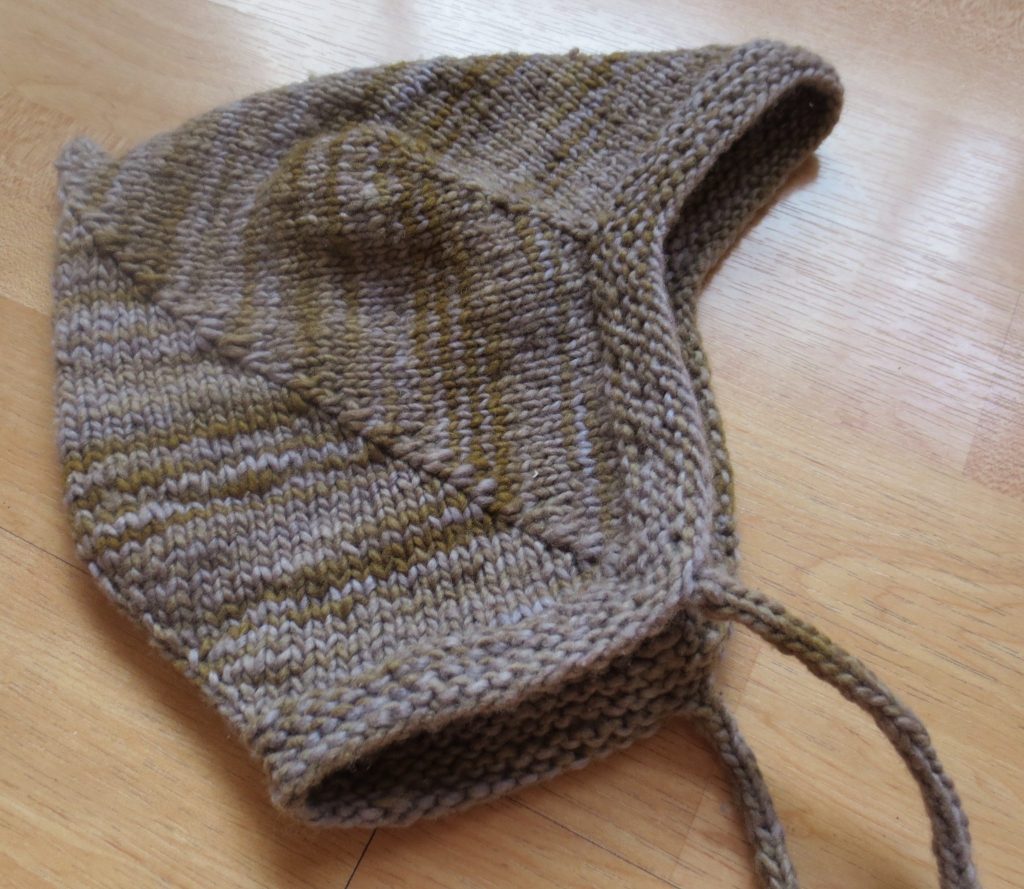
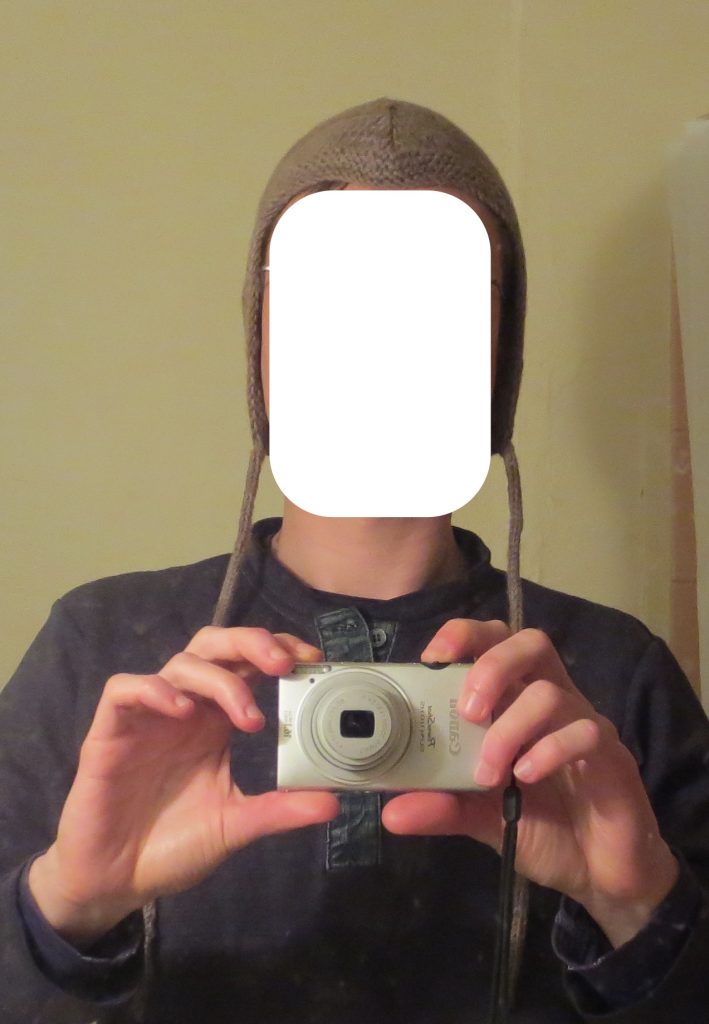
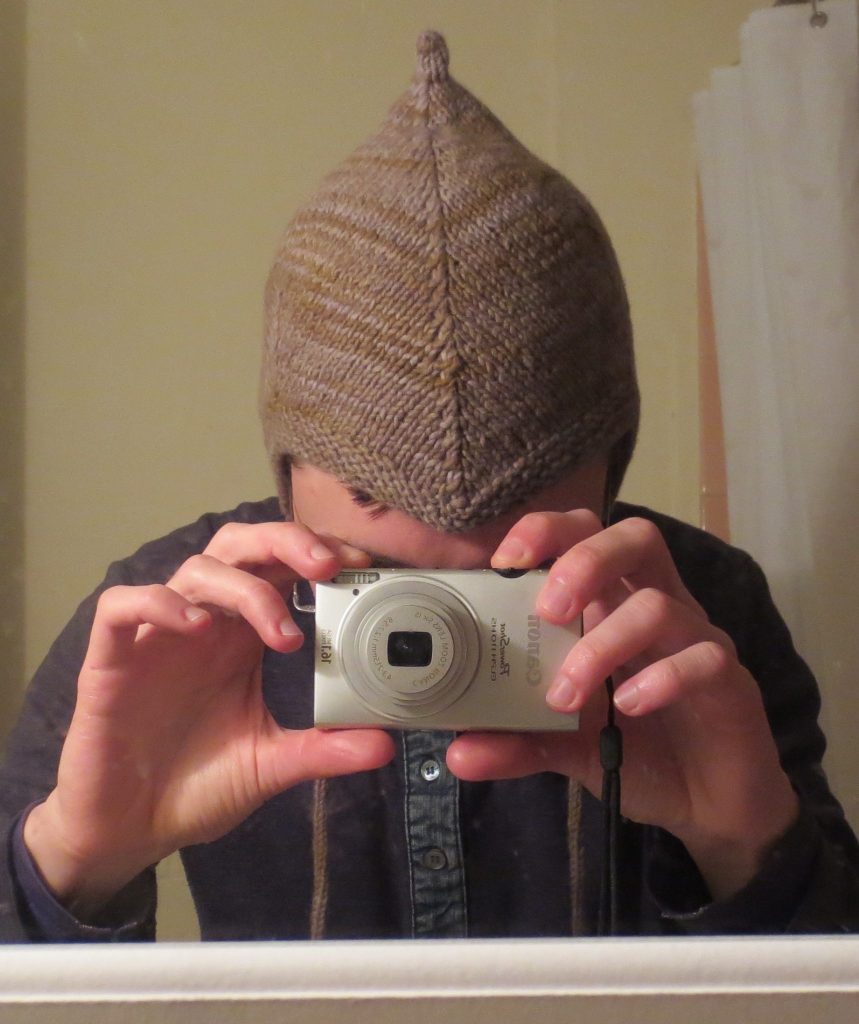
Since I’m trying to use up the merino wool from the failed sweater, I’ve been asking if anyone has knitting requests! Sibling C is perpetually cold and tries to avoid using a lot of energy on heating in the winter, so she requested a sleep hat.
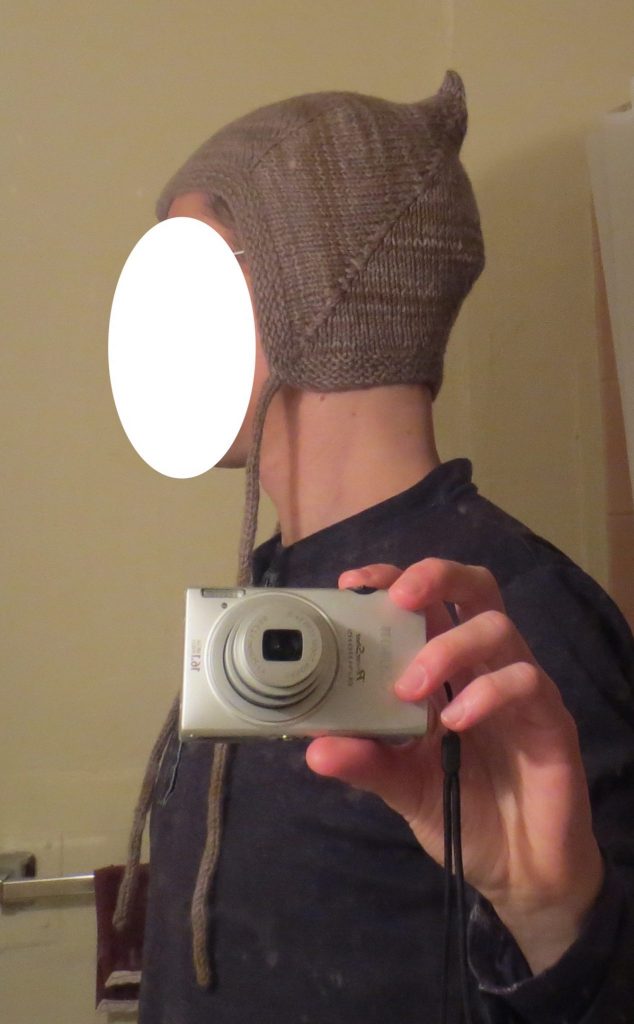
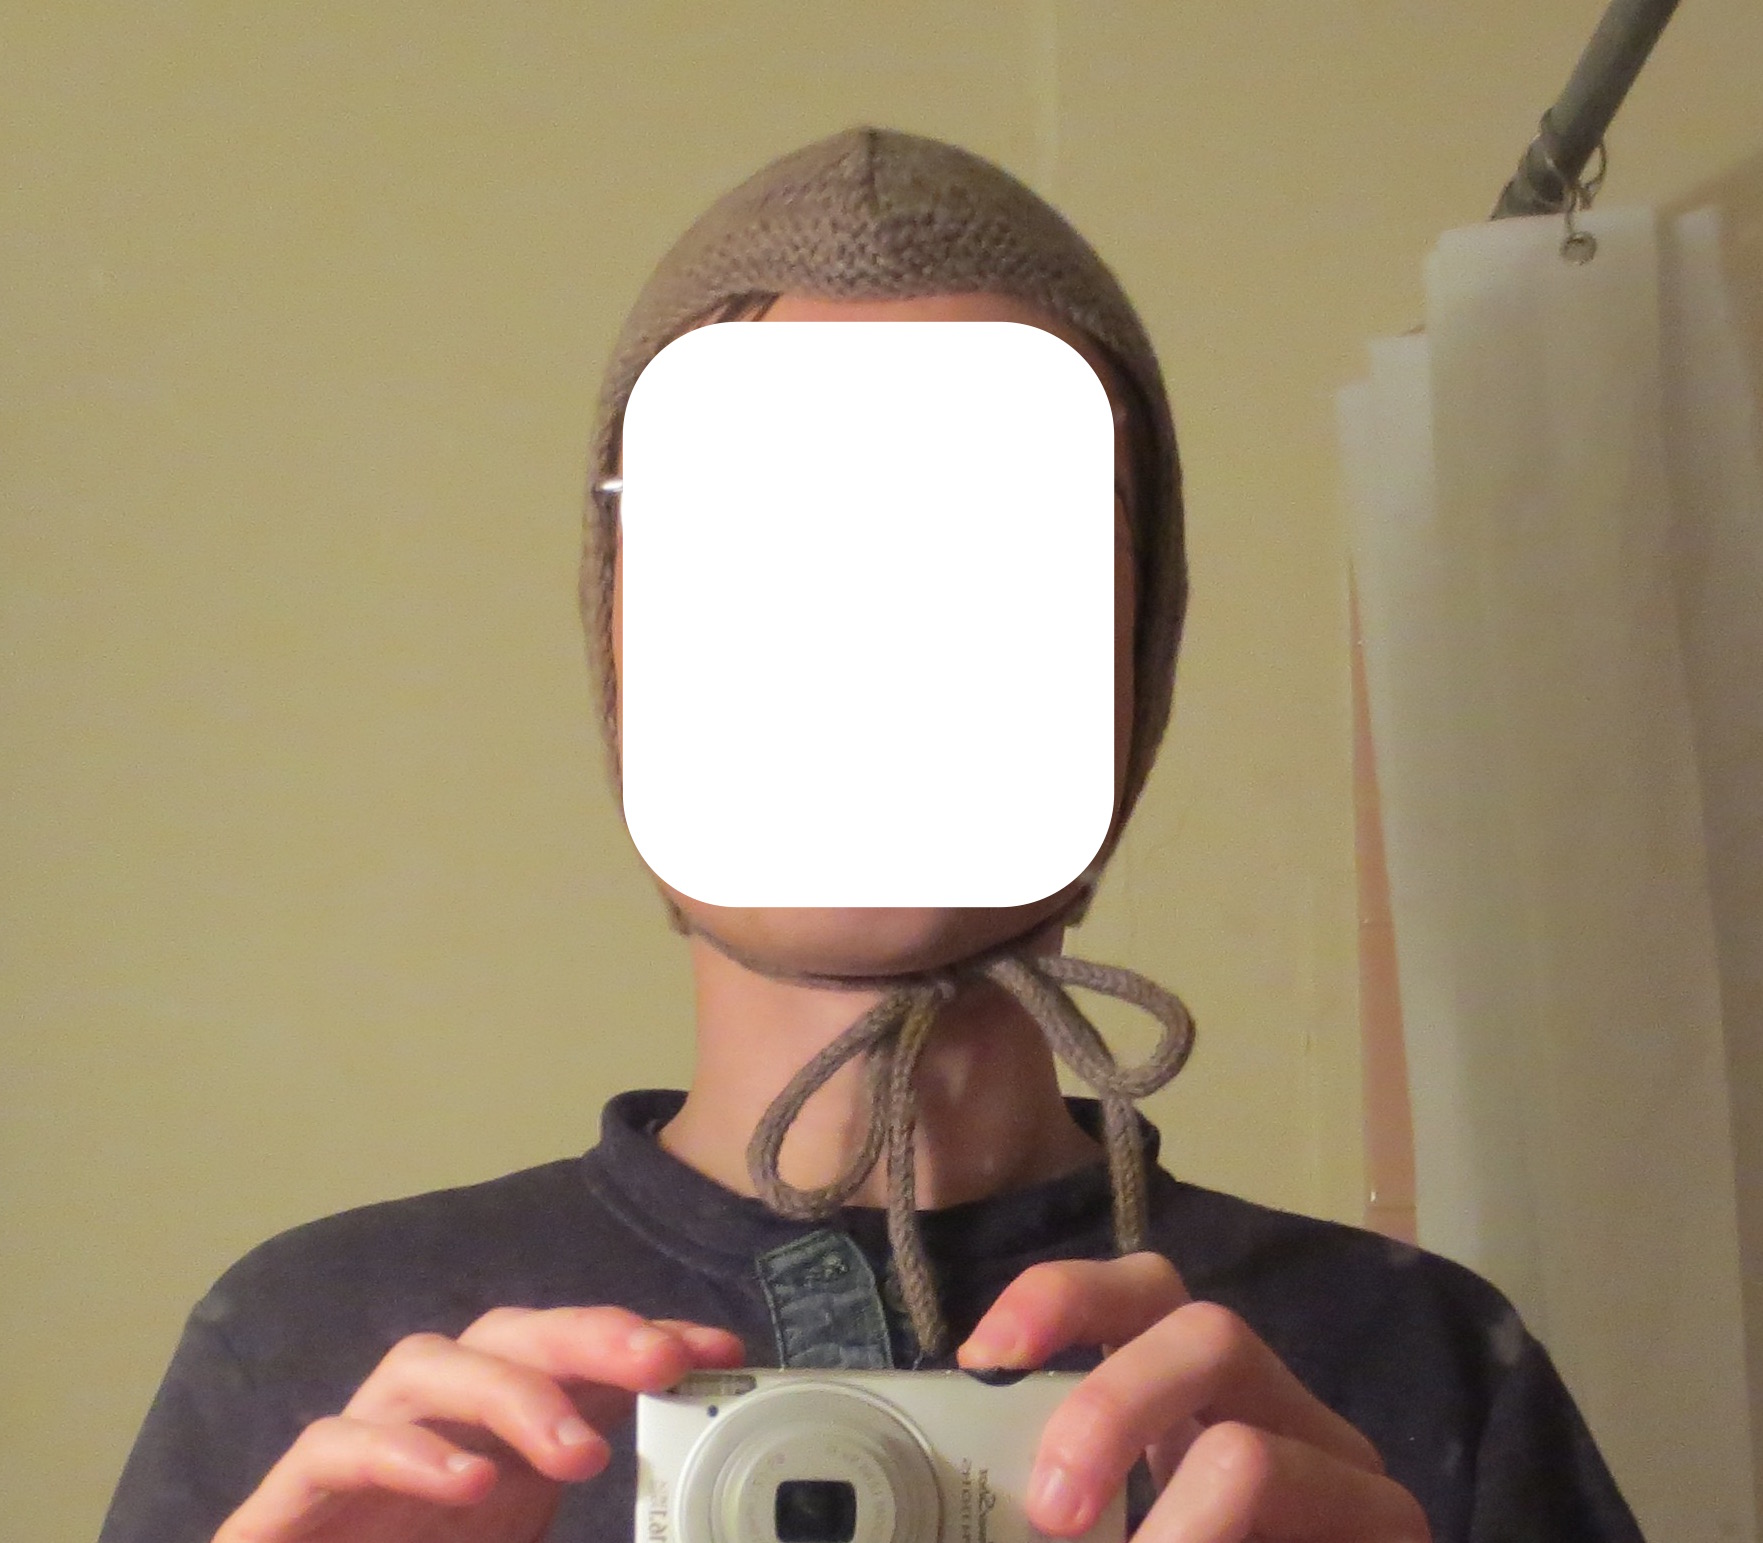
I modified this baby pattern (pictures of the finished product here) by casting on 107 stitches and using short rows to make the top curlier and pointier and more elven (:
I-cord ties! They are knit top-down, with the initial stitches picked up from the edge of the hat.
Stockinette with a garter stitch border in a smaller needle size (3 mm).
Looks kinda dorky…
The hat has three points; one comes down on the forehead, the other two create ear flaps and allow for I-cord attachment.
Many shoe-making methods require a last, a hard, foot-shaped form around which a shoe is molded to give it 3D shape. Since I am a fan of “minimalist” or “barefoot” shoes, I wanted to use a last that is actually shaped like my feet. The Munson Army last, developed for minimalist walking shoes by a military doctor shortly before World War I as detailed in his book, was an option but I was not able to find any for sale online.
So instead, I cast my feet!
There are several ways to do this. The standard alginate mold approach involves casting your feet (or other body part) in alginate jelly, then filling the negative with some other material (plaster is popular, but can only be used once). This method exactly replicates your feet in shape and size.
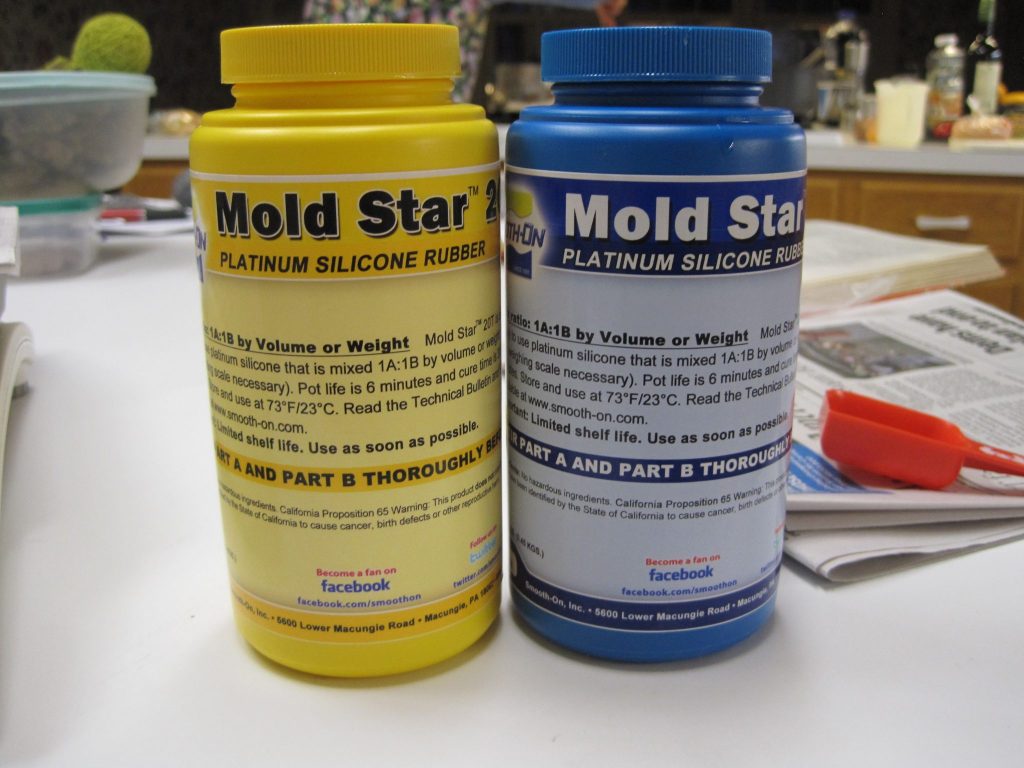
Casting kit I used. I now have quite a bit of alginate powder left over.
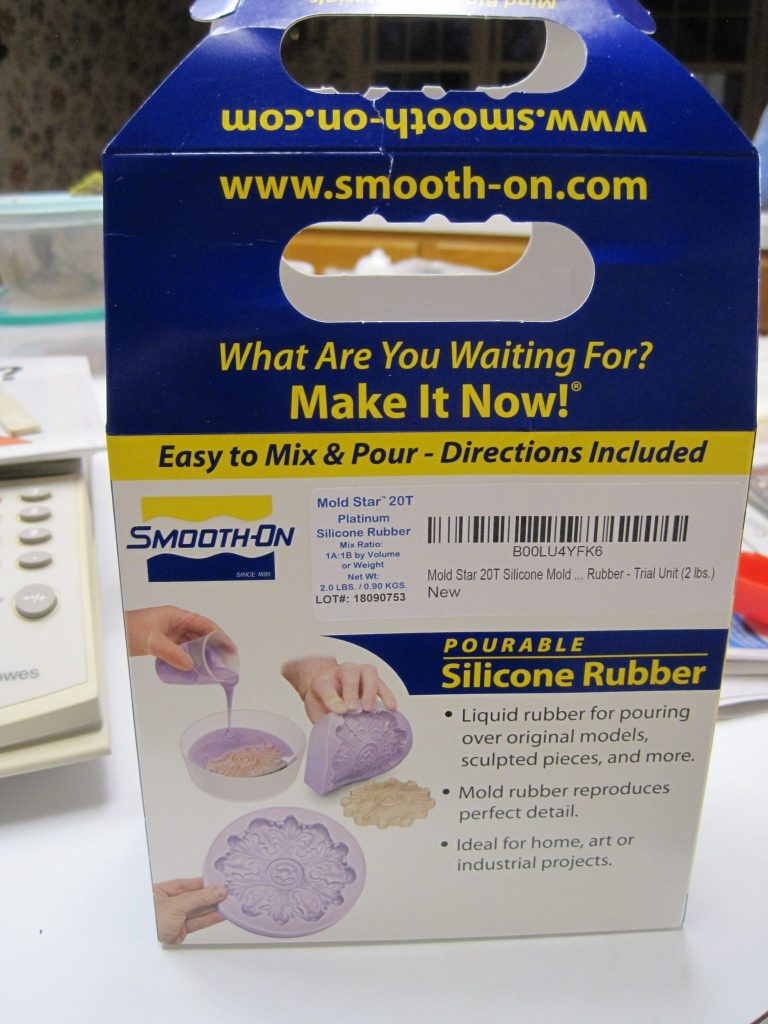
Since I wanted to have extra room for socks and wiggling my toes, I did not use the alginate approach. Instead, I wrapped my feet in fabric strips dipped in silicone, similar to how one would use plaster bandages.
Two-part silicone.
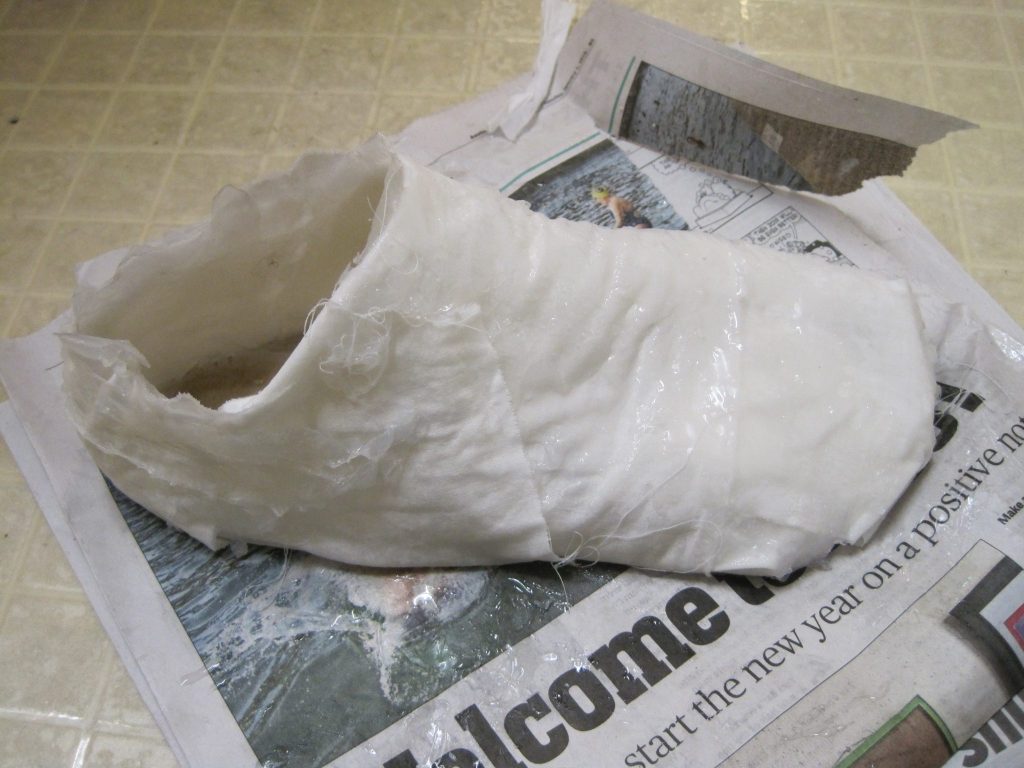
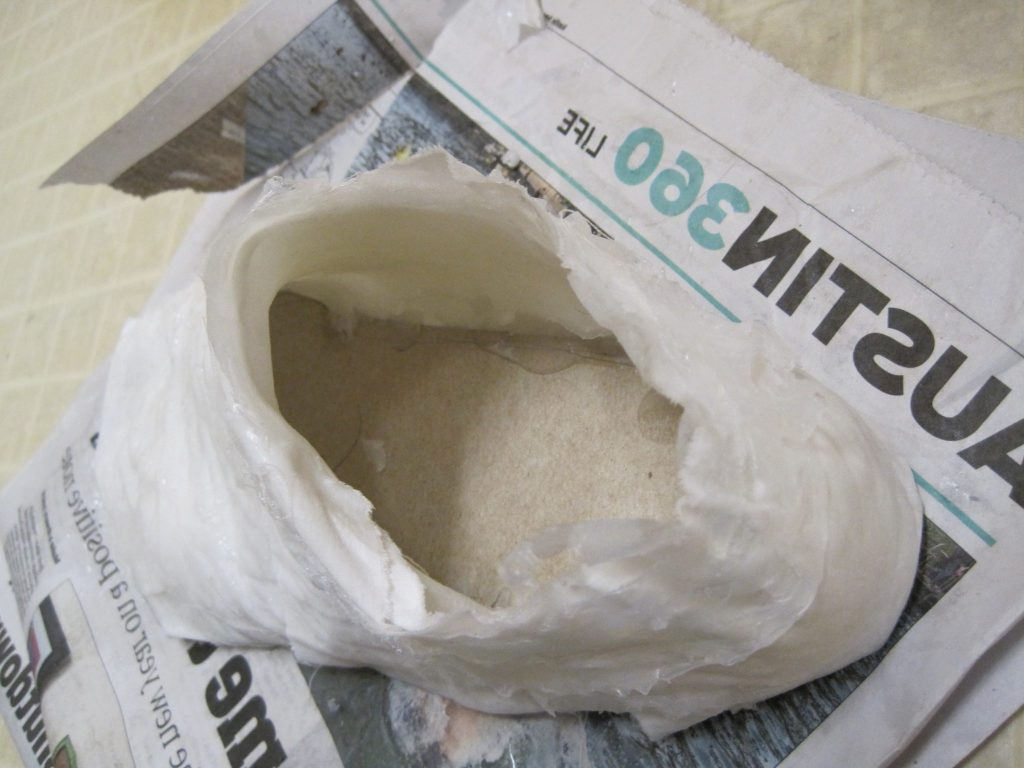
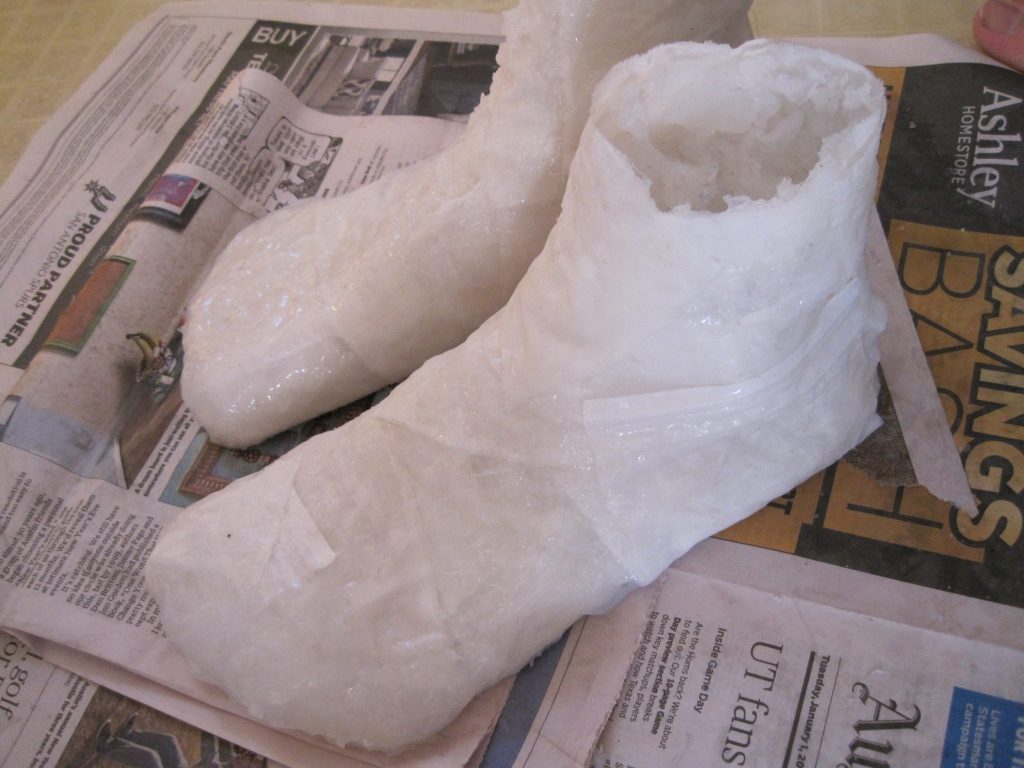
I made the lasts in parts, starting with the toes and working my way up the leg. I would periodically remove the cast to unstick it.
I cut out cardboard “insoles” to add structure to the bottom of the lasts while I built them.
The silicone cured quite quickly, within 5 minutes of mixing the components. I used slightly-but-not-quite-cured globs to start filling the lasts up to solidify them.
Wrapped up to the ankle for future boots, perhaps!
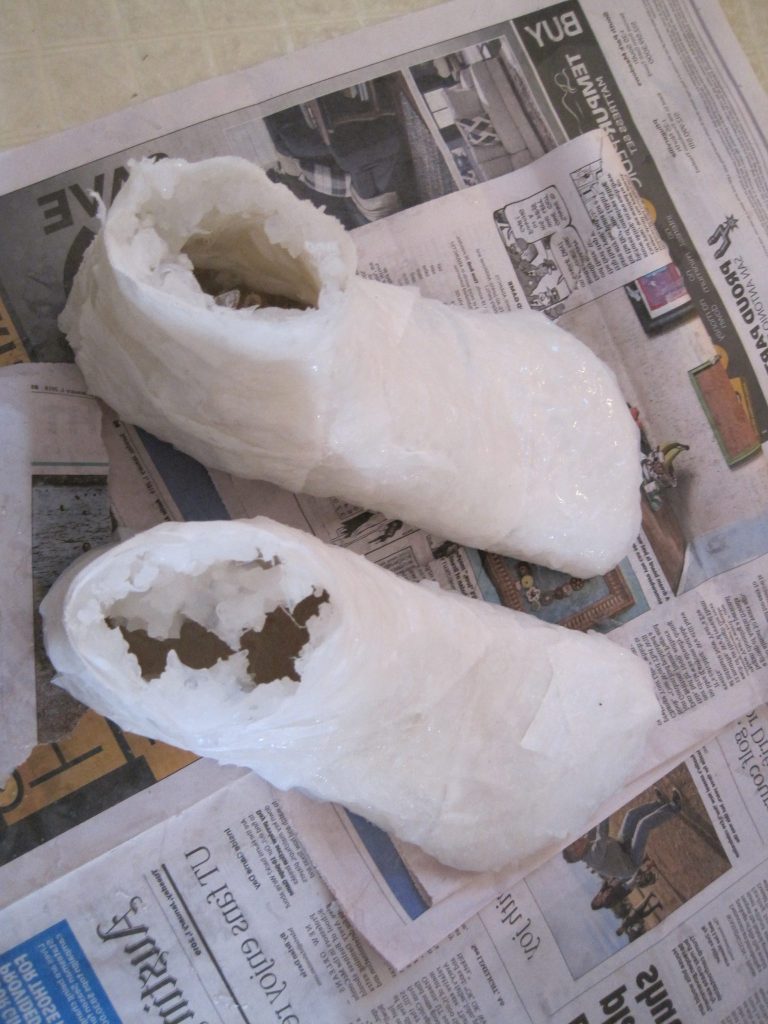
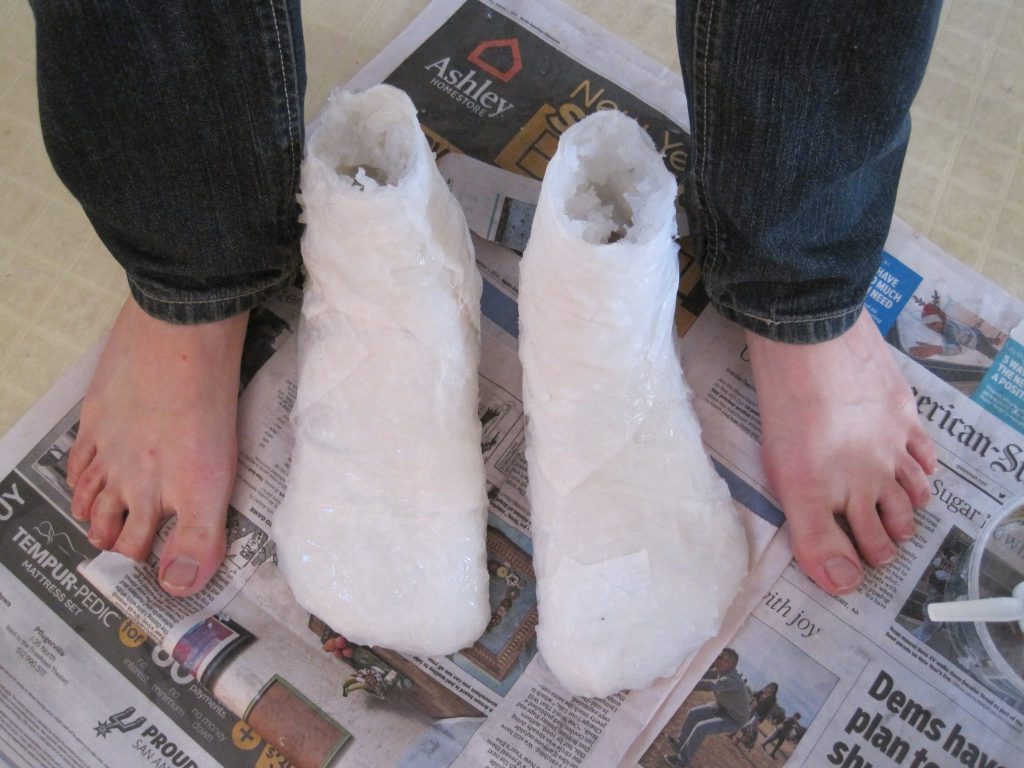
Currently, the lasts are flexible shells. For making shoes, they must be stiff and able to hold nails. My plan is to fill them with additional silicone (and maybe fabric as filler) to achieve this.
I continue to be interested in making shoes. It’d be nice to make welted leather shoes (and I hope to eventually, since my everyday shoes are close to being completely worn out), but they require a lot of specialized tools (see the shoe-making Reddit community for more info). So I thought I’d start with an easier task: making felt slippers! If they turn out well, I may want to make felt shoes also (like Russian valenki, traditional felt boots).
I followed the directions in this tutorial, in addition to watching lots of Youtube videos (Christi Dea makes felt slippers and shoes, and does other weird fiber art).
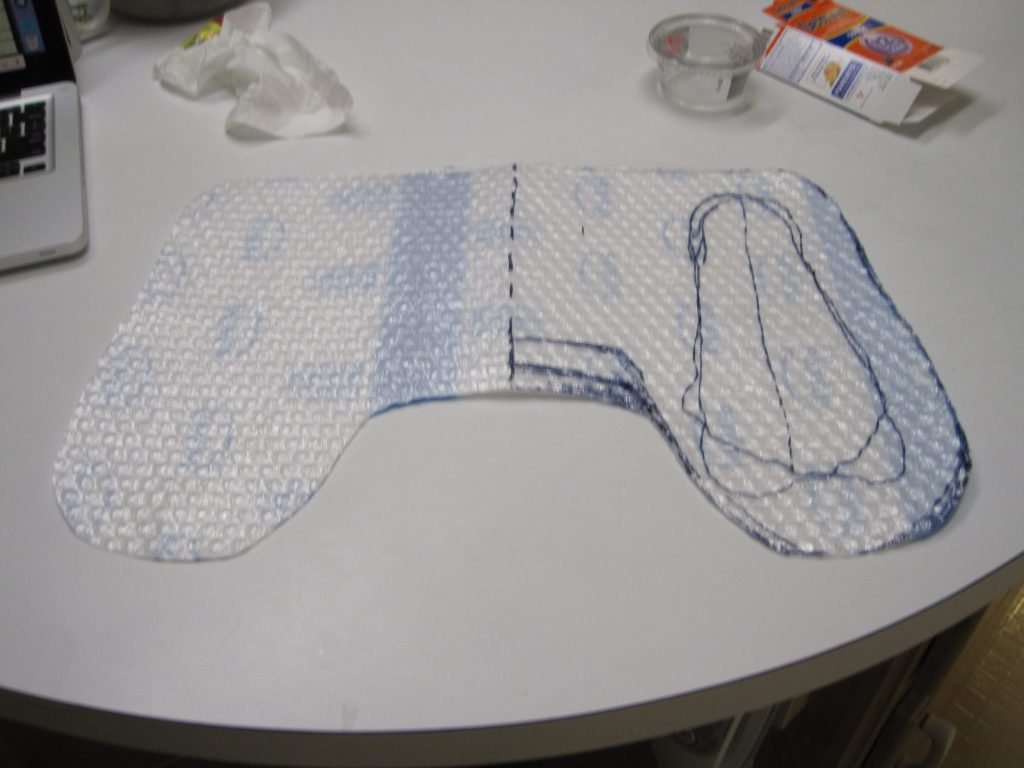
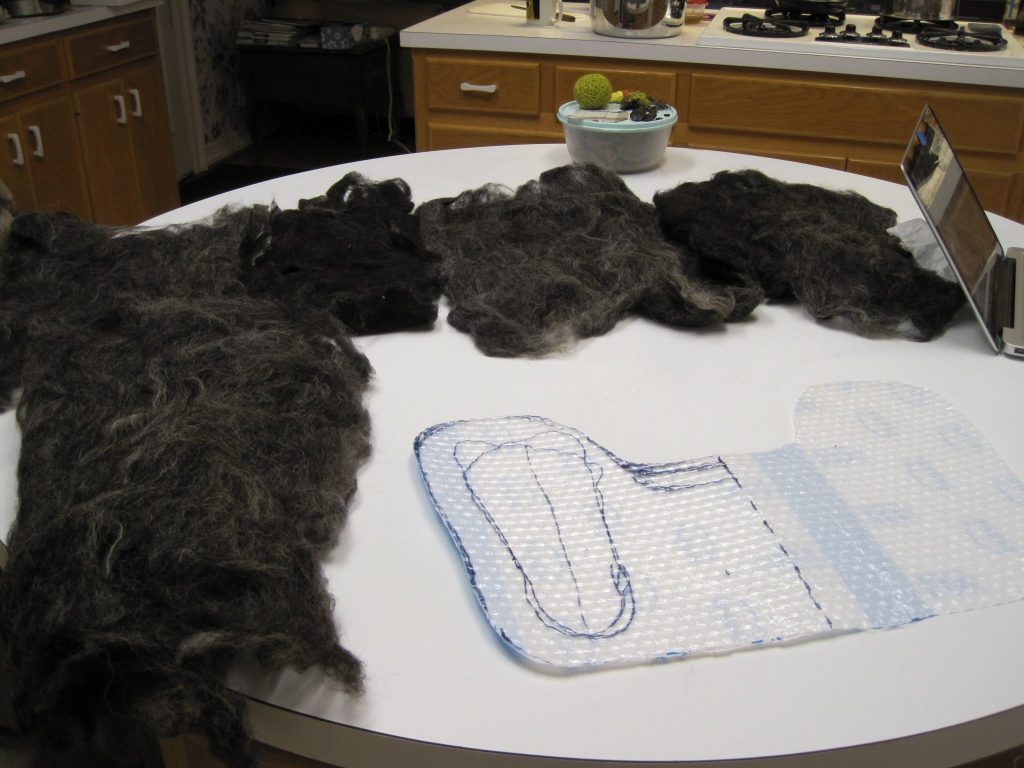
Make a bubble wrap template by tracing your foot + allowance for shrinkage, and adding the desired ankle height. Fold the bubble wrap in half so that you get an attached, double template.
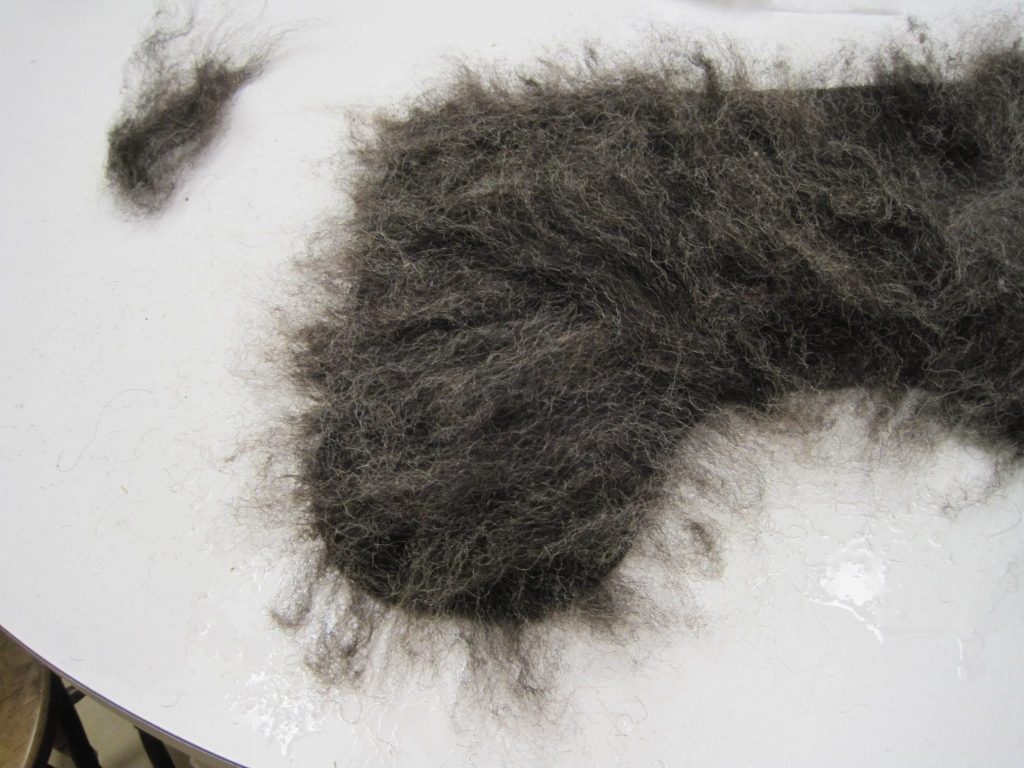
Gather all your wool! I used brown and gray Shetland wool that I bought from another spinner on Craigslist. According to the above tutorial, you will need about 500 grams (1+ lb) of wool, loose, roving, or batts are all fine.
Then you layer wool and felt it a little bit, just enough to hold together.
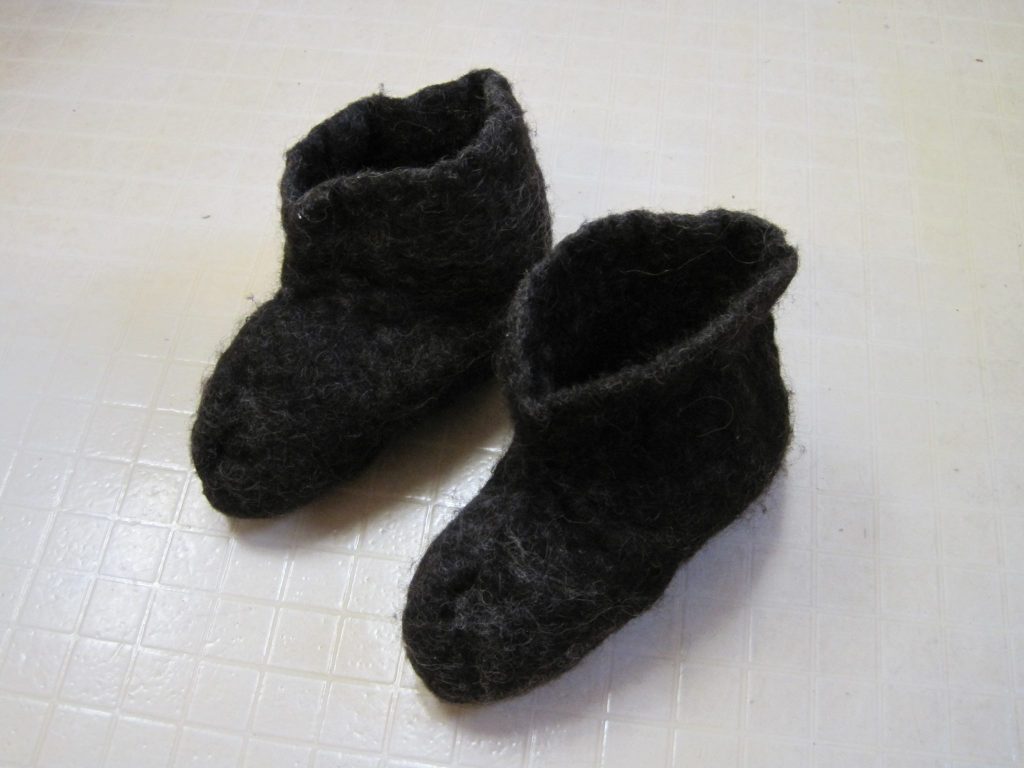
Then you full (fulling is the origin of the common last names Walker, Tucker, and Fuller!) it to shrink and harden the felt. It takes a loooooong time to do this by hand. I also put my booties through the washer and dryer, but they need to be shrunk further.
They are very voluminous at the moment. The instructions I followed incorporated a tongue into their shoes, so I was led to add extra space around the ankle. As you can see, this was a mistake. Hopefully I can shrink all the extra down to fit, or design a tie/button system to take up the excess. I’m aiming for slip-ons or easy-tie shoes.
To get the slippers to fit my feet well, I’m going to shrink them around a set of lasts I made (with much difficulty!) of my feet:
They still need to be filled to be made solid.
So this project is very much in progress. I’ll update y’all once I get more done!