I recently refinished my trash-find mid-century modern triangle table (post coming later on that). As part of the project, I re-painted the feet black. I generally aim to use “healthy” eco products and while doing finish research I came across milk paint, which fulfills those requirements. This was the perfect small project to test it out!
Milk paint is a little finicky, and behaves differently than standard paint (you normally have to mix it from powder, for example). I found some guides from Peter Galbert, a Windsor chairmaker, on how to use it that have lots of tips and tricks.
Intro: why to use it and how to deal with the foaminess
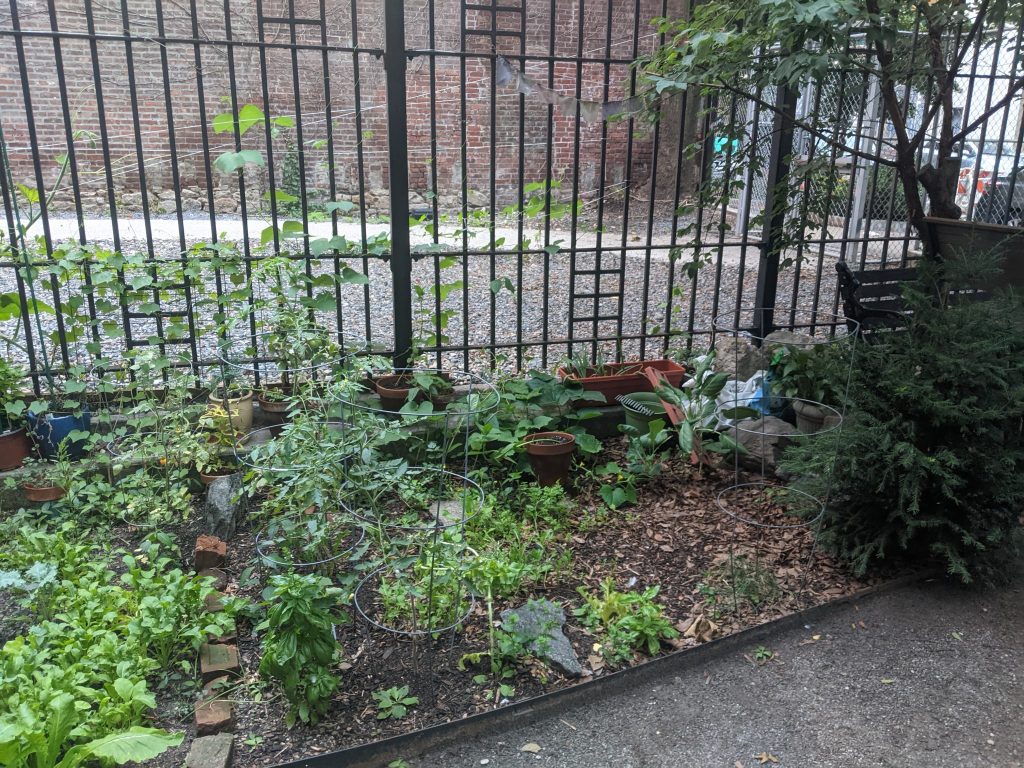
August of last year. Looking fairly lush. I actually had a fair bit more growth later in the season, even pretty late into the fall. The back fence was covered in vines — both my beans and other people’s veggies.
Front to back starting on the left side, I have basil, a pepper (hidden, gifted by a fellow gardener!), teeny baby onions, cherokee purple tomato (gifted by a fellow gardener!), cucumbers, and squash and stuff (volunteer brassica) at the back
Off to the right side are a yew (bush-like) and a box elder (small tree). Plus there’s a full-grown zelkova tree above the benches to the far right. So the plot isn’t too too sunny, especially that front right corner. The spot is too shady for veggies, so I’ve started putting some shade-tolerant native plants (inland sea oats, and volunteer violet transplants) in that corner.
I think the soil is really bad, too. I need to mix more compost in. I was supposed to do that over the winter, but time got away from me. Still planning on going some prep before planting seeds for this upcoming year.
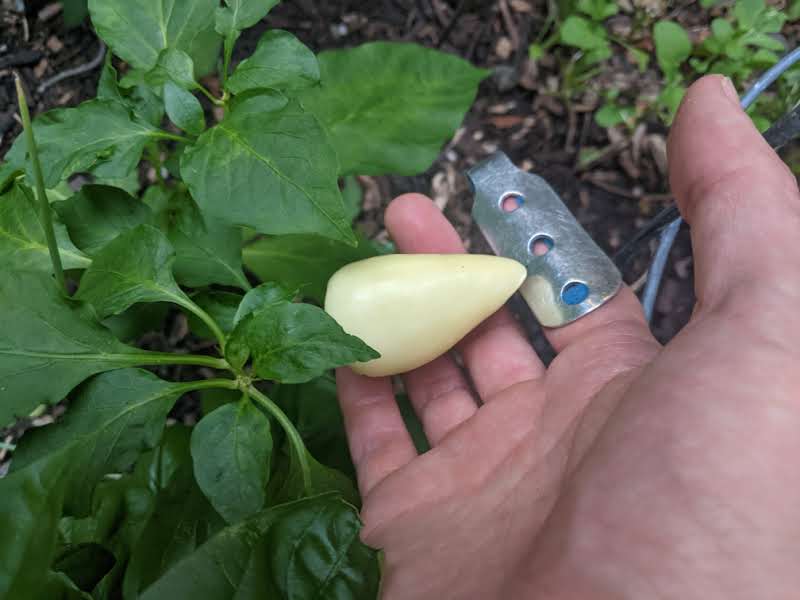
I harvested a couple peppers off of this plant. They weren’t spicy at all. The plant was kindly gifted to me by a fellow gardener. She got the seed from a coworker.
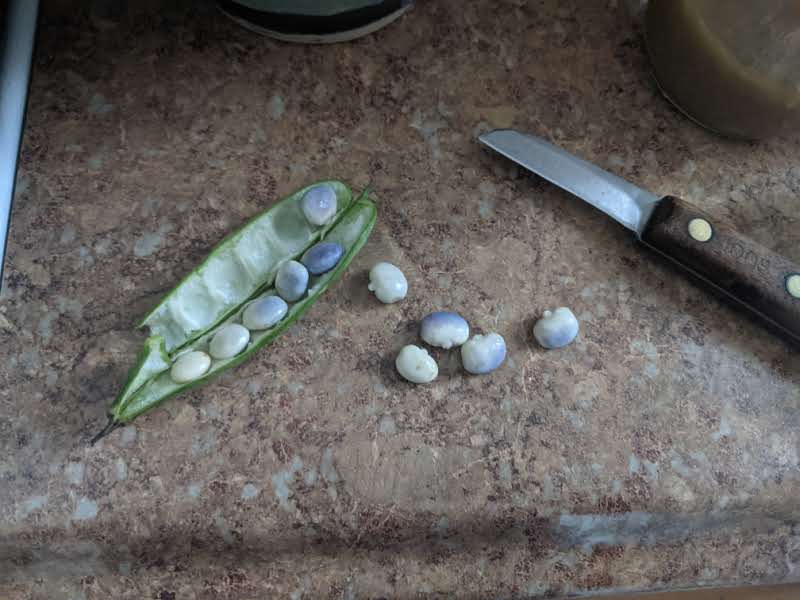
Last harvest of the year (November). There were several pods, more than shown here. I had these beans in soup. I also got a cucumber (not totally sure it was mine. The vines on the fence were all jumbled together. I definitely had planted a cucumber, though), basil, and some other odds and ends.
I tried to start another sewing project over the holiday break after finishing the knitting needle holder. Clothes are always so much harder, though, and I didn’t get too far.
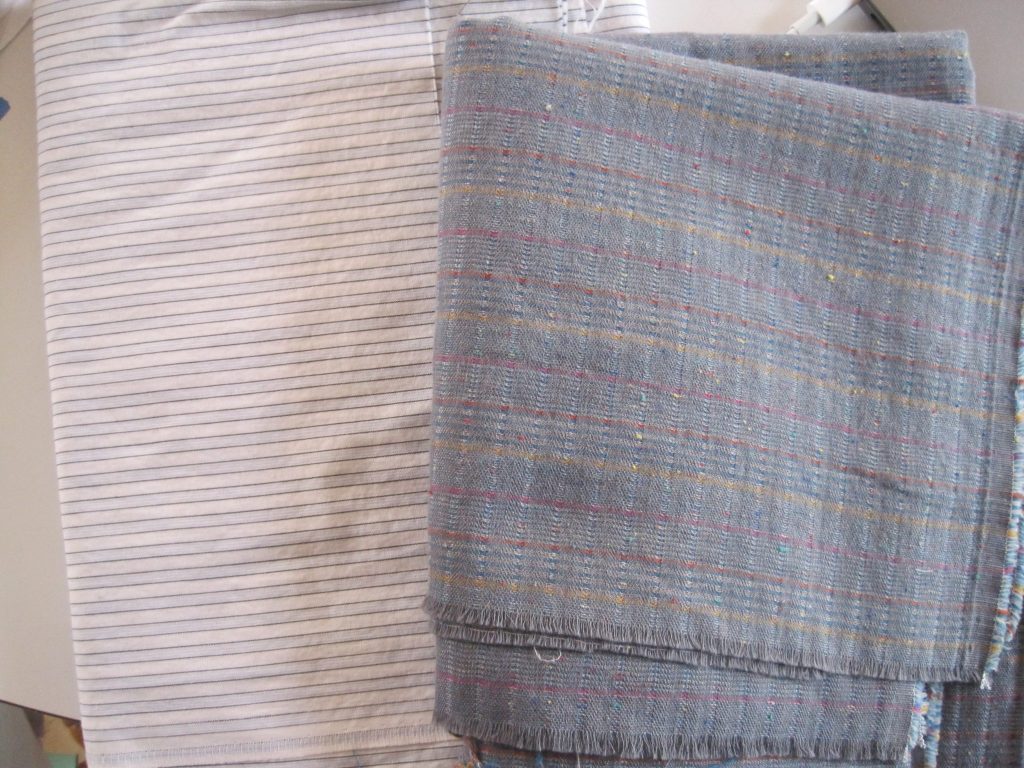
I wanted to use one of these nice fabrics from my mom’s collection.
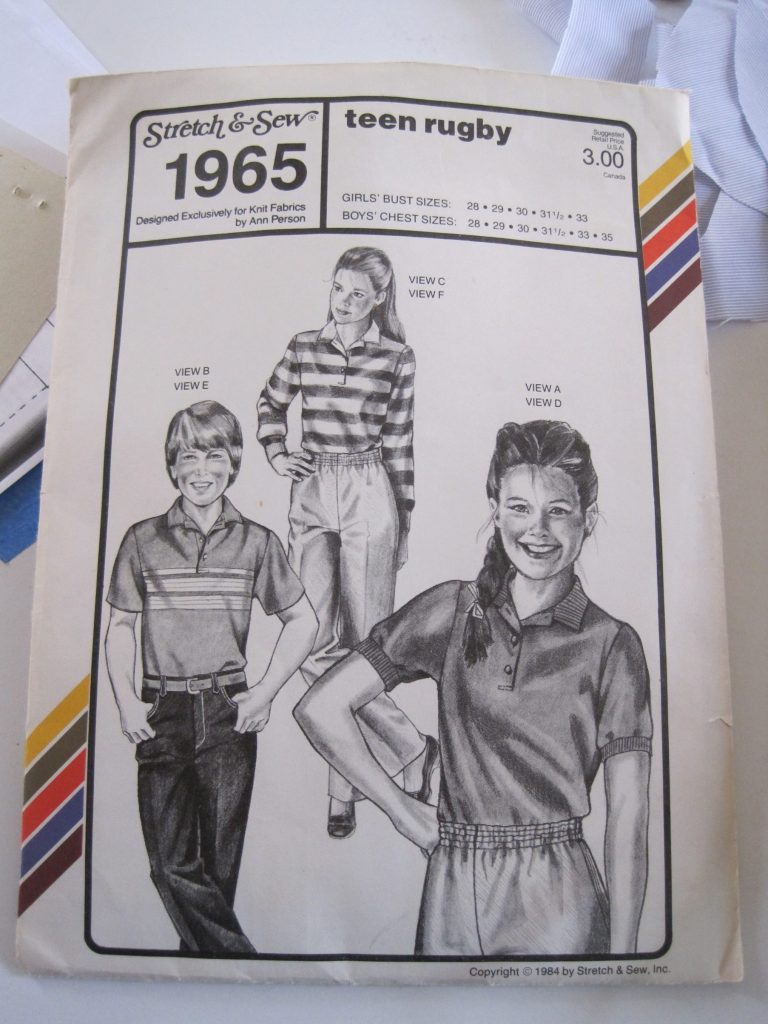
I was looking at either making this kind of shirt (partial placket, no-button cuffs, probably replacing collar with mandarin or faced crew collar, e.g. a henley)
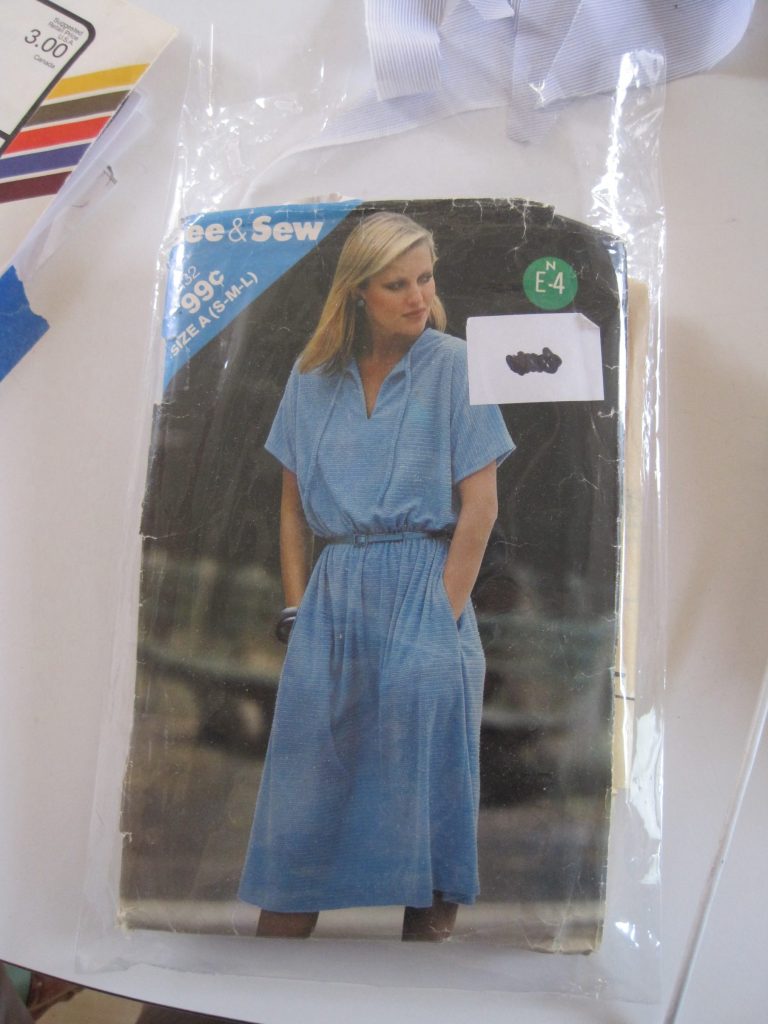
or the top half of this dress, as a shirt (both patterns from Austin Creative Reuse).
I tried to do the rugby shirt, adapting the pattern to use raglan sleeves, and it did not go well. No photos, but the shoulders were poofy and the rugby shirt pattern isn’t wide enough at the bottom for me. It was a mess. I’ll have to revisit this again in the future…
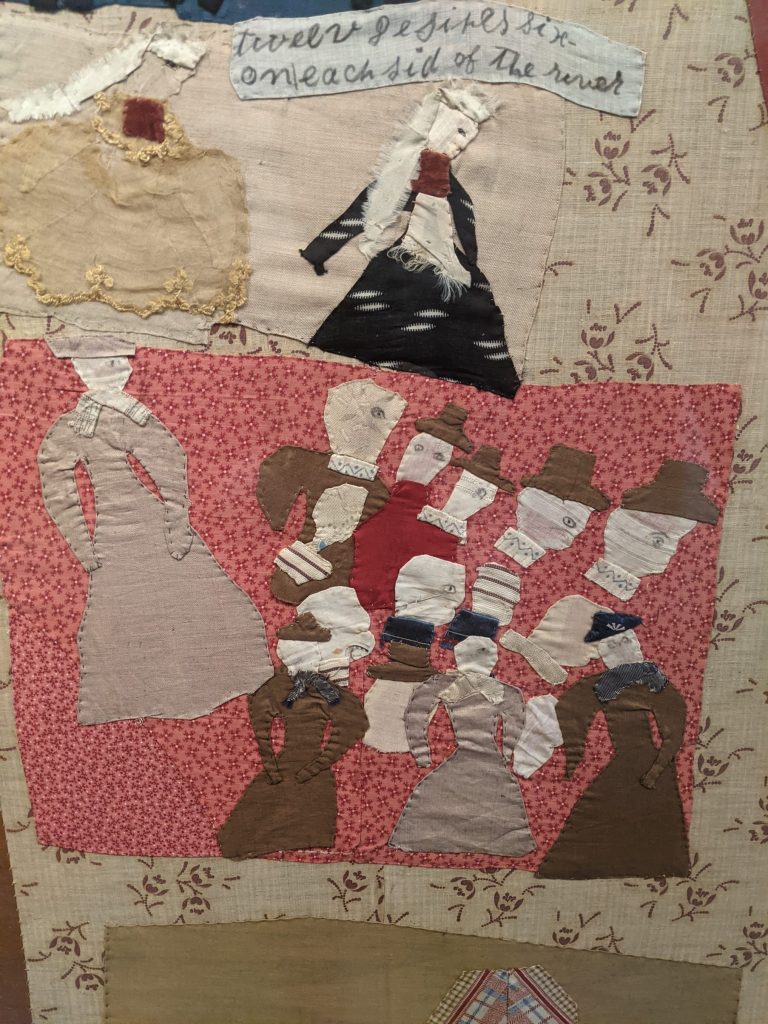
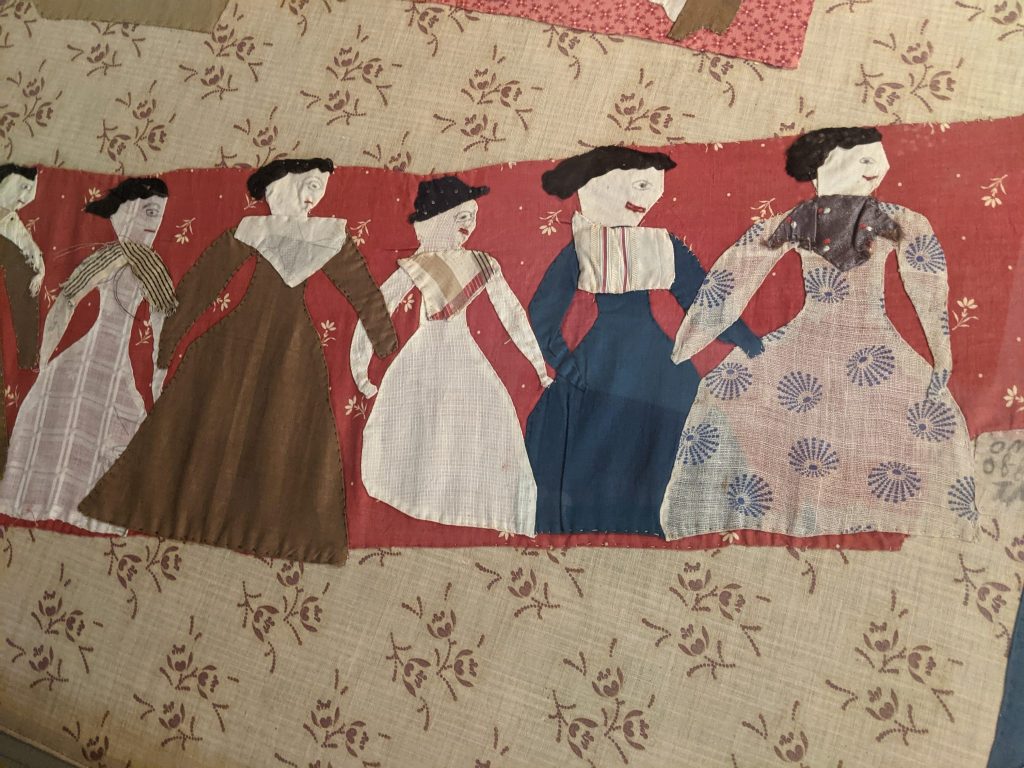
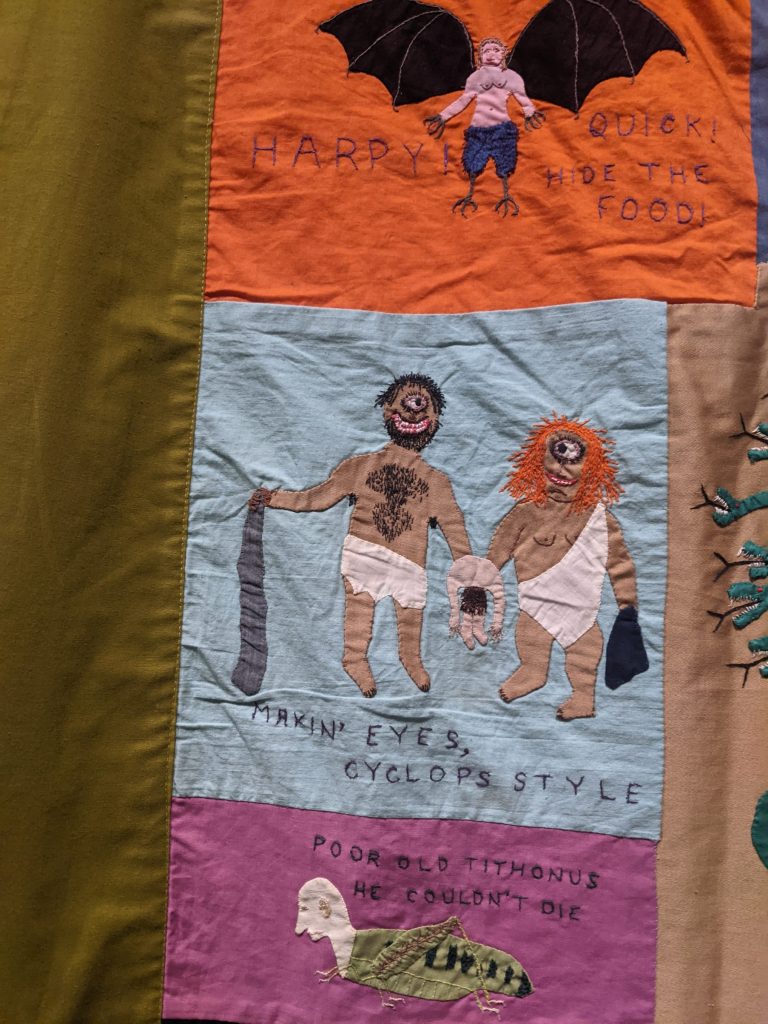
The first three pictures are from a quilt exhibit at the American Folk Art museum, on Tucker Square. The quilts were really cool. They also had a good exhibit on wind vanes a while back (there was a wind vane made by the guy who made the wind vane on Faneuil Hall in Boston – it’s a grasshopper!).
This quilt narrated a scene of people going to church and some Biblical scenes. “Twelv [sic] desires six on each sid [sic] of the river”. There’s a river off to the right, not shown.
Ladies going to church, if I recall correctly.
Quilt by a professor (?) of mythology with a sense of humor.
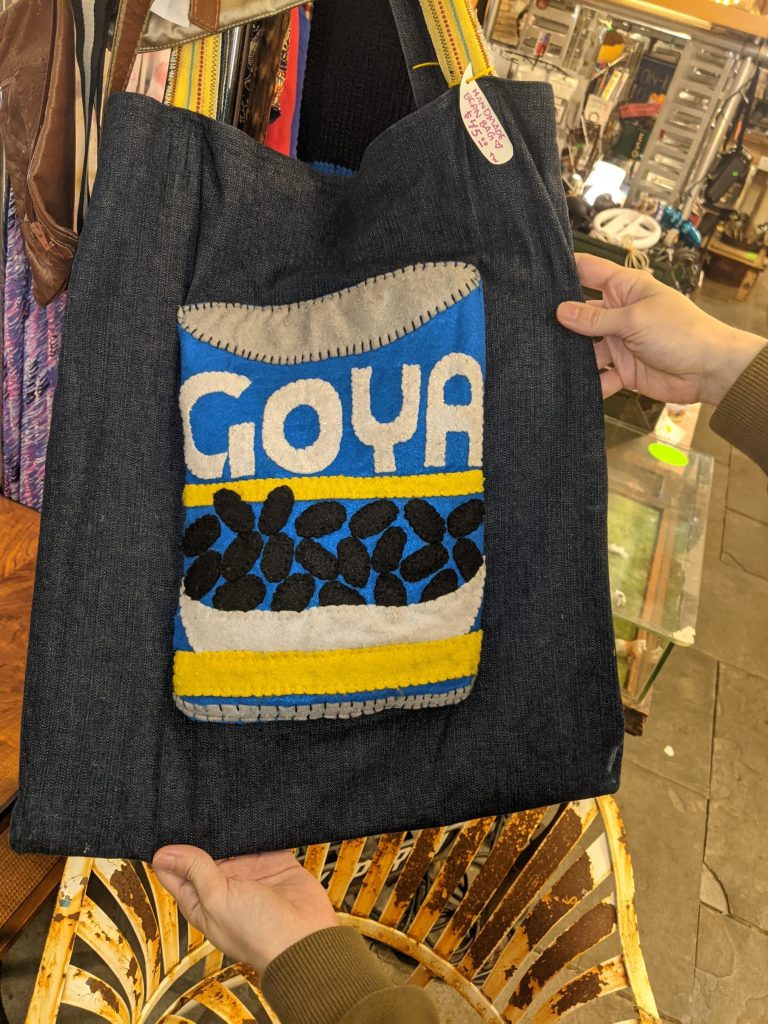
Seen at a thrift store, maybe Austin Creative Reuse. Black bean bag, anyone?
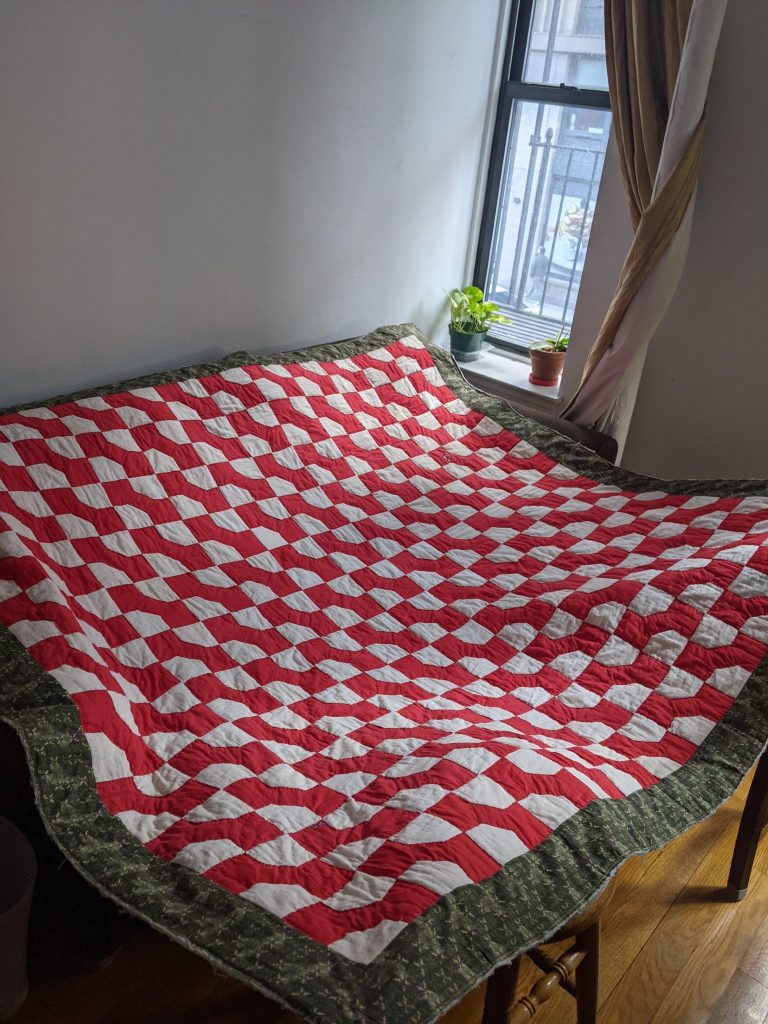
The front. I’m still not sure the green fabric was right for the border. It’s just a totally different look. I am glad I made the quilt bigger, though. It’s only just big enough for a twin bed as-is.
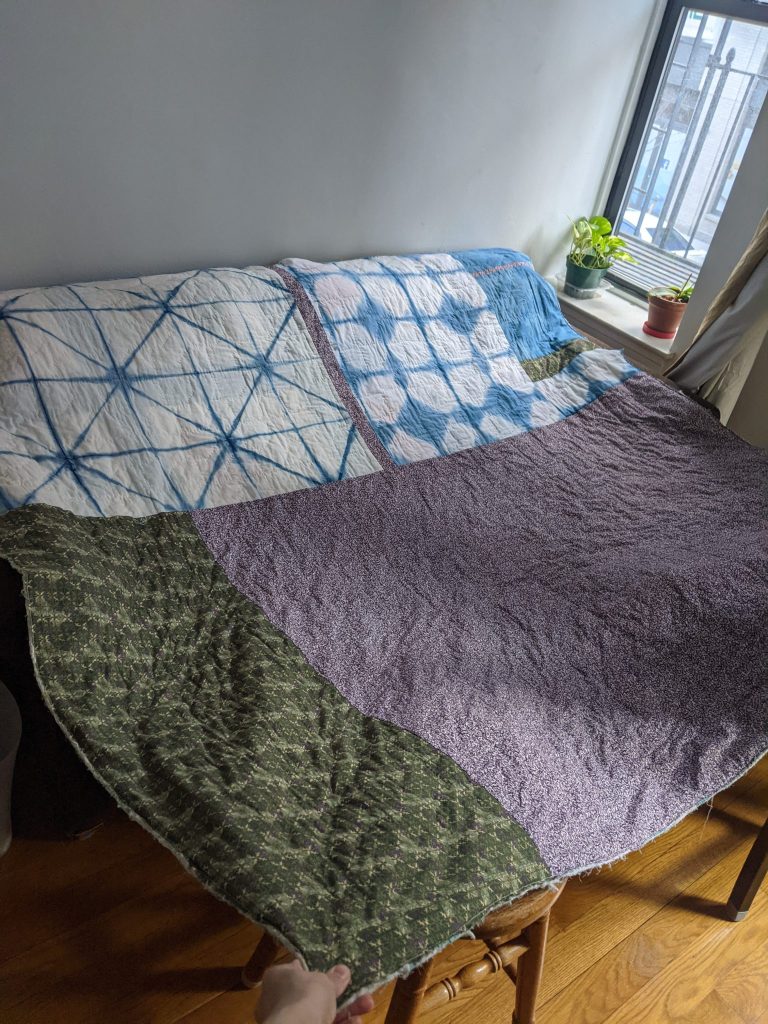
The back. Sibling C and I dyed the blue fabrics using indigo.
In use and with the edging sewn on! It looks good and it’s quite warm. I’ve been using it all winter.
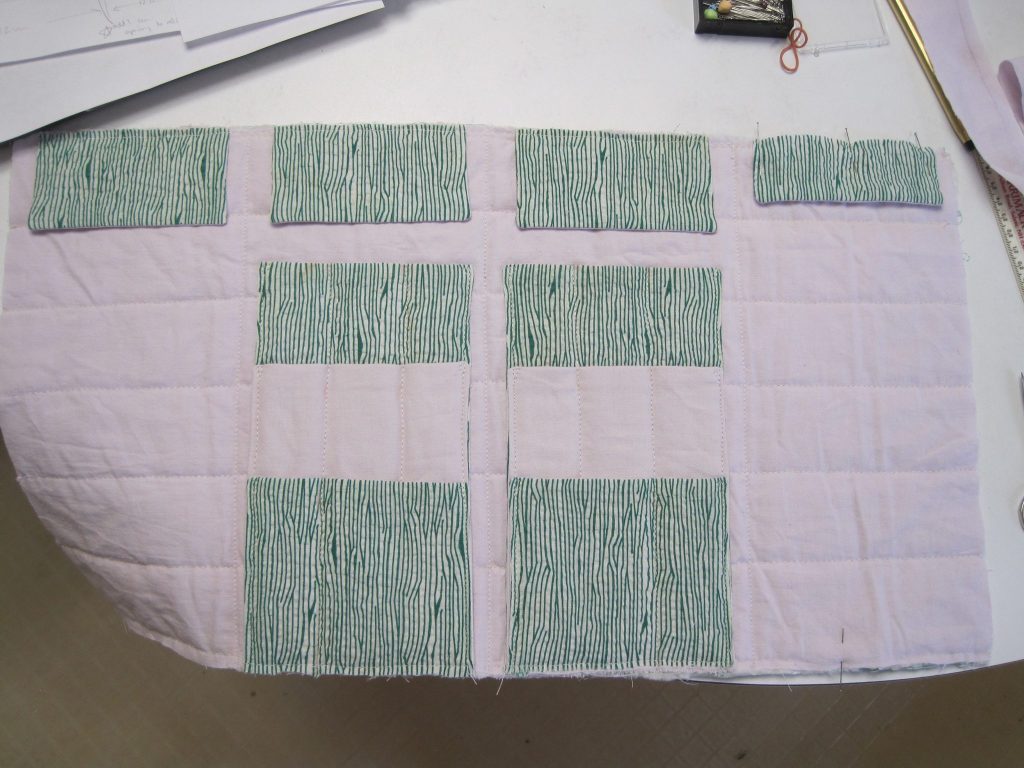
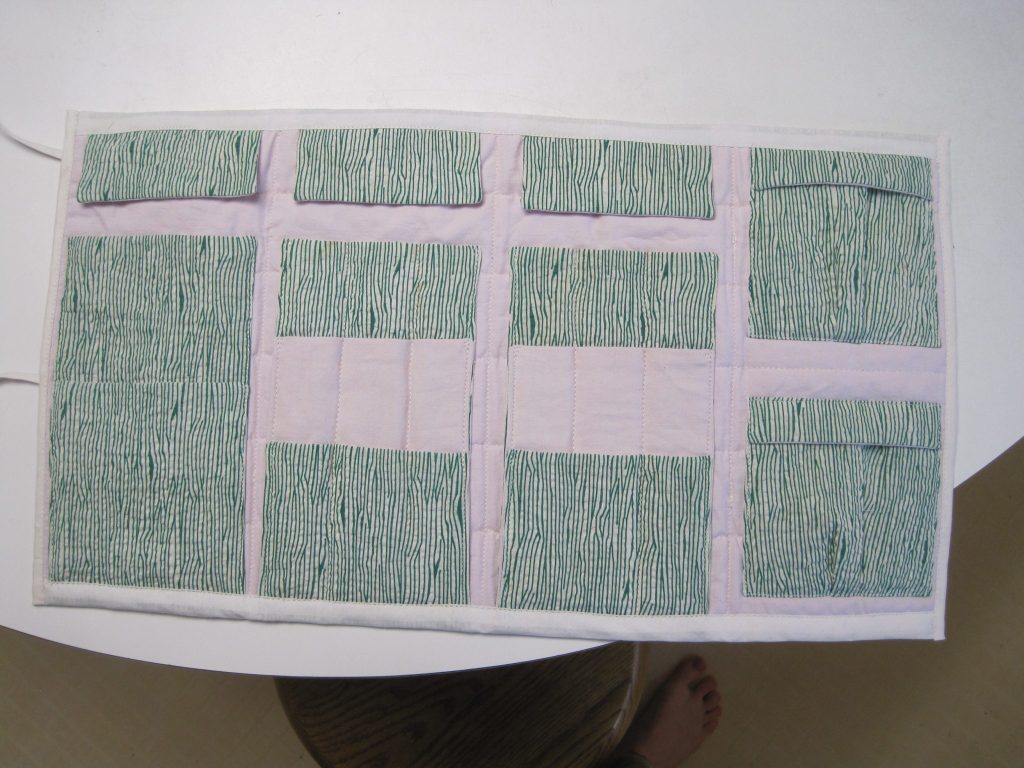
My knitting needles have been in an opaque pencil pouch for a while. It’s hard to see them and everything gets mixed together, so I’ve been wanting a new organizer for them for a while. Over the winter holidays, I made my own with some scrap fabric.
Basic layout (unfinished — pockets will be added on the far left and right sides). The purple fabric is from an old sheet from my grandparents, and the green seersucker fabric is scraps leftover from a maternity shirt my grandma made (that both she and my mom used).
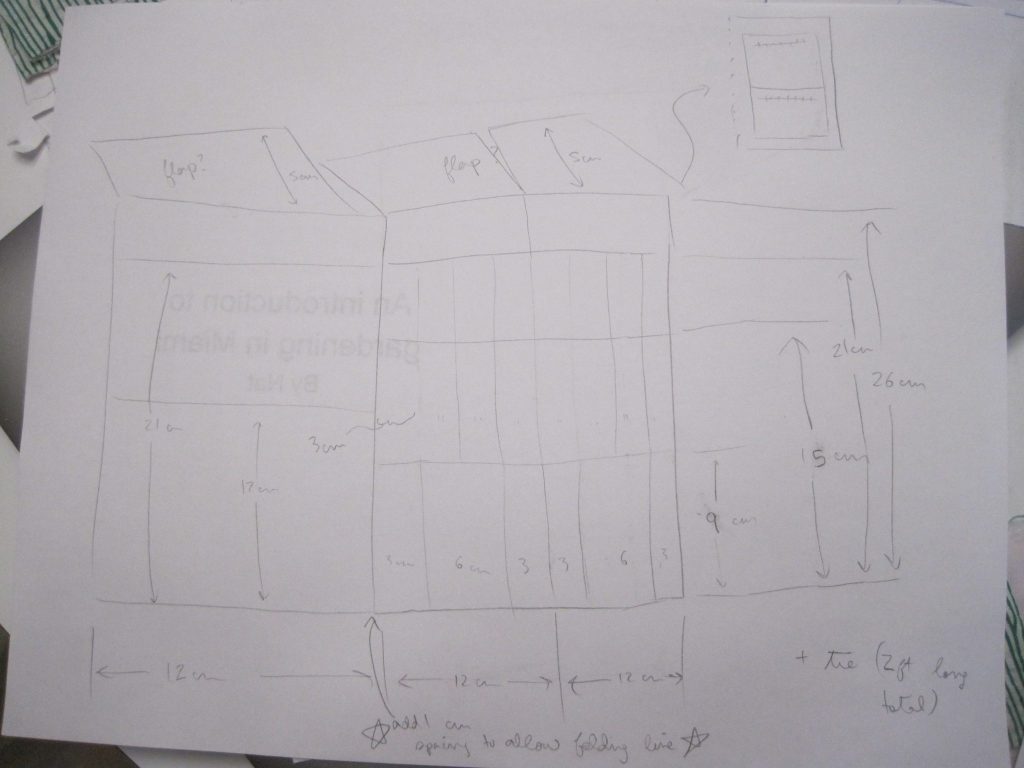
Rough design dimensions. I sewed it a little bigger than this, but it should’ve been even bigger! Some of my needles are too long and stick out.
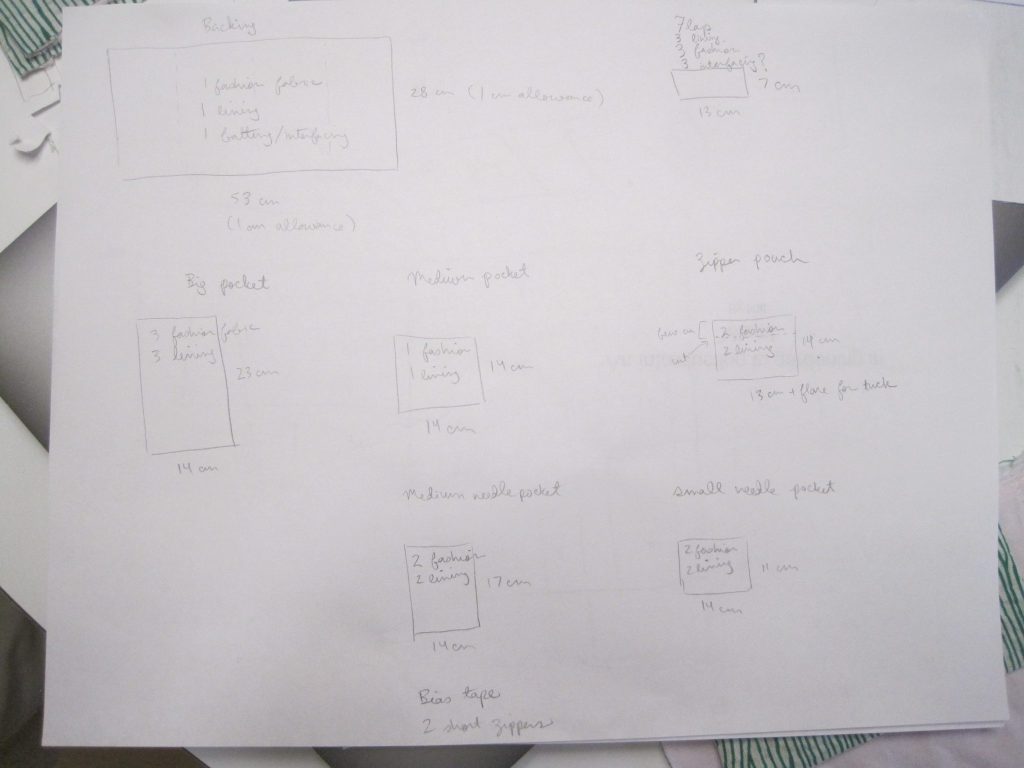
Sizes of pocket pieces to cut.
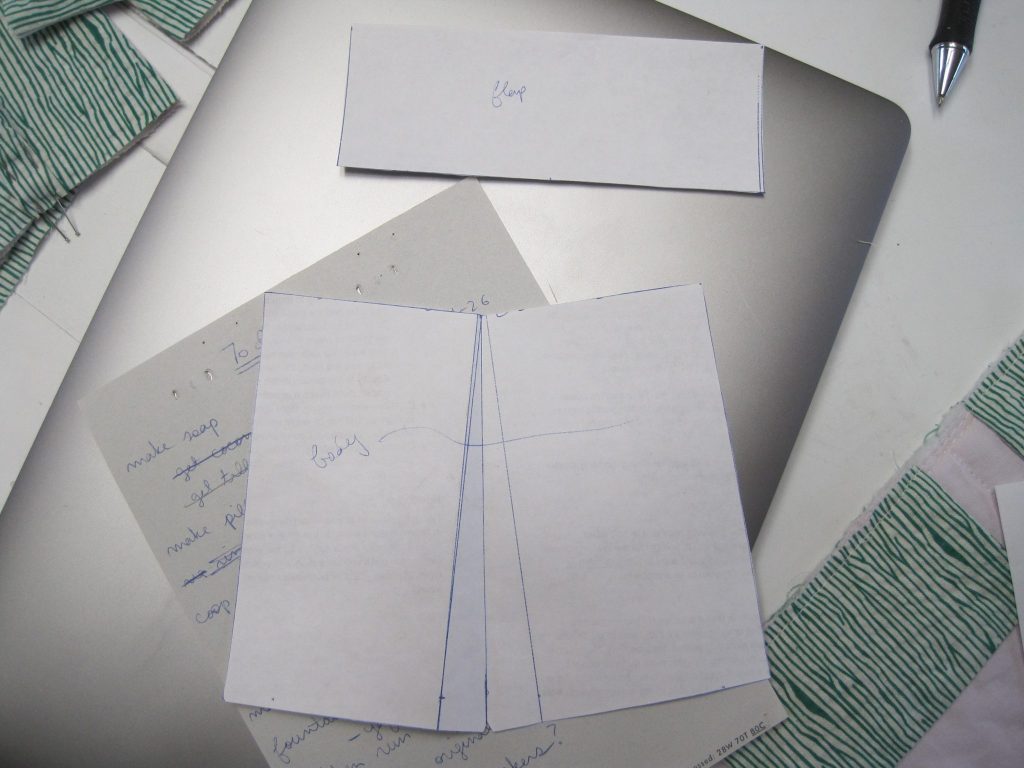
Pattern for closed-top pocket (pleated for extra volume).
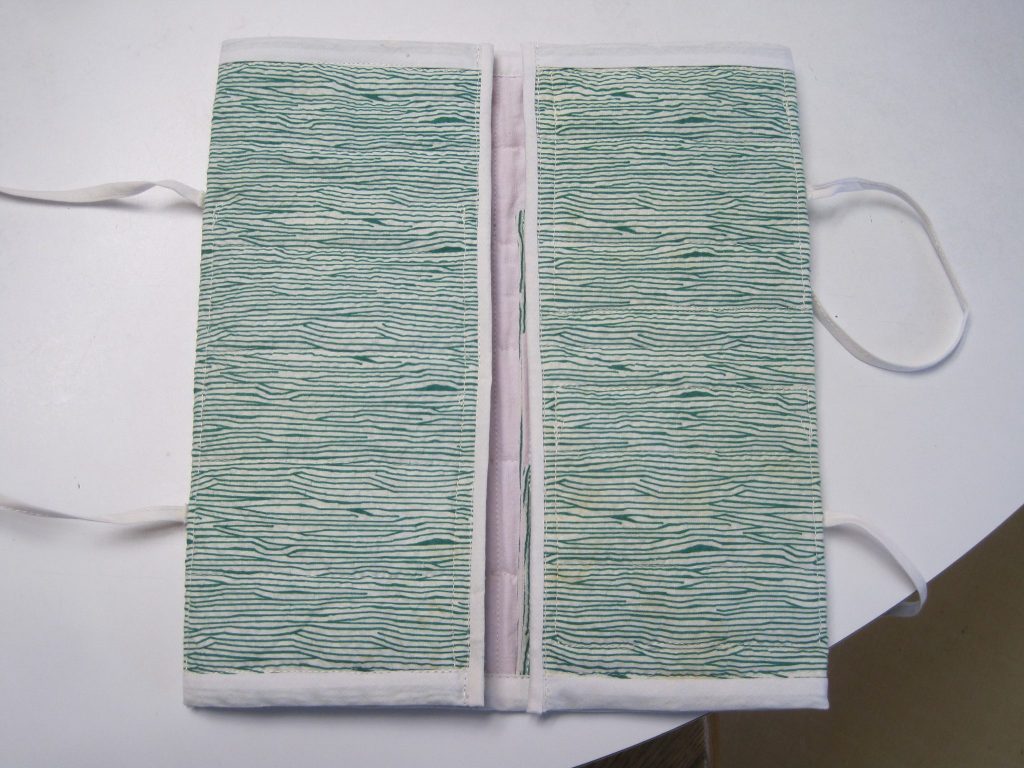
Finished inside!
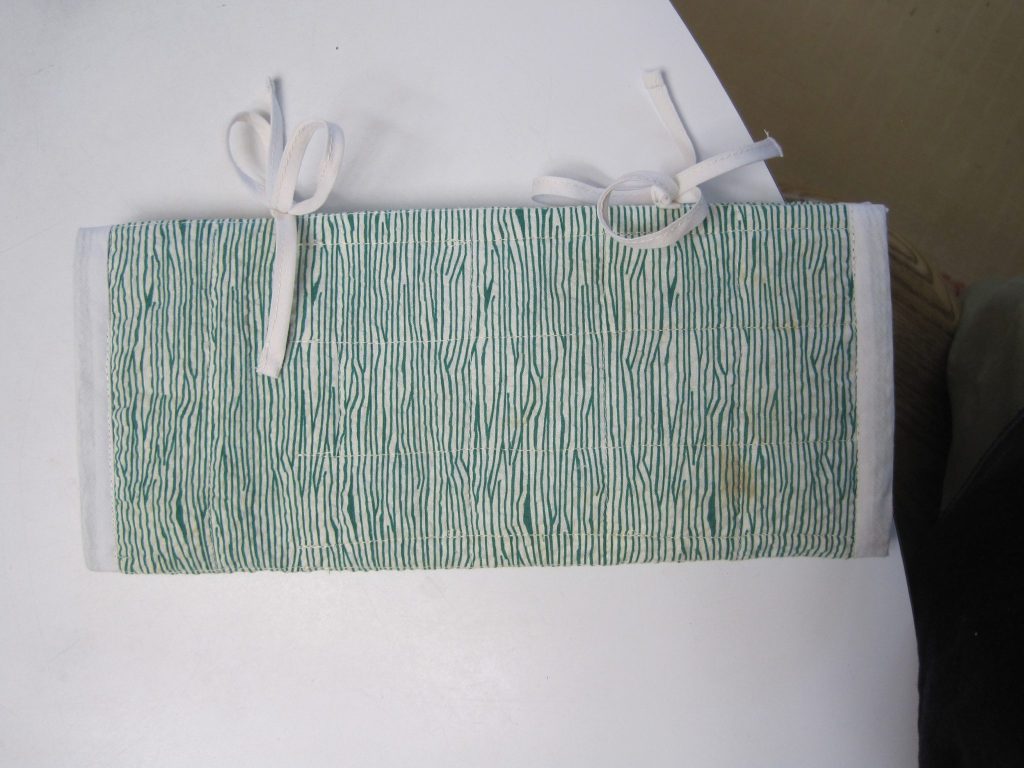
Finished outside!
It ties so if you fill it up a lot you can still close it.
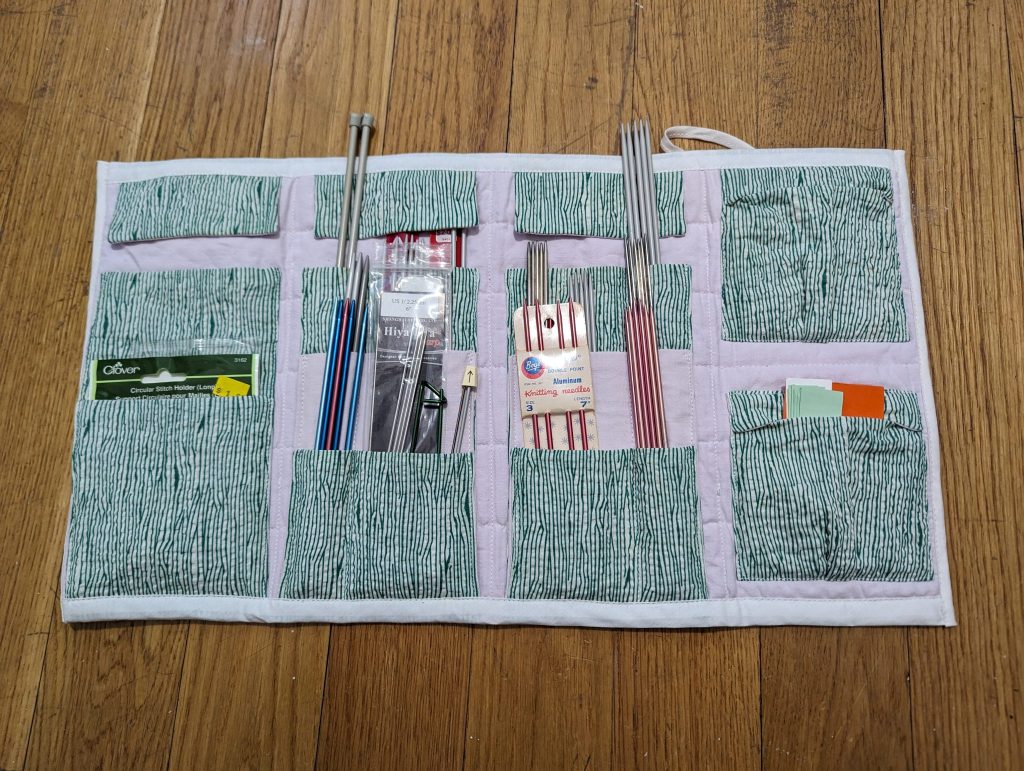
And with all my needles added! Besides some of my needles being too long, having multiple rows of needle pockets all on top of one another doesn’t actually work that well. The bulk builds up fast. It would be better to offset the pockets, just have one or two rows, and/or make each individual pocket wider. Definitely a step up from my old storage method, though!
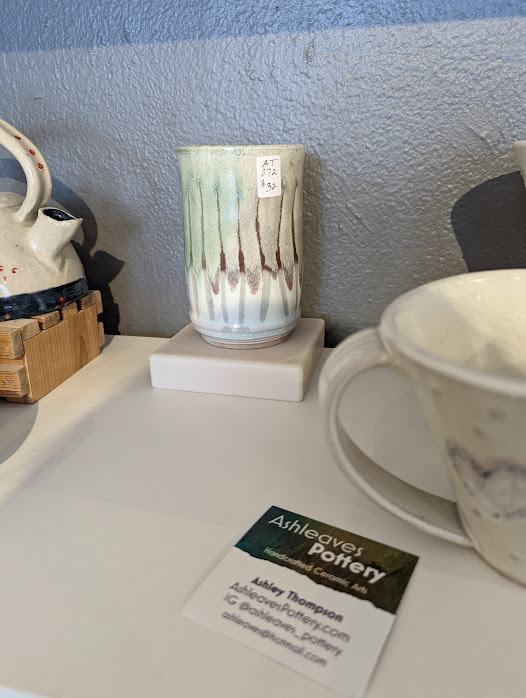
While visiting my parents in Austin for Thanksgiving, J and I went to a local pottery studio and gallery.
We hiked along a harrowing stroad (https://en.wikipedia.org/wiki/Stroad) to get here. So many driveways for cars to hit you at…
Compared to New York stores, the studio was shockingly large inside, like a small warehouse.
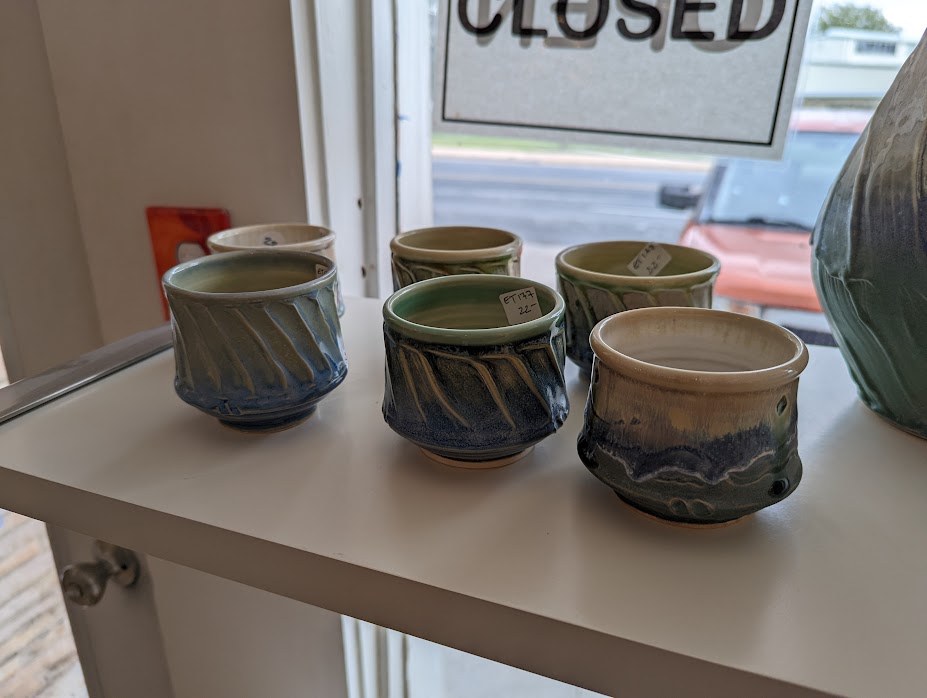
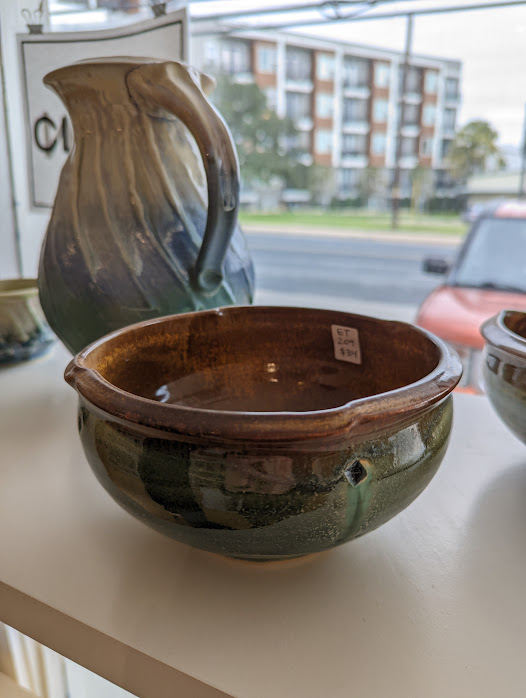
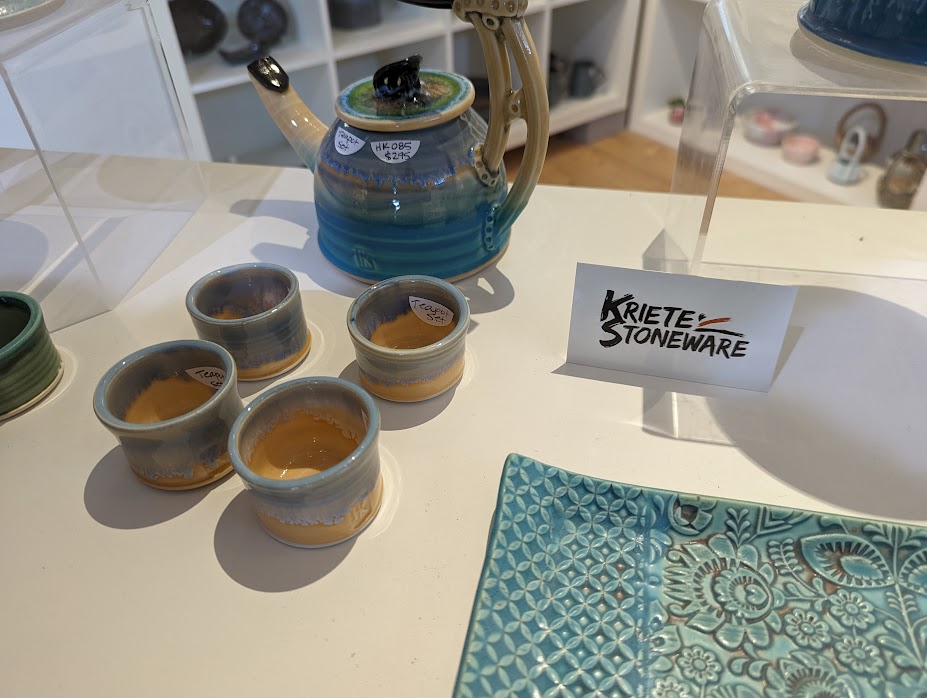
There was quite the variety of ceramic items at the store, decorative, useful, and both. I liked the following items.
The vertical lines are carved into the cup. The artist used a glaze that changes color based on the thickness of the coat, so the lines ended up a different color than the main body of the cup. I also like the particular color combo.I like the “notches” in the edge and the little diamonds removed from the side. The decoration is nice but not overwhelming, it’s just simple.J like the size of these teacups. Unfortunately they came as a set with the teapot (plus the colors are ugly!).
Sibling C and I have been working on the red and white bowtie quilt project. I finally finished sewing all the seams back together (although a second look-through showed that my initial standard for “good” may have been too low).
I assembled the back panel from some coordinating and some scrap fabrics. The brown floral fabric I mentioned in the last post is actually a large amount (maybe enough to make a dress), so I didn’t want to use it if possible. The tradeoff is that I had to do more piecing.
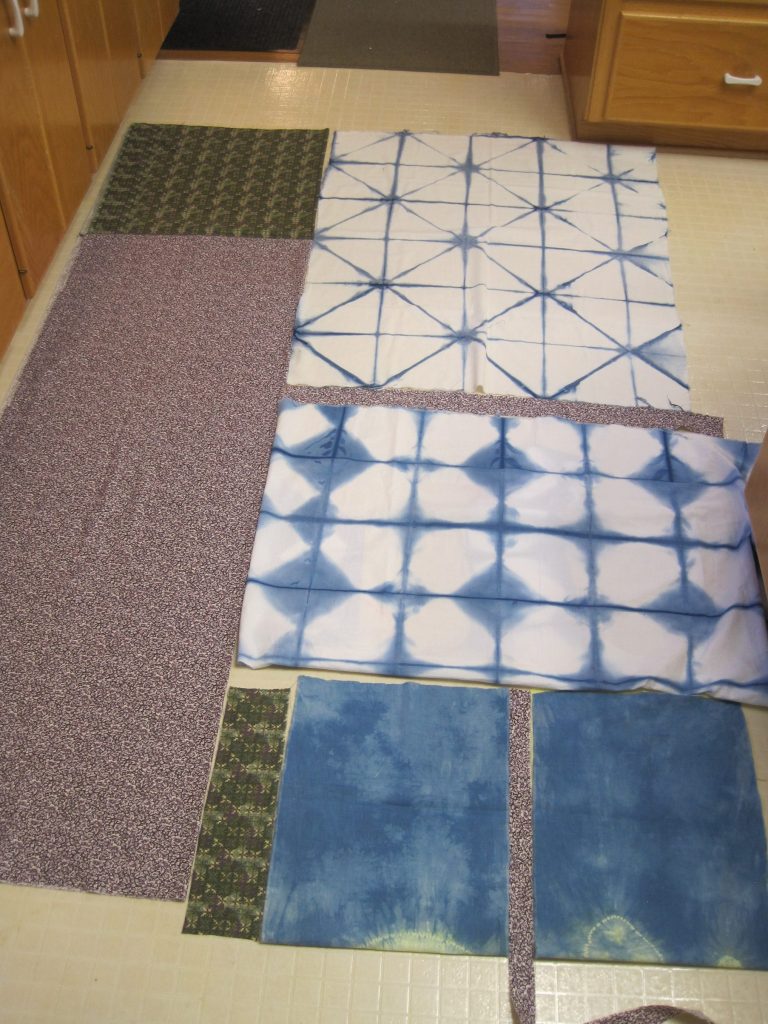
Planned layout for back. The big purple/green block is folded in half here, so the back would actually be larger. The blue and white and blue speckled-y fabrics are hand-dyed by me with indigo and turmeric using shibori techniques (https://en.wikipedia.org/wiki/Shibori)!The “batting”
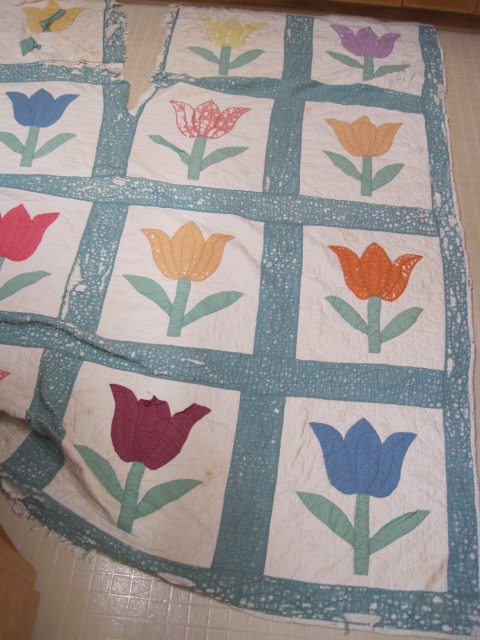
I bought a lovely but worn hand-sewn quilt from eBay to use as filling for this new quilt. Reusing an old quilt like this used to be more common, when fabric and batting was more valuable. Old blankets or sheets, for a lightweight quilt, can be used as well. Search on eBay using the keyword “damage” or “damaged” to find good quilt or blanket candidates.
The old quilt needed some repairs to make it useable. Sibling C and I sewed up that big rip and padded thin areas with scraps of cotton batting.
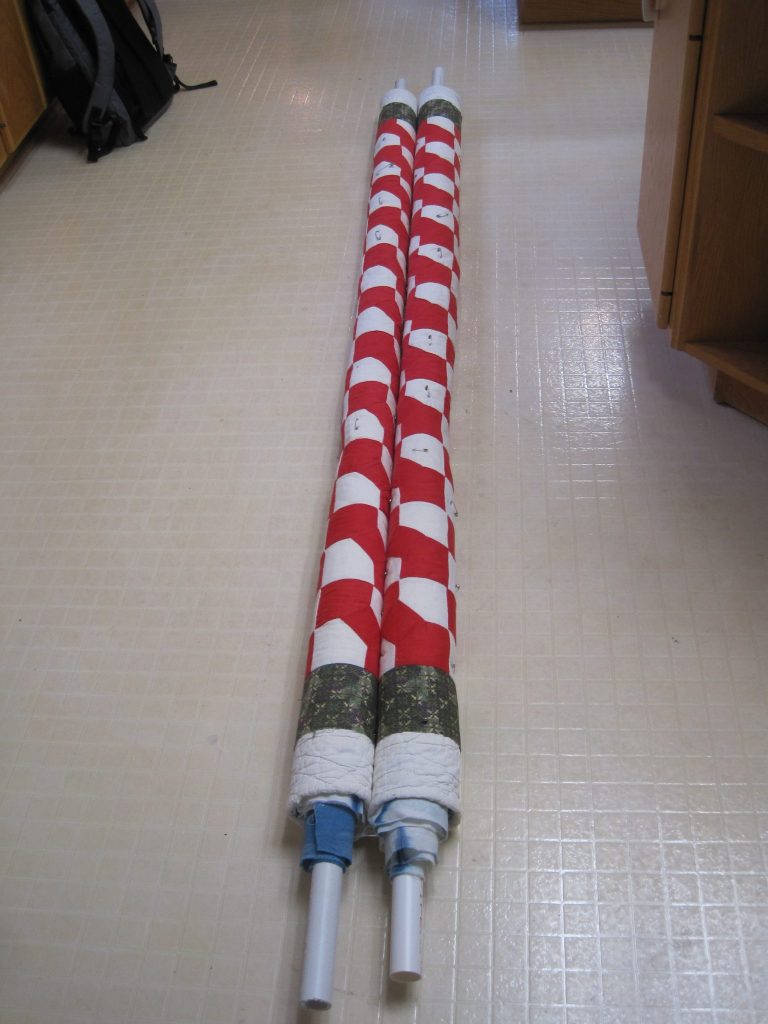
Sandwiched all the layers (back, batting, and top), safety-pinned together, and rolled up around some PVC pipes.
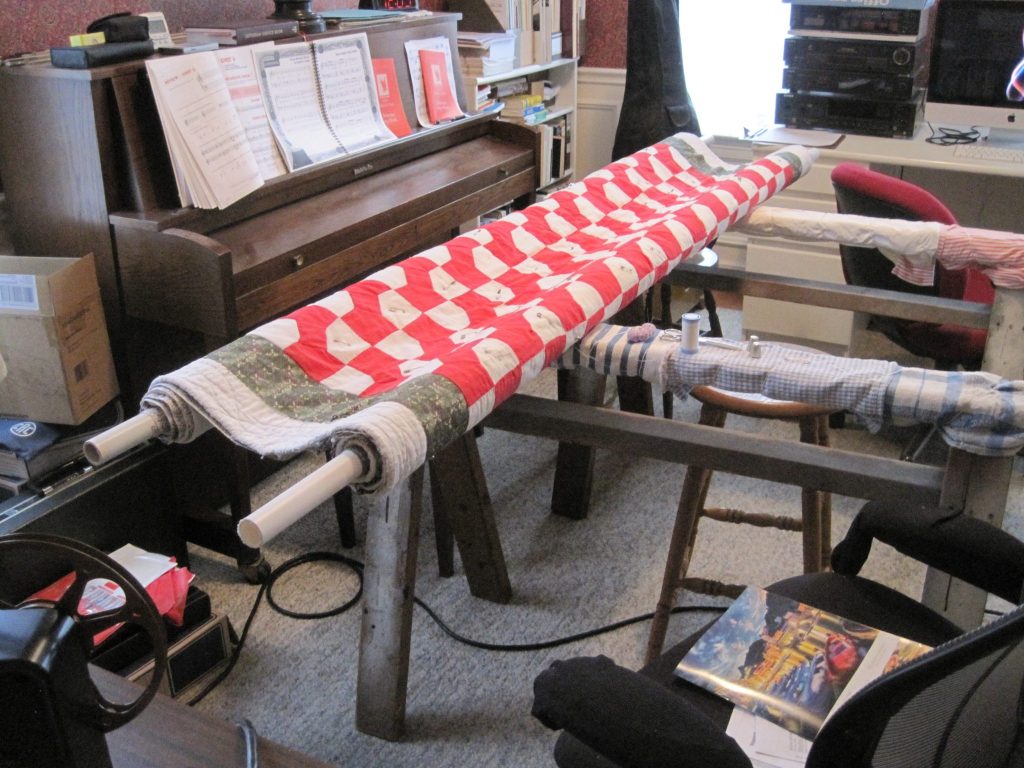
We’re in the quilting stage right now. The quilting pattern is pretty simple, just outlining the red bowties.
Since this quilt is pretty large (maybe 70″ x 78″) we used a special setup to get the excess fabric out of the way when working on it.
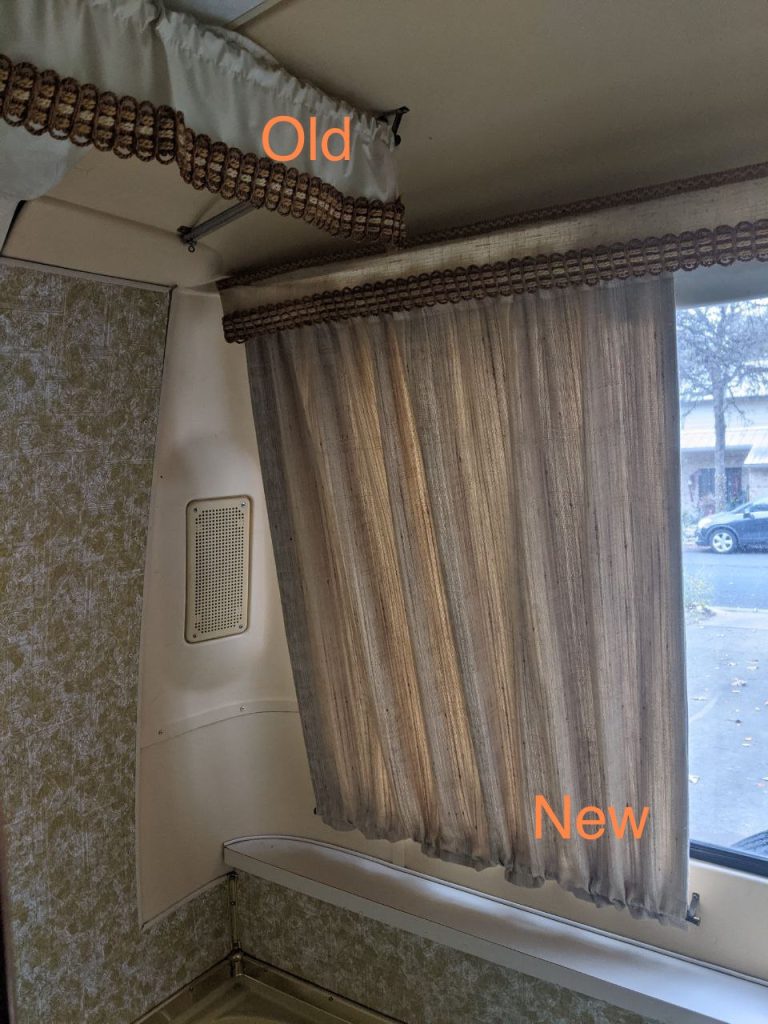
I received a surprise sewing request from my dad. He wanted a replacement curtain for the bathroom in his RV. The old one was falling apart — probably rotten from the sun. The fabric was an upholstery burlap with an interfacing layer for stiffness.
We measured the dimensions (essentially a square with some topstitching) and I duped it using surprisingly well-matched fabric from Austin Creative Reuse . The fabric was only $5.50!
Installed, it’s essentially indistinguishable from the old curtain and from the old flourishes (bits with trim) that remain.