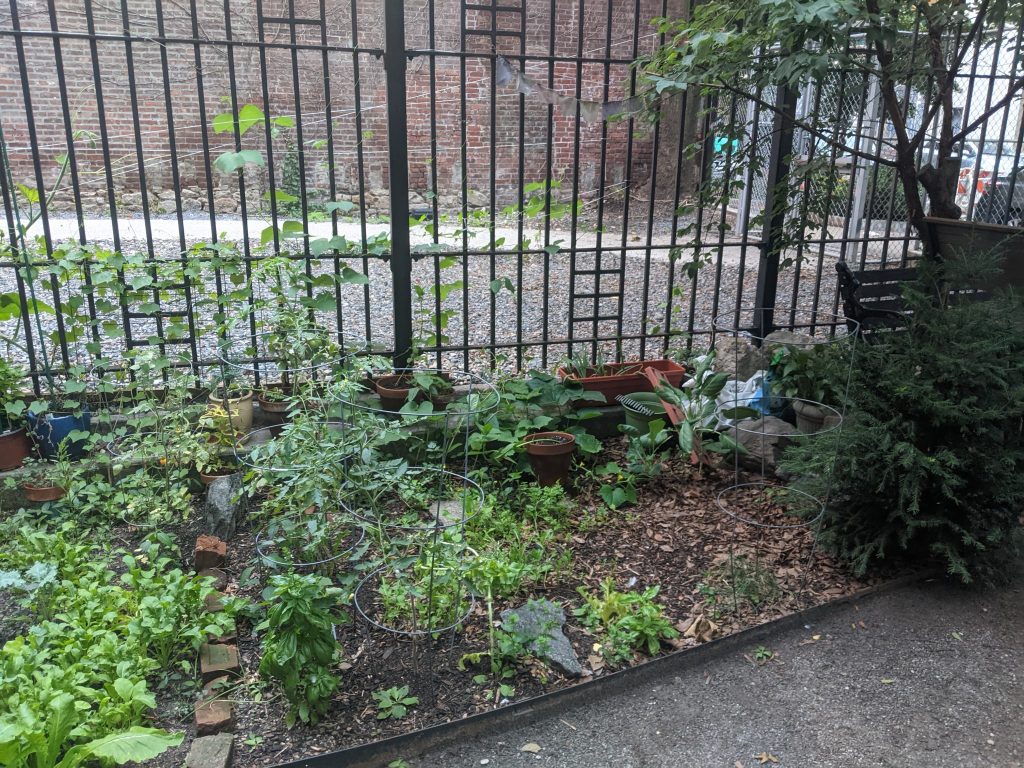
August of last year. Looking fairly lush. I actually had a fair bit more growth later in the season, even pretty late into the fall. The back fence was covered in vines — both my beans and other people’s veggies.
Front to back starting on the left side, I have basil, a pepper (hidden, gifted by a fellow gardener!), teeny baby onions, cherokee purple tomato (gifted by a fellow gardener!), cucumbers, and squash and stuff (volunteer brassica) at the back
Off to the right side are a yew (bush-like) and a box elder (small tree). Plus there’s a full-grown zelkova tree above the benches to the far right. So the plot isn’t too too sunny, especially that front right corner. The spot is too shady for veggies, so I’ve started putting some shade-tolerant native plants (inland sea oats, and volunteer violet transplants) in that corner.
I think the soil is really bad, too. I need to mix more compost in. I was supposed to do that over the winter, but time got away from me. Still planning on going some prep before planting seeds for this upcoming year.
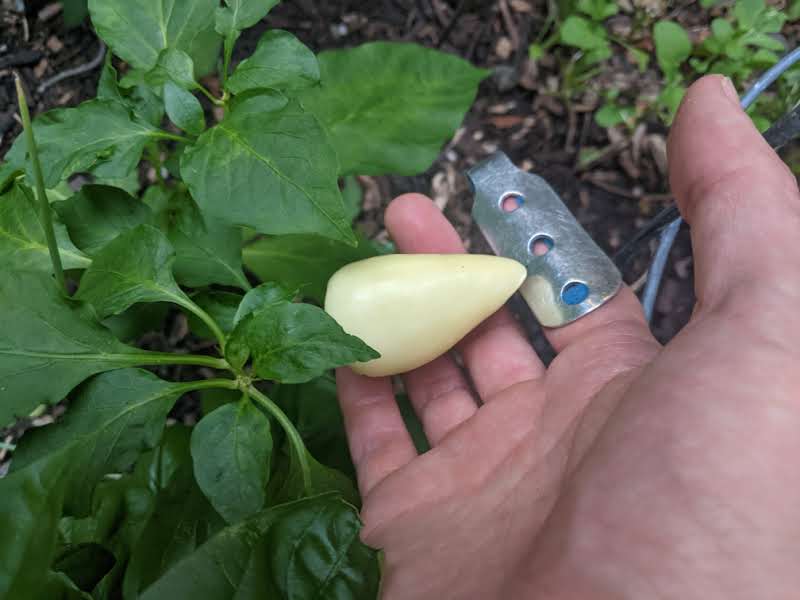
I harvested a couple peppers off of this plant. They weren’t spicy at all. The plant was kindly gifted to me by a fellow gardener. She got the seed from a coworker.
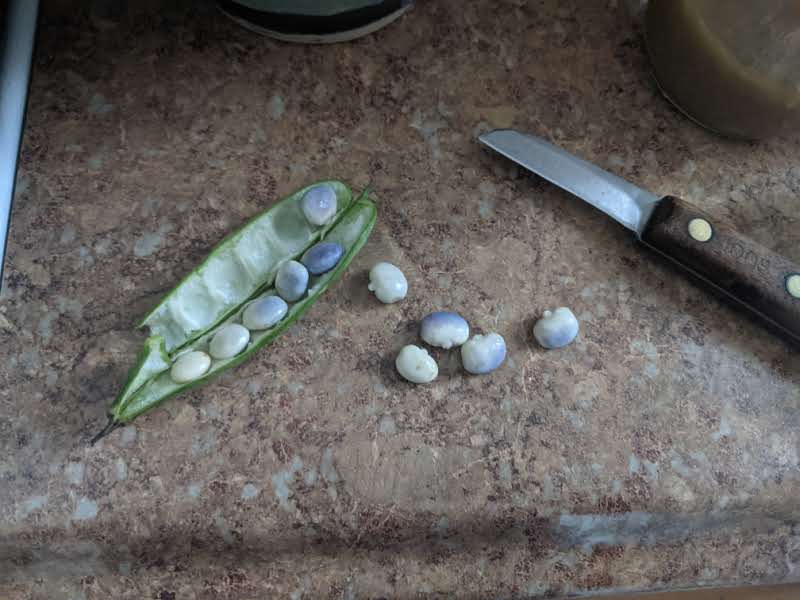
Last harvest of the year (November). There were several pods, more than shown here. I had these beans in soup. I also got a cucumber (not totally sure it was mine. The vines on the fence were all jumbled together. I definitely had planted a cucumber, though), basil, and some other odds and ends.
I tried to start another sewing project over the holiday break after finishing the knitting needle holder. Clothes are always so much harder, though, and I didn’t get too far.
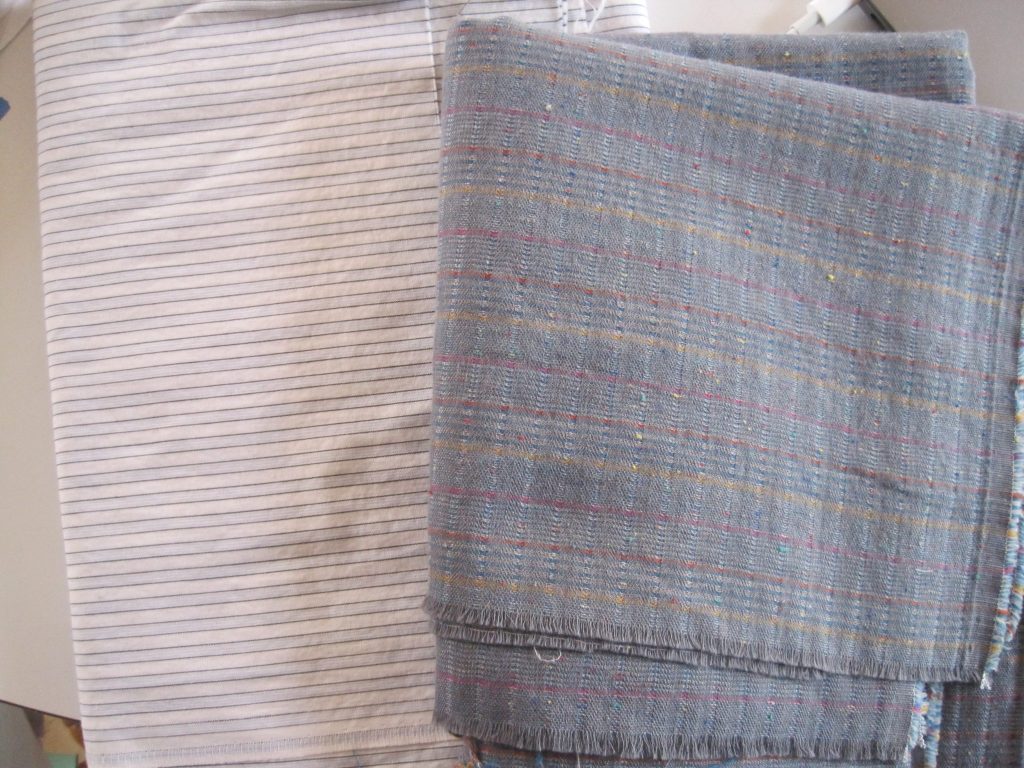
I wanted to use one of these nice fabrics from my mom’s collection.
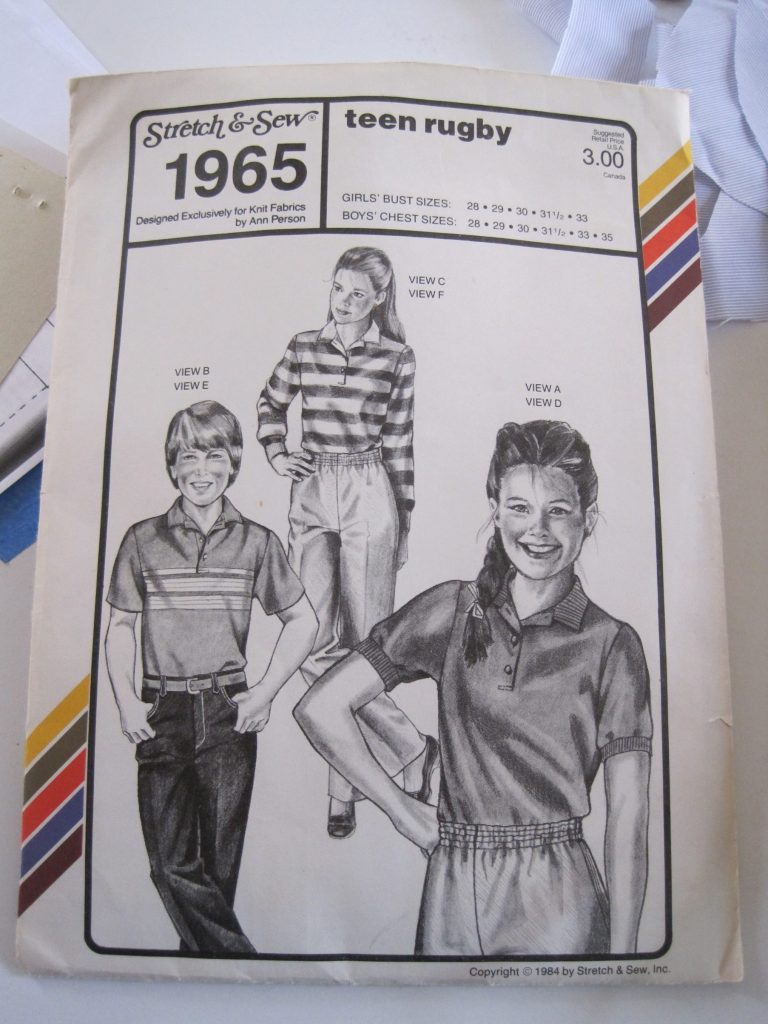
I was looking at either making this kind of shirt (partial placket, no-button cuffs, probably replacing collar with mandarin or faced crew collar, e.g. a henley)
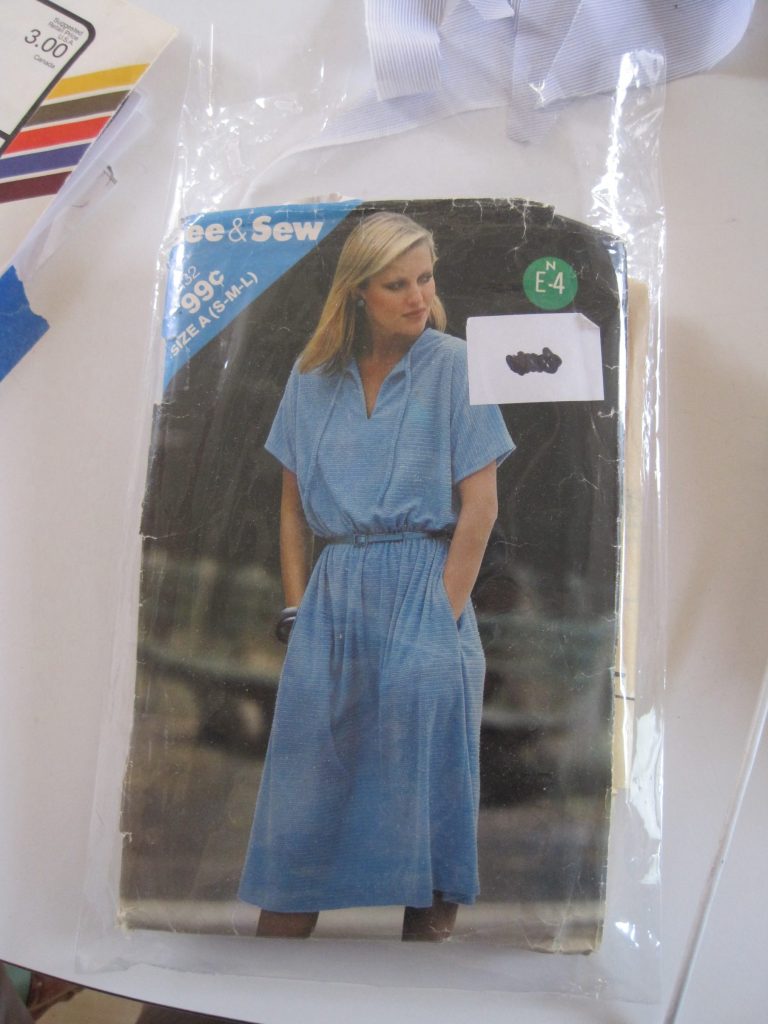
or the top half of this dress, as a shirt (both patterns from Austin Creative Reuse).
I tried to do the rugby shirt, adapting the pattern to use raglan sleeves, and it did not go well. No photos, but the shoulders were poofy and the rugby shirt pattern isn’t wide enough at the bottom for me. It was a mess. I’ll have to revisit this again in the future…
Traditional Indian (from Andra Pradesh and Tamil Nadu) cookies that are BOTH gluten free and vegan!! Plus really tasty. This was a great find for some of those parties where there are multiple people with food restrictions.
225 g moong dal
200 grams fresh grated coconut
225 g sugar
pinch cardamom powder
pinch turmeric (or saffron)
Some cashews (maybe like 1/4 cup or to taste), chopped
Soak beans a least an hour. Blend soaked beans to make a smooth paste. You’ll need to add some water.
Cook bean paste in a pan by itself for a bit, then add everything else. Cook together ~10 min until no longer clings to sides of pan (or until you’re bored/think the beans are cooked through and it seems dough-like. Mine never stopped clinging).
While still hot, spread batter 1.5 cm thick on damp cloth. Let cool then cut into shapes.
Making soy milk generates a lot of okara (soy lees) as byproduct. It still has a lot of goodness left, so I don’t like to throw it away, but the texture isn’t super appealing (like wheat bran). There are some traditional recipes meant to use up okara (like unohana), but these protein/nut/chocolate breakfast balls are better and pretty easy.
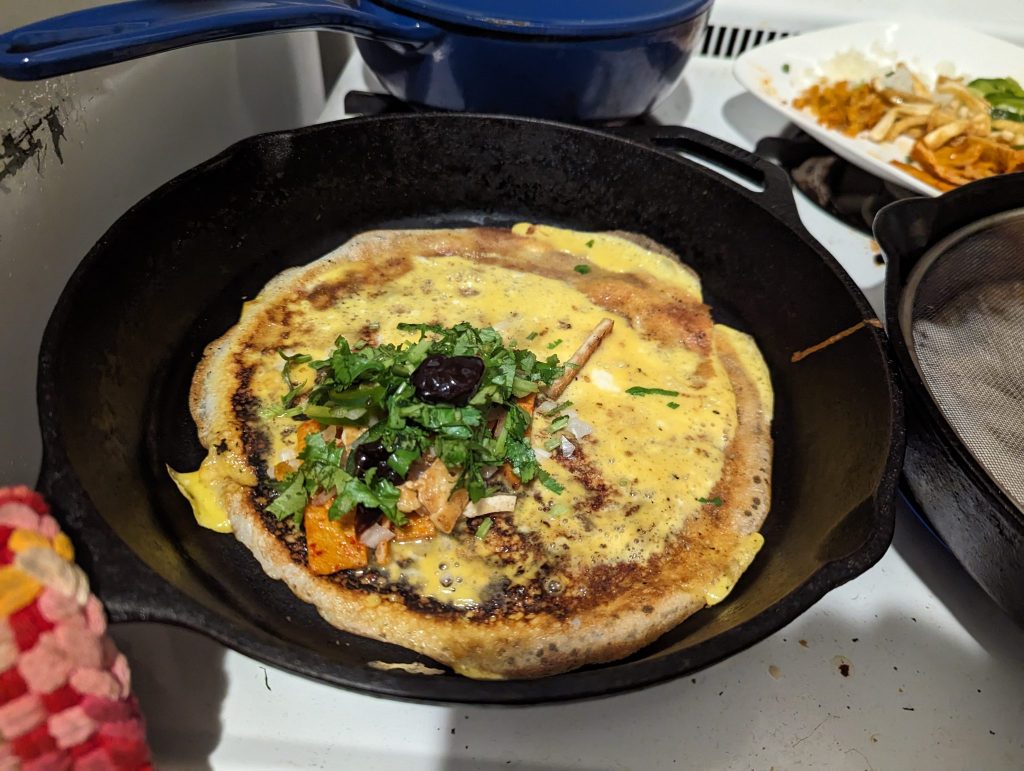
We made jian bing recently (crepe with egg and veggies inside, Chinese style). Usually the crepe would be wheat dough you have to knead and roll out very thinly, but we made this batch using dosa batter (rice-based) and they turned out great!!
We can buy dosa batter from a nearby Indian grocery store, so it’s easier. (Of course, if we made the wrappers at home, they could be whole wheat.)
I used a variety of fillings: egg, fried tofu matchsticks, Chinese pickled spicy mustard stem, fishcake (Korean-style, leftover), minced onion, green onion, lettuce, and cilantro. Sauces were hoisin, peanut chili oil, super spicy oil (leftover from hotpot), and garlic chili sauce.
Pretty darn good overall. My only tip for next time is to use less hoisin. General cooking instructions here.
We had really good Japanese hotcakes at a restaurant, Rule of Thirds, in Greenpoint. I thought it would be fun to recreate them at home.
The original. Goo in middle is maple butter. Plus the restaurant had fancy counters (walnut, maybe?) and fancy design in general.
The original pancake was light and fluffy, and somewhat eggy but not custardy. Like a standard pancake, it is probably leavened by both eggs and chemical leavening. But the soufflé-like texture is probably from a relatively high proportion of egg and whipping the egg whites. It was not very sweet, similar to a standard pancake.
I figured I wanted some features of a standard pancake and some features of an whipped eggy cake-y thing (not really a soufflé — the hotcake weren’t that eggy).
We happened to see the hotcakes in progress at the restaurant. The batter was ladle-able, but had enough body to make a mound in the baking dishes (definitely egg fluff). It wasn’t particularly yellow.
2 oz (1/2 cup) cake flour (I actually used maybe 3/4-1 cup)
3 Tbsp sugar
1 1/2 tsp baking powder
3 eggs
1/4-1 cup (??) milk (I actually used maybe 2/3 cup)
2-3 Tbsp butter, melted (I actually used maybe 2 Tbsp)
Whisk flour and baking powder
Melt together milk and butter. Keep warm.
Whisk egg whites with sugar.
Whisk yolks until light in color and fluffy. Temper with some of egg white mixture.
Fold 1) into 4). Fold in 2).
Bake for 15 min at 350°F.
V1 of the home version. Not so close.
I think I reinvented corn bread (without corn). It wasn’t bad, but not very close at all to the restaurant version.
One big issue I had is that I added WAY too much milk, which caused the batter to be too liquidy. I added more flour to give structure to the batter, which made it too dense and cake-y. It seems like most of the structure needs to come from whipped egg whites. My pancake is also more yellow than the one at the restaurant. The eggs we get have super bright yolks, but maybe the “pancake” needs less yolk.
So for next time, I need less flour, and to reduce the overall amount of liquid (so less milk, butter, and maybe egg yolks).
Recipe to try next time:
Hotcakes V2?
2 oz (1/2 cup) cake flour
2 Tbsp sugar
1 1/2 tsp baking powder
2 egg yolks
3 egg whites
2 Tbsp milk
1 Tbsp butter, melted
Whisk flour and baking powder
Melt together milk and butter. Keep warm.
Whisk egg whites with sugar.
Whisk yolks until light in color and fluffy. Mix in 2). Temper with some of egg white mixture.
Fold 1) into 4).
Bake for 15 min at 350°F.
As it turns out, there are recipes online for “Japanese soufflé pancakes”. I didn’t bother searching, because I didn’t think the “hotcake” recipes I would find would be soufflé-y enough. I think I’ll continue with the experiment because it’s fun.
While Jimmy was at an internet café, I went to the nice Goodwill on 6th Ave. They have a section at the front with sorted-out fancier items (nice for a quick browse), but even the non-curated items are quite nice.
Prana. Intending to use this as more of a work/outdoors shirt. It fits pretty well, but the pattern’s just okay. The fabric is pretty loosely woven, so it may not last well.
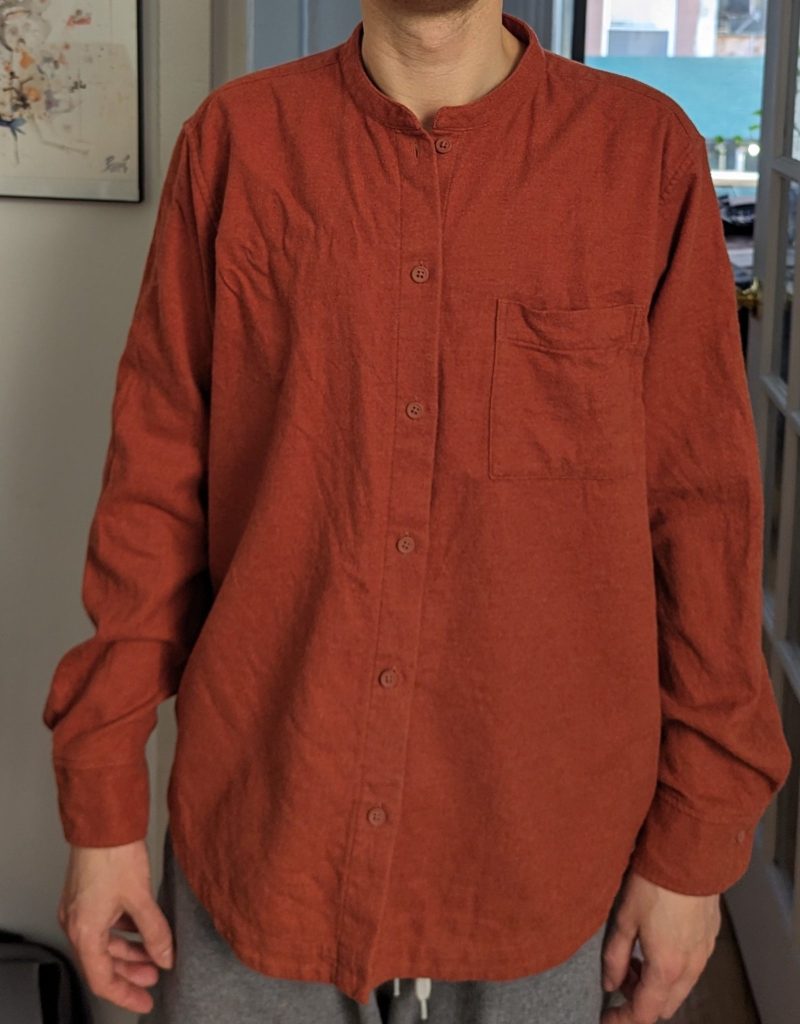
“Flanders Linen”, although I couldn’t find out much about them. They claim to have been around since 1350. The shirt is only 30% linen, though. It is crisp and light — should be good for summer. I just washed everything, hence the wrinkles.
Corduroy shirt from Uniqlo. Really this is too big, but we’ll try it out.
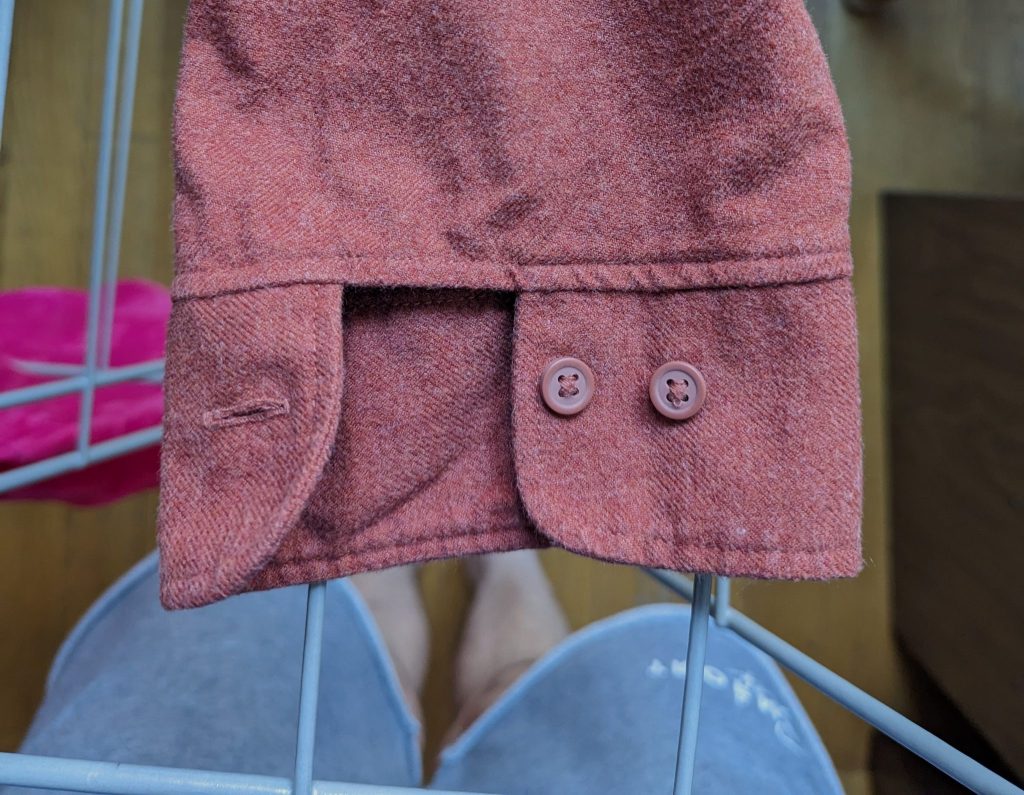
My first Muji shirt!! I like their clothes. They have interesting construction, but are still simple. I like the low collar on this. Overall it looks like monk clothing.
Cuff detail. The cuff pleat is formed when you button it! Might use this on future shirts I make. Color is more accurate in the previous photo.
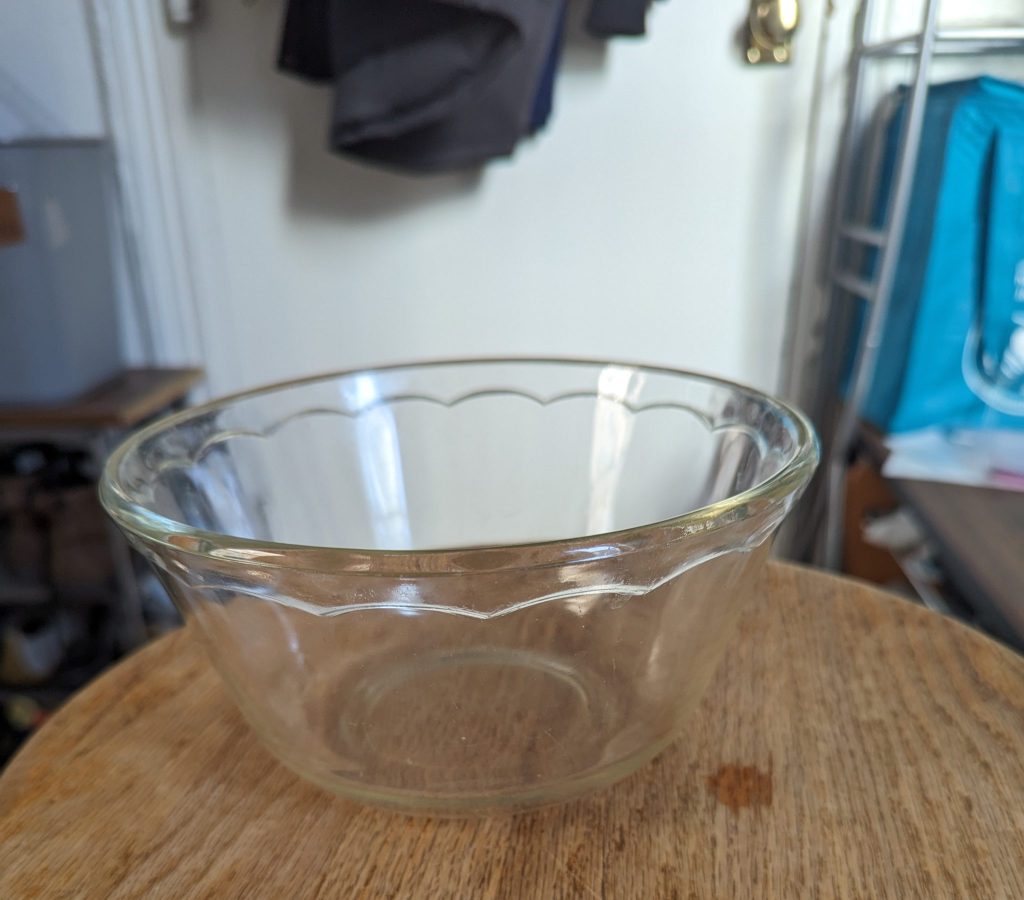
I also found this nice mixing/serving bowl on the sidewalk on the way back!