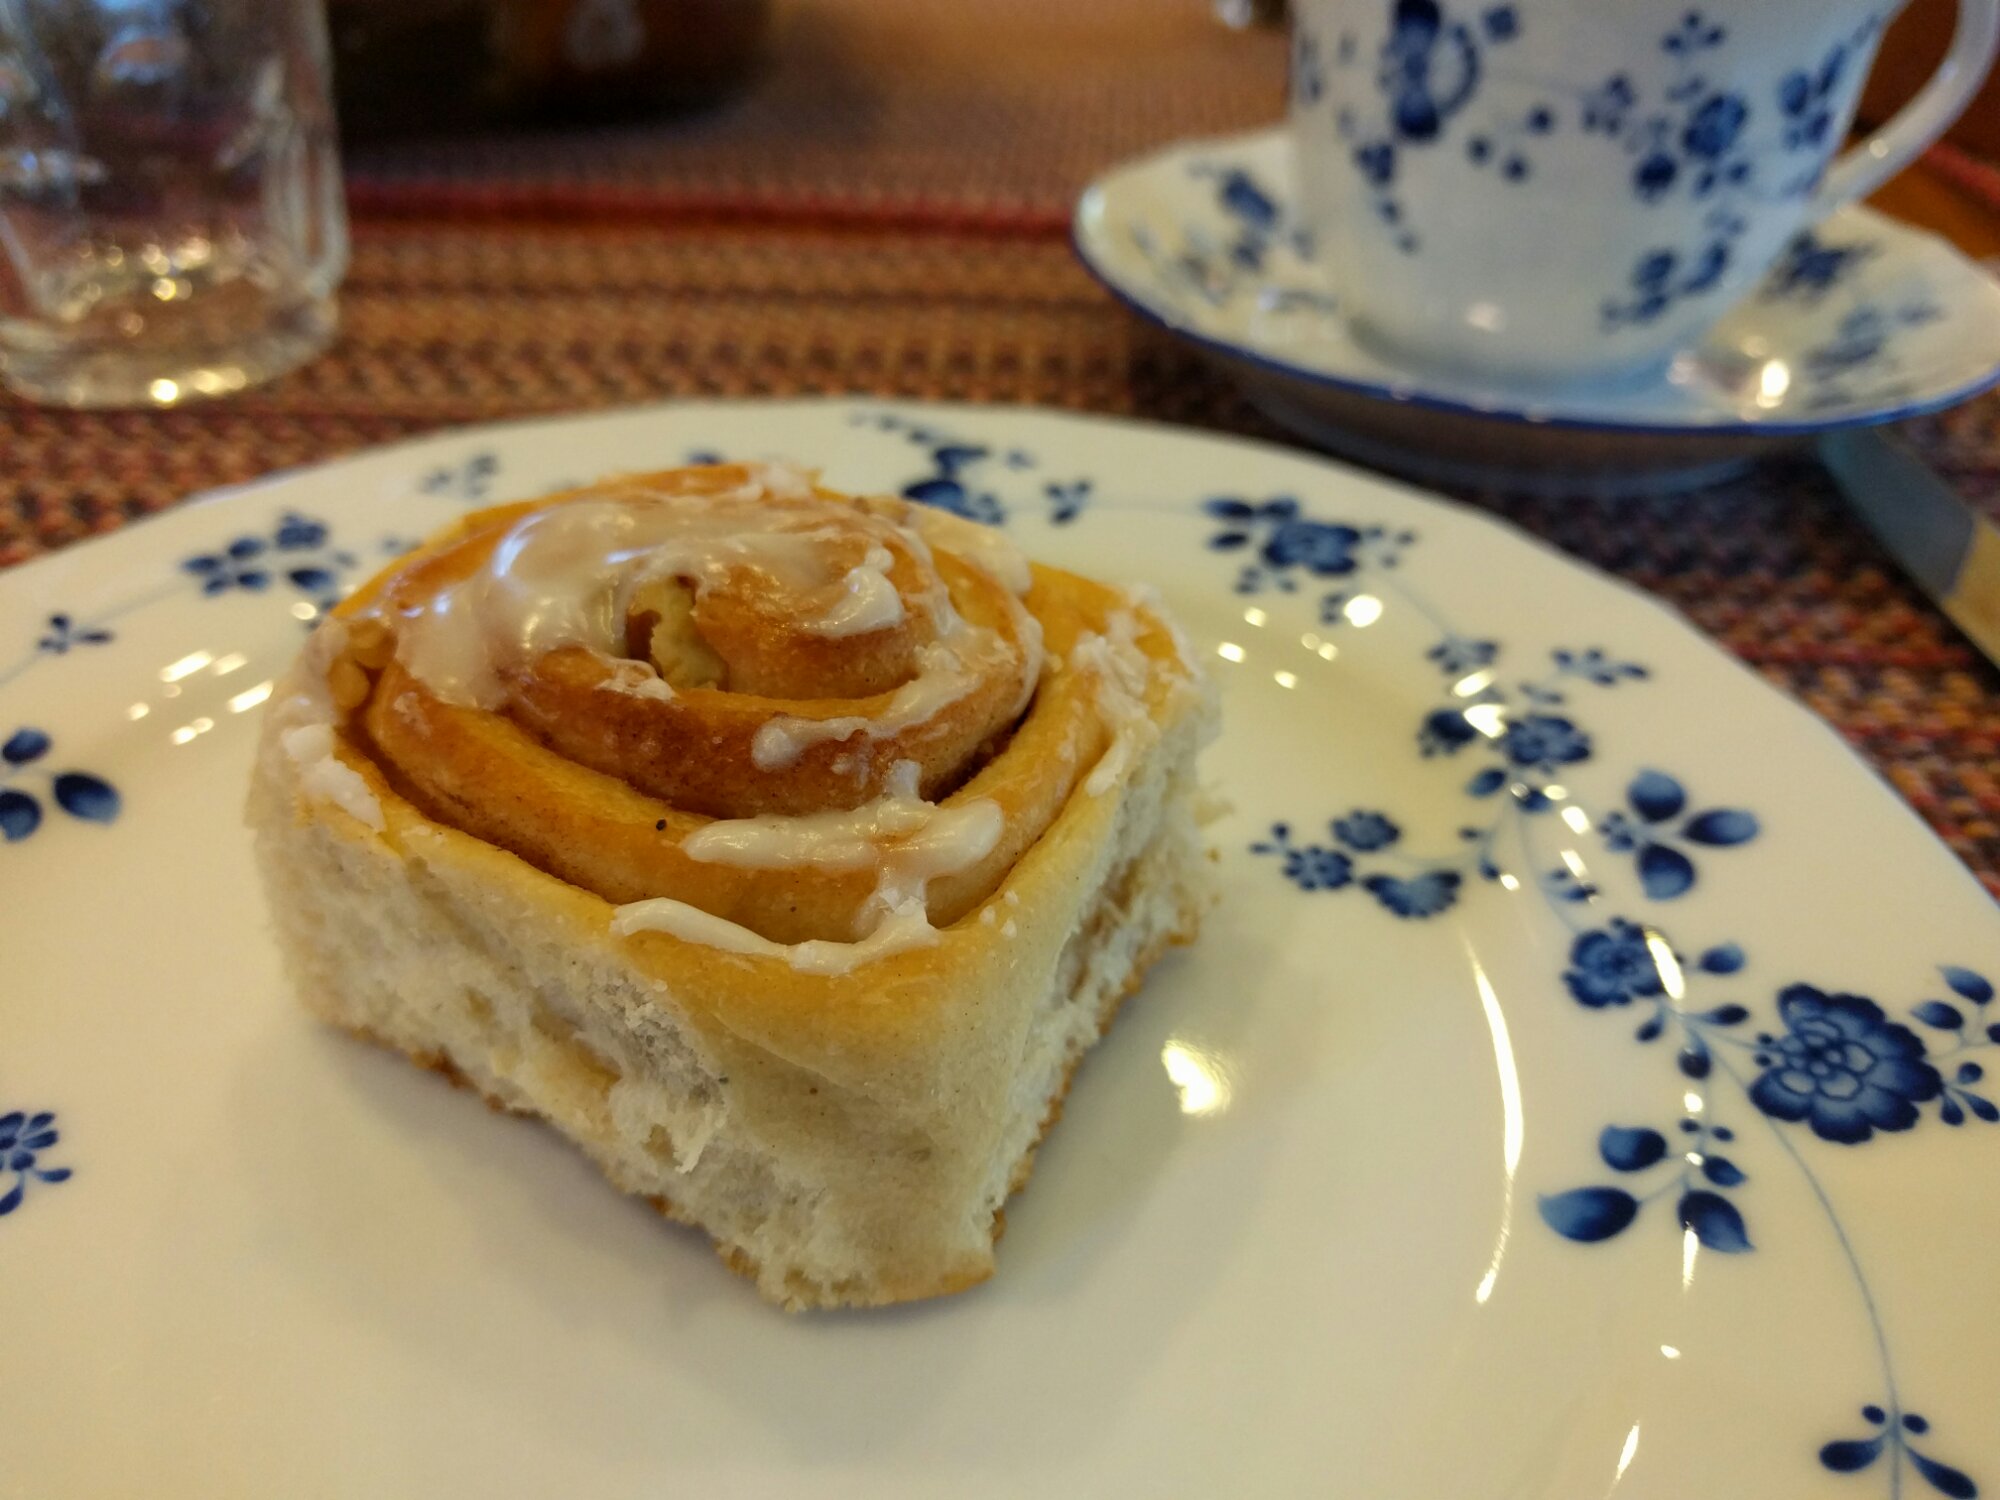
Cinnamon Rolls

Food, sustainablity, and some other stuff

Another recipe from my mom. I haven’t tried this one yet, so let me know how it is!
Brownies:
1/2 cup flour
1/2 cup cocoa
1/3 cup melted butter
1 cup sugar
2 eggs
1 tsp vanilla
1/2 cup chopped nuts (optional)
Cheesecake batter:
2 Tbs butter, room temperature
3 oz cream cheese, room temperature
1/4 cup sugar
1 egg
1 Tbs flour
1/2 tsp vanilla
To make brownies: Sift together flour and cocoa. Mix butter, sugar, eggs, and vanilla. Mix together the flour and butter mixtures. Add nuts
To make cheesecake batter: Blend butter and cream cheese. Add sugar and beat well. Add egg, flour and vanilla.
Spread about a third of the brownie batter in a greased 8-inch square pan. Spread cheese batter on top. Drop spoonfuls of remaining brownie batter on top and swirl with spatula. Bake at 350°F for 30 min. Store cooled leftovers in fridge.
Use your own favorite brownie recipe instead. Top with cream cheese mixture and swirl.
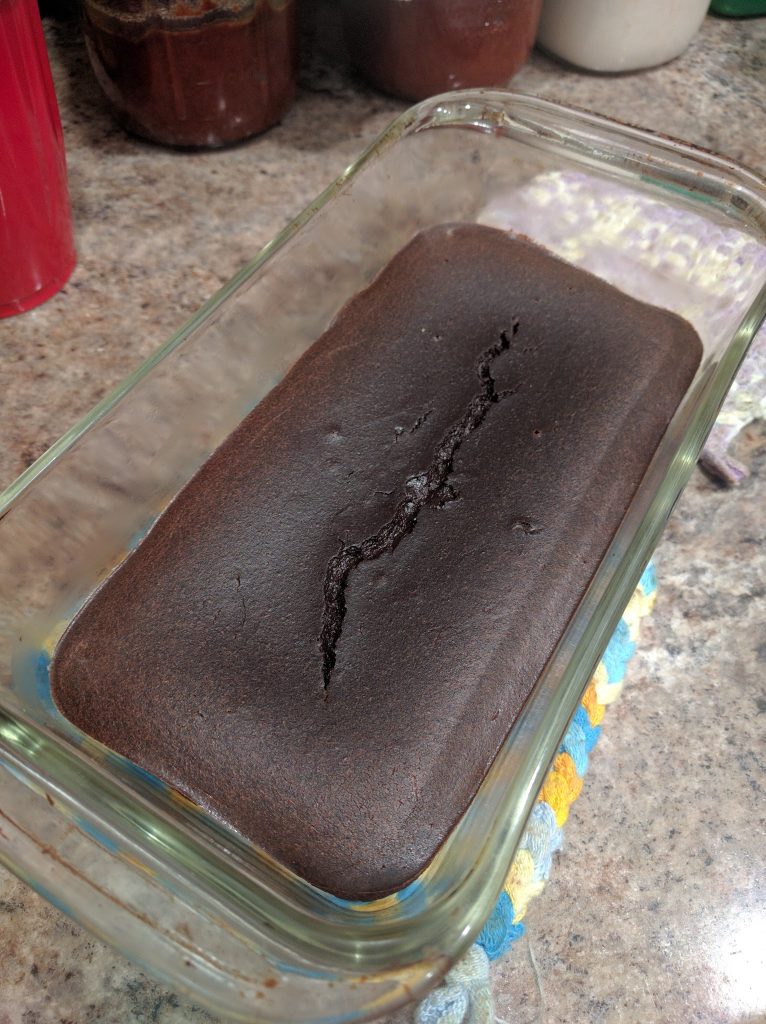
We have a lot of cocoa powder, so we’ve been making brownies. In an effort to make them healthier, they’ve turned out kinda …odd. Definitely edible, but not especially brownie-like. This is the original, pre-substitution recipe, from my mom’s 4-H days.
1/2 cup flour
1/2 cup cocoa
1/3 cup melted butter
3/4-1 cup sugar
2 eggs
1 tsp vanilla
1/2 cup nuts (optional)
Sift together flour and cocoa. Mix butter, sugar, eggs, and vanilla. Mix flour and butter mixtures. Add nuts. Place in greased 8-inch square pan. Bake at 350°F for 30 min.
Use whole wheat or whole wheat pastry flour, or any other kind of flour. Because brownies are a type of quick bread (not leavened by yeast), they don’t require gluten. When substituting whole grain flour for white flour, however, you usually need to increase the amount of liquid.
Add mashed beans to make the brownies fudgier. If you add enough, the texture gets lighter and almost sponge-like, although the pores are very small. At that point, it isn’t much like a brownie, but it still tastes good!
Make cheesecake brownies by swirling a mixture of cream cheese, sugar, and vanilla into the brownie batter. I’ll post a recipe for this in the future.
One of the vendors at the farmers’ market was selling “sauce boxes” of tomatoes for $20 each. Each box was about 20 lb, so it was quite the bulk discount! I also got 10 lb exra (for no extra cost) when I asked if I could add overripe and ugly tomatoes!! The vendor seemed to think they were worthless :<
Unfortunately, I forgot to account for the trip back home, about a mile. The 20-lb box seemed doable, but I got greedy with the overripe ones. J only agreed to buy the box of tomatoes on the condition that he wouldn’t need to help carry it… but that promise totally fell through. We ended up each holding an end of the box.

But! We’ll have so much tomato sauce! And maybe salsa too.
We also got reject fancy apples for $1/lb. The plan is to make apple pie.
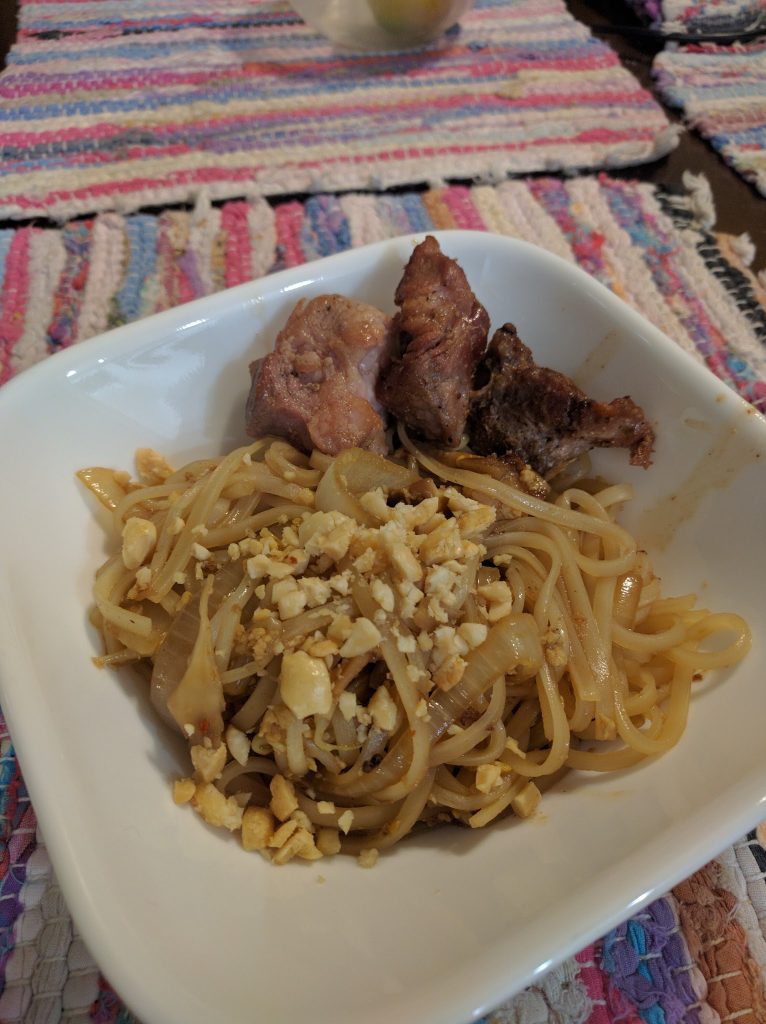
J and I made pad thai the other day. It’s pretty simple, but requires a few special ingredients that can’t be substituted for: fish sauce, tamarind paste, and rice noodles.
We followed a not-so-stellar Serious Eats recipe. It made too much sauce for the amount of noodles and veggies- we actually doubled or tripled the amount of noodles and still had too much sauce. Besides, the sauce wasn’t quite right. First of all, there was too much fish sauce, so it was too salty. The recipe called for honey in place of palm sugar in an attempt to make the recipe more accessible, which is a noble effort. Unfortunately, the honey added too much water, so there was a puddle of water at the bottom of the pan…
These changes should be easy to incorporate next time.
I’ve been thinking of taking a ceramics class. I got my feet wet during college, and really enjoyed it. It’s amazing to think that you can make all your cups, plates, bowls, and more yourself! You could even make your own toilet.
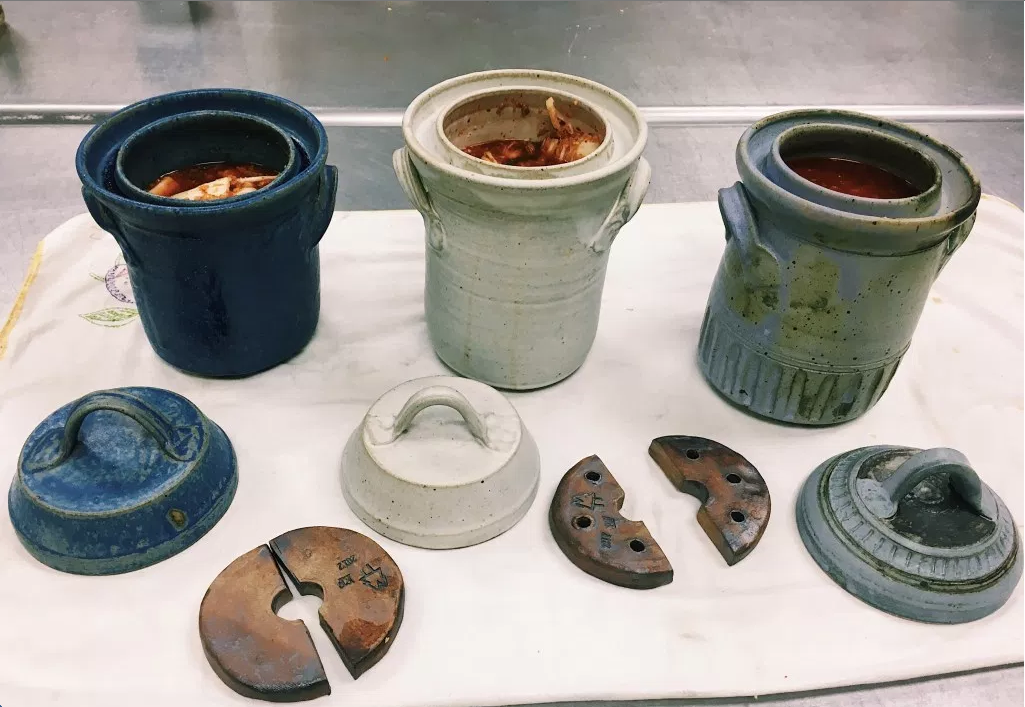
I’m especially interested, though, in making onggi, which are traditional Korean fermentation vessels. Here’s a video on how they’re made.
Apparently the type of clay is very important, and detailed information is probably only available in Korean. I’d be satisfied with something like these crocks, which are also pretty and functional.
I worked in a research lab in South Korea for a summer during undergrad. I’m thinking of contacting the grad student I worked with to see what he knows about traditional Korean food (and onggi!). Maybe he’d be willing to do some research for me (:
I also could make a donabe (see Toiro Kitchen for more info. The cookbook by Naoko Moore on donabe cooking is also quite good).
And, well, a ceramics class just sounds fun. I like learning new crafts!
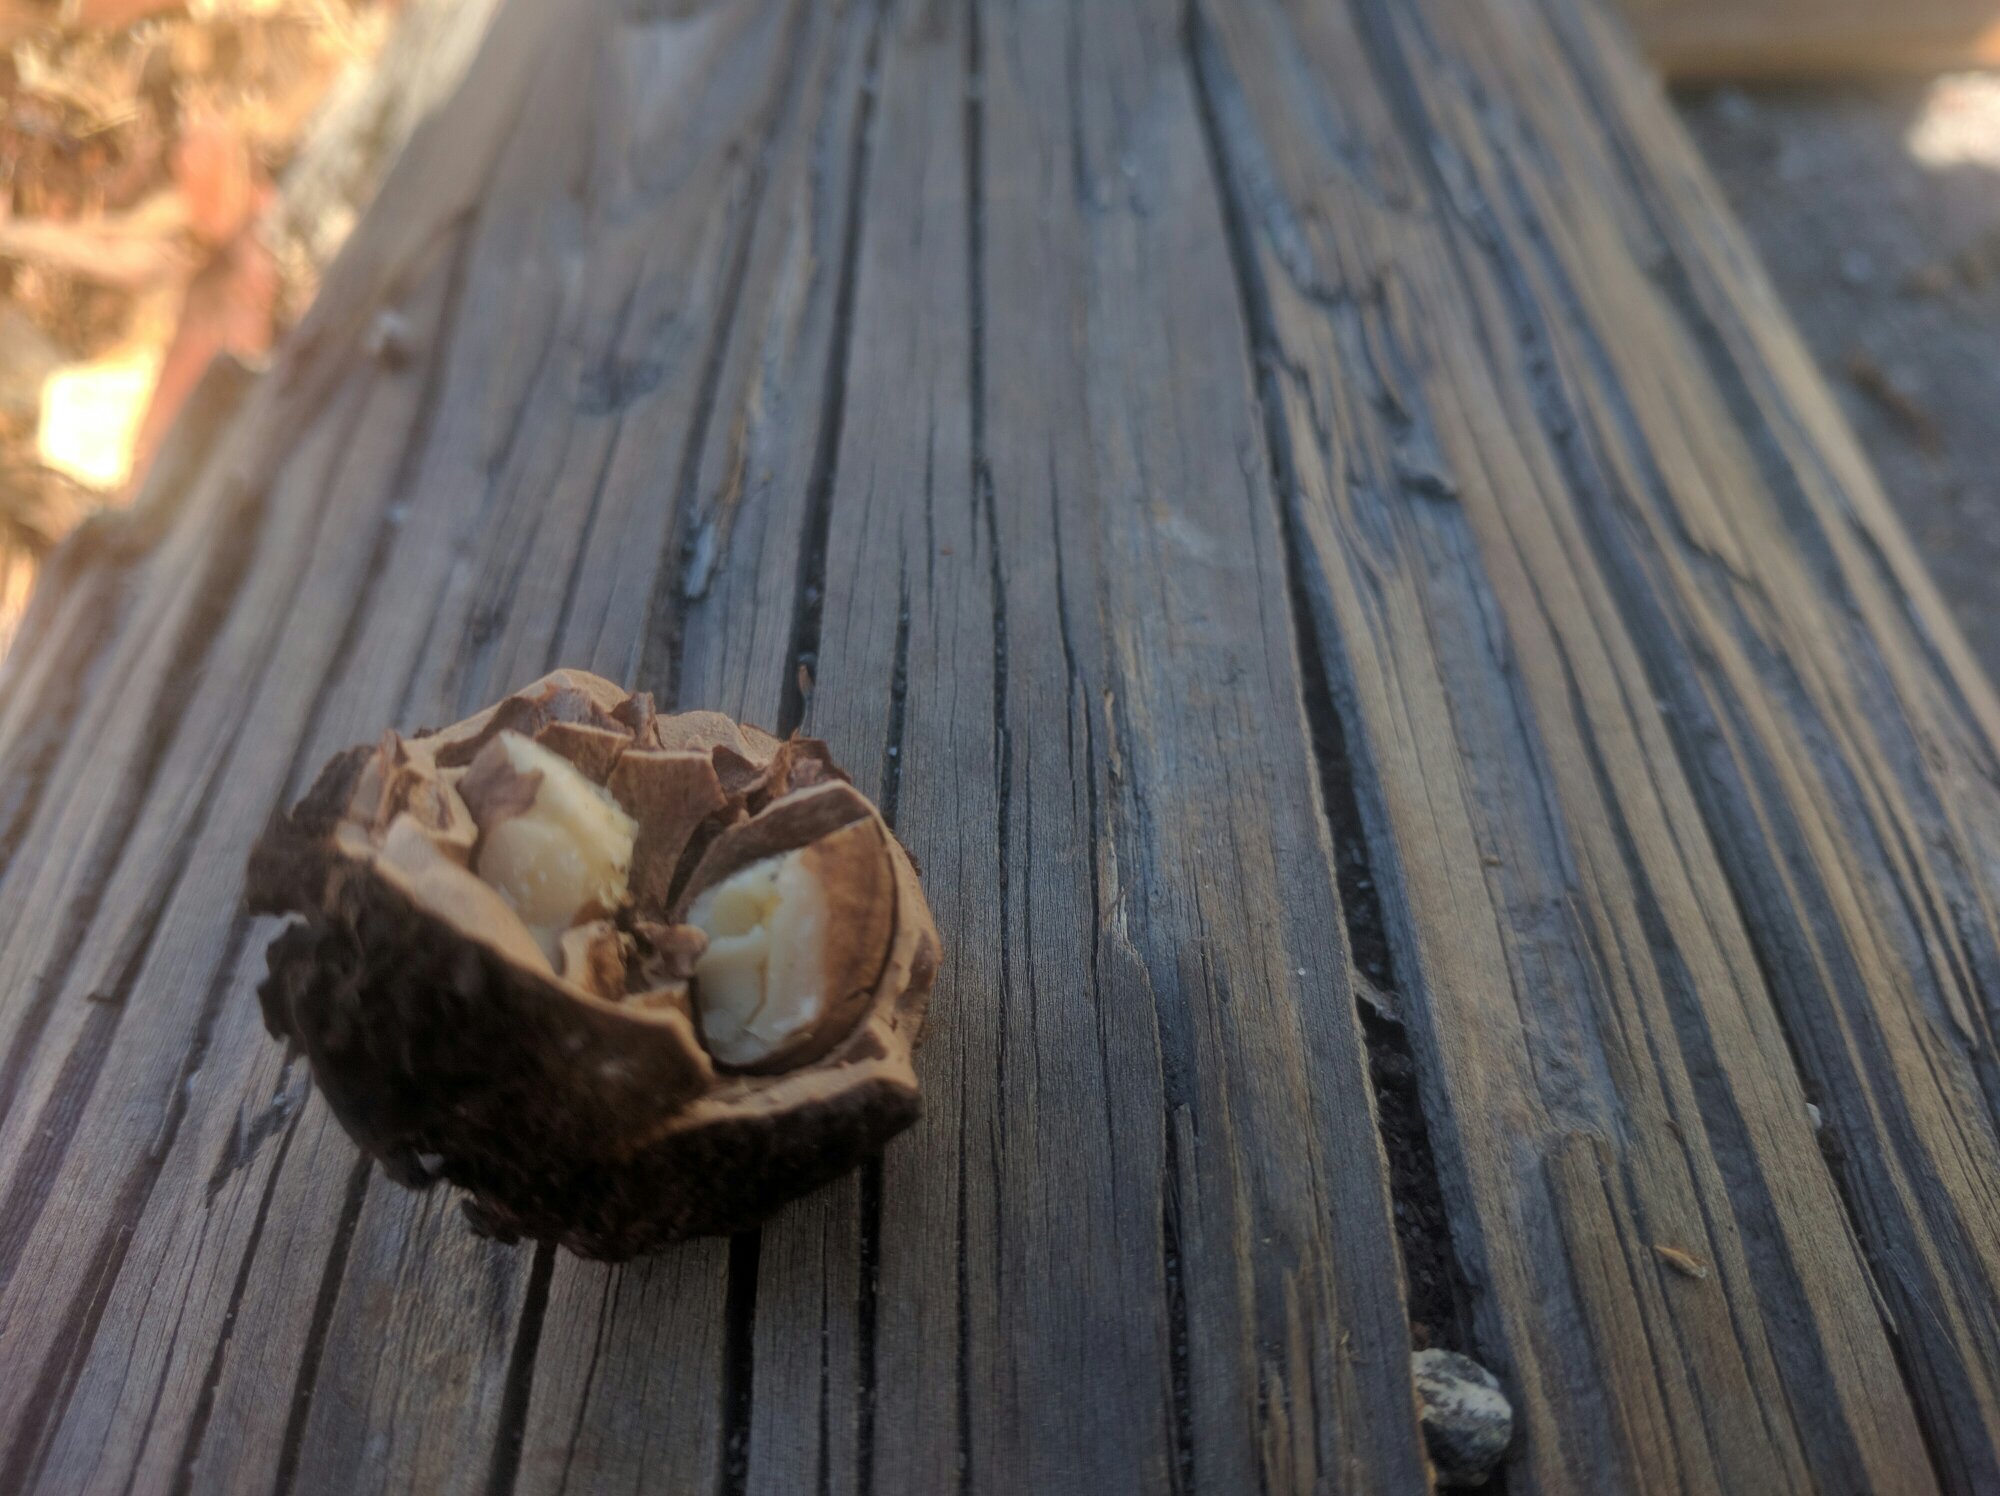
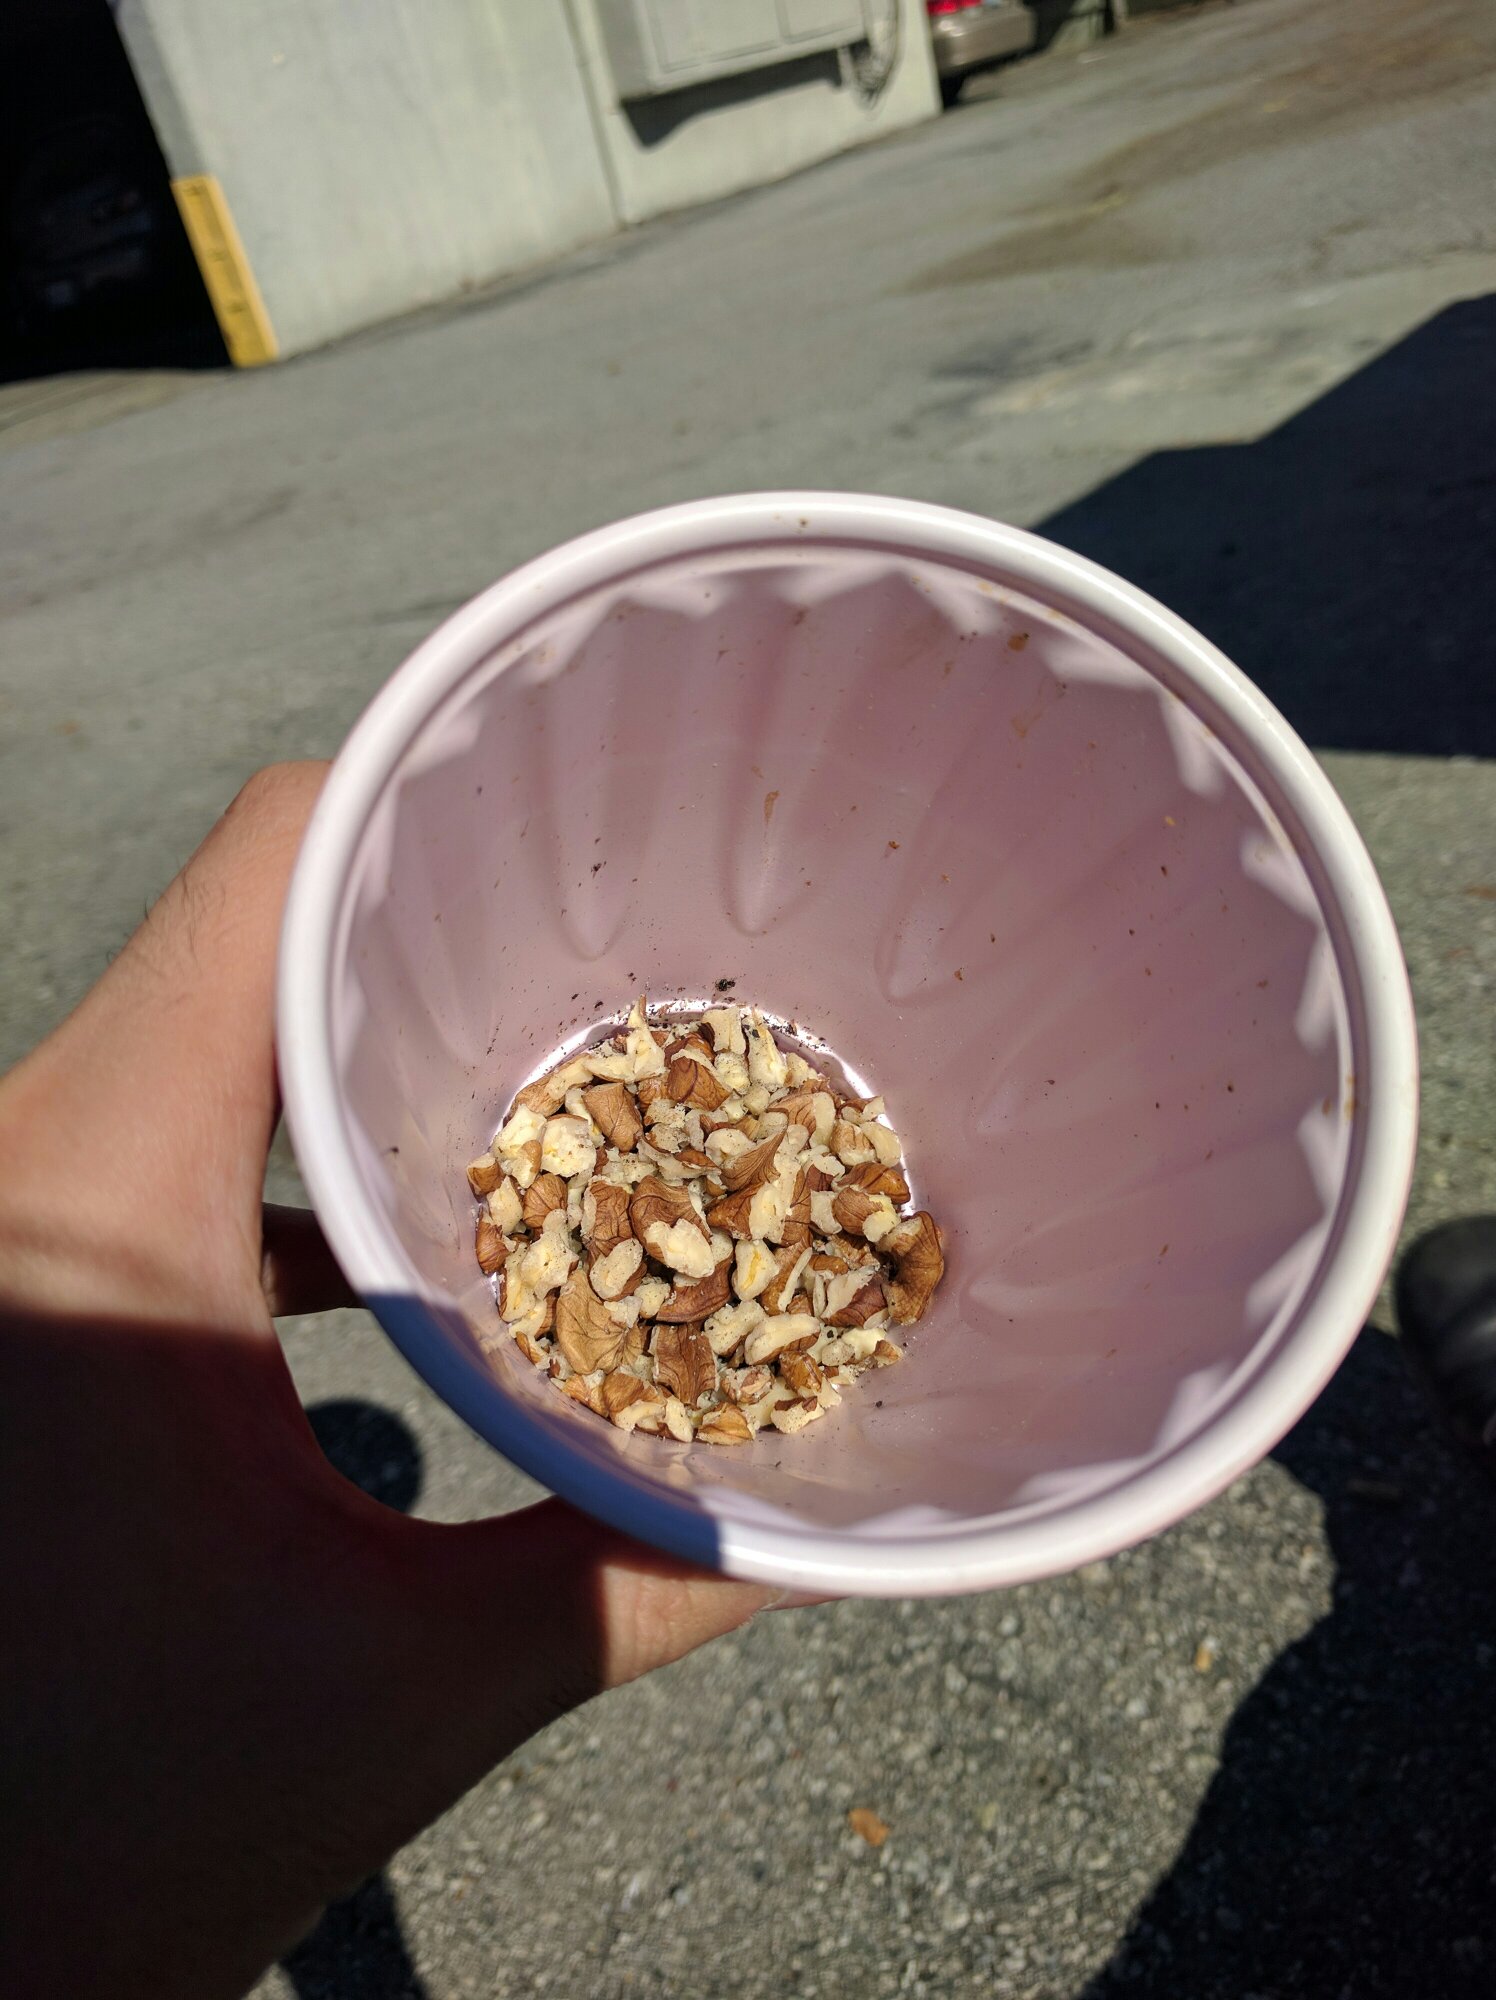
We cracked open a bunch of black walnuts that N had collected from some nearby trees. The shells are so hard! We used a big hammer to smash them open.
Using alcohol instead of water prevents gluten from developing. Any type of alcohol is fine, although higher proof is more desirable, and you can use flavored types if you prefer. How about beer crust??
(makes 8- or 9-inch one-crust pie)
1 cup flour
1/2 teas. salt
1/3 cup butter
about 3 Tab. ice-cold vodka
(for an 8-inch two-crust pie, use 1-1/3 cups flour; 1/2 teas. salt; 7 Tab. butter; 4 Tab. cold vodka or so)
Measure flour and salt into a bowl. Cut in the shortening. Add the vodka and hope that the flour is moistened and dough almost cleans the side of the bowl. You may need to add more vodka. Gather the dough into a ball (or two if for a two-crust pie). Carefully flatten the ball(s) so that a round shape is maintained. Refrigerate at least an hour or overnight before rolling out — this is supposed to help with gluten reduction.
Apple pie recipe from my mom. This particular write-up is a compilation of several different recipes and techniques, and has not been vetted so be careful.
The recipe was adapted from a Cook’s Illustrated recipe and a Joy of cooking (or maybe Betty Crocker) recipe, seen below.
Pastry for 8-inch two-crust pie
5 cups thinly sliced pared tart apples
1/3 cup sugar (this is less than the original recipe recommends)
1/4 cup flour (the original recipe calls for 3 Tbs but juicy apples need more) or 2 Tbs tapioca starch
1/4 to 1/2 tsp cinnamon
dash salt
1 Tbs butter
Use different apples, depending on taste. It is usually recommended to use a combination of sweet (Golden Delicious, Jonagold, Braeburn) and tart (Granny Smith, Empire, Cortland) apples.
Use tapioca starch instead of wheat flour. A smaller amount (1 1/2 tsp for every Tbs of flour called for) gels just as well, and doesn’t risk imparting a chalky texture.