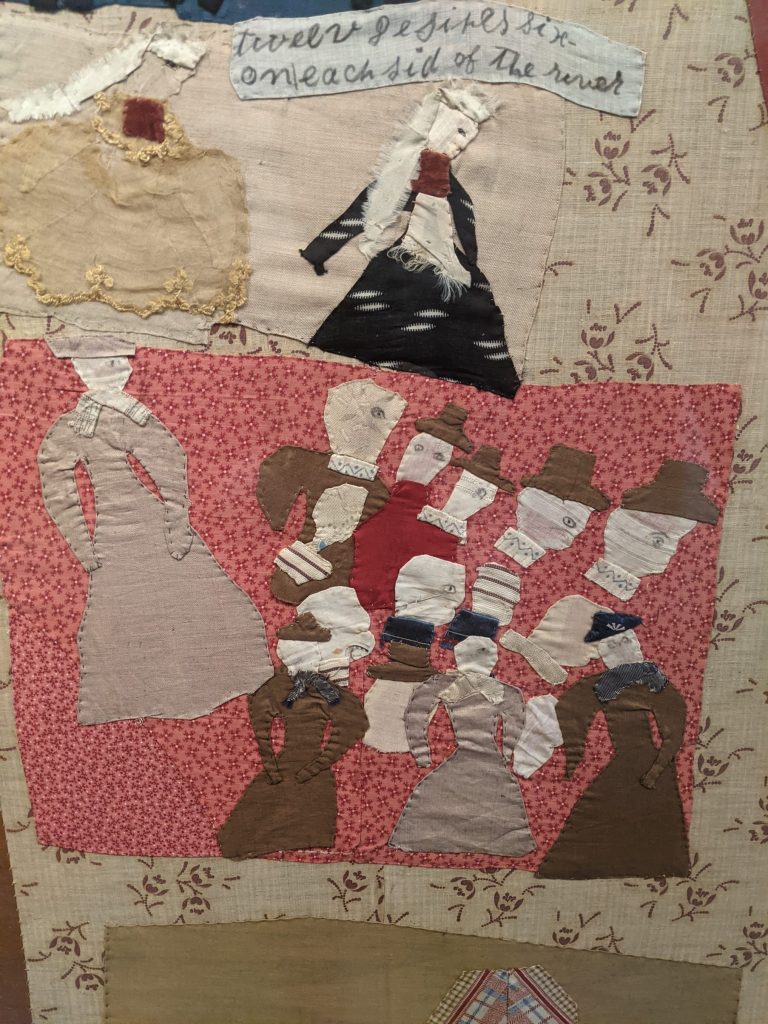
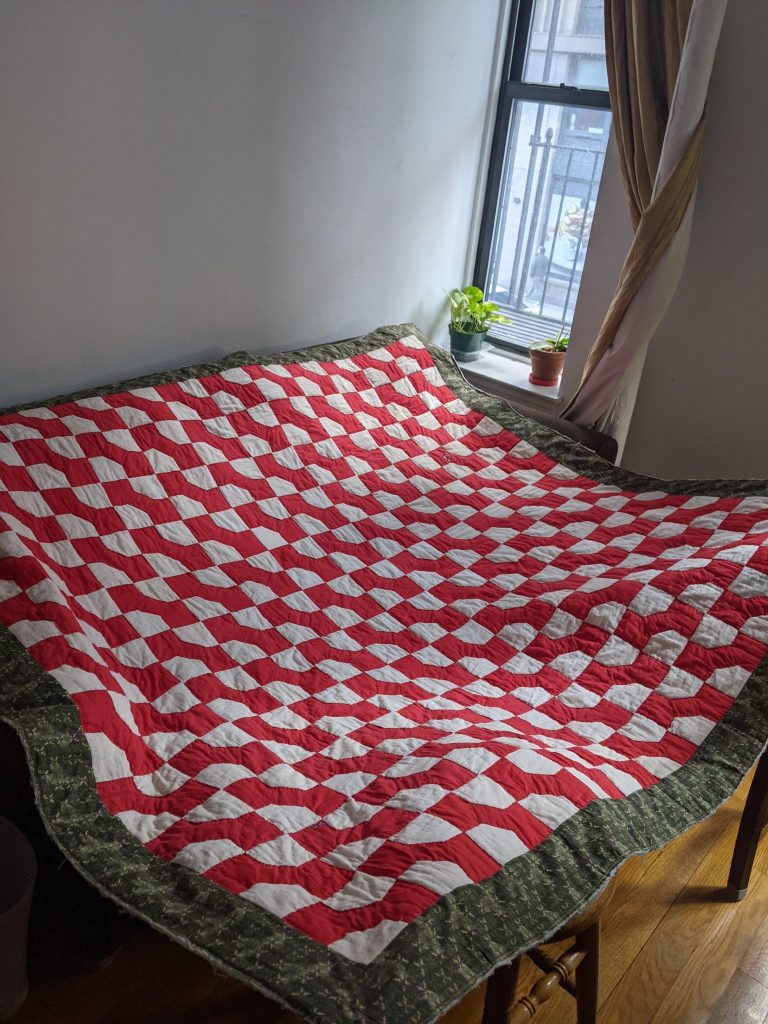
The first three pictures are from a quilt exhibit at the American Folk Art museum, on Tucker Square. The quilts were really cool. They also had a good exhibit on wind vanes a while back (there was a wind vane made by the guy who made the wind vane on Faneuil Hall in Boston – it’s a grasshopper!).
This quilt narrated a scene of people going to church and some Biblical scenes. “Twelv [sic] desires six on each sid [sic] of the river”. There’s a river off to the right, not shown.
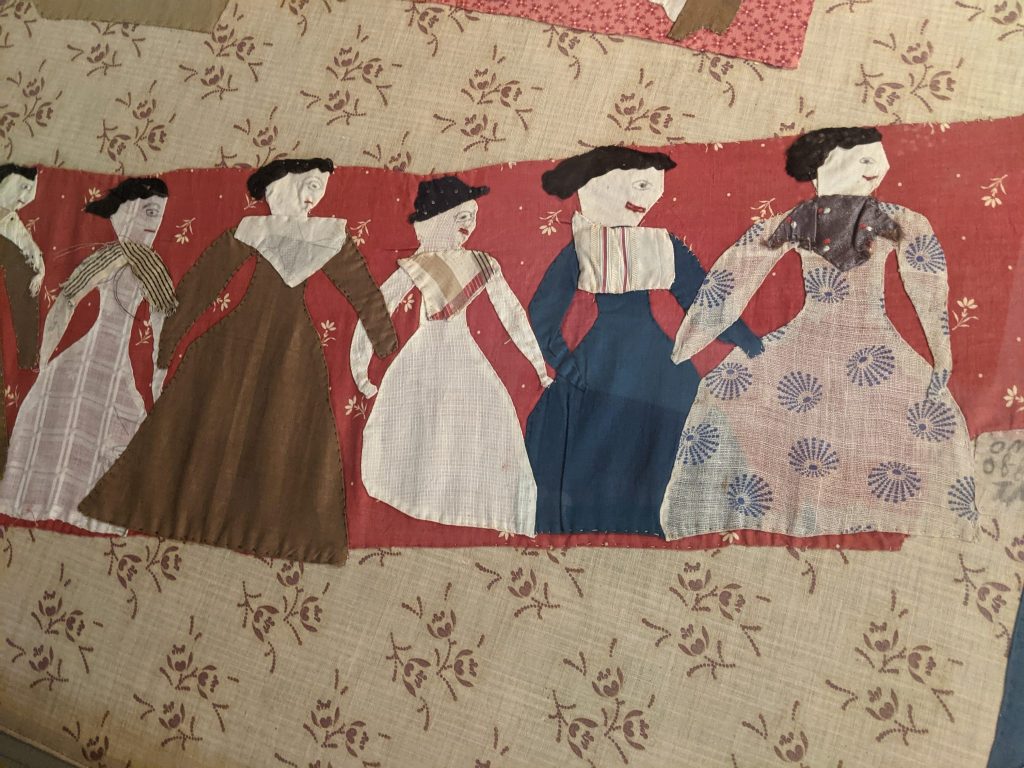
Ladies going to church, if I recall correctly.
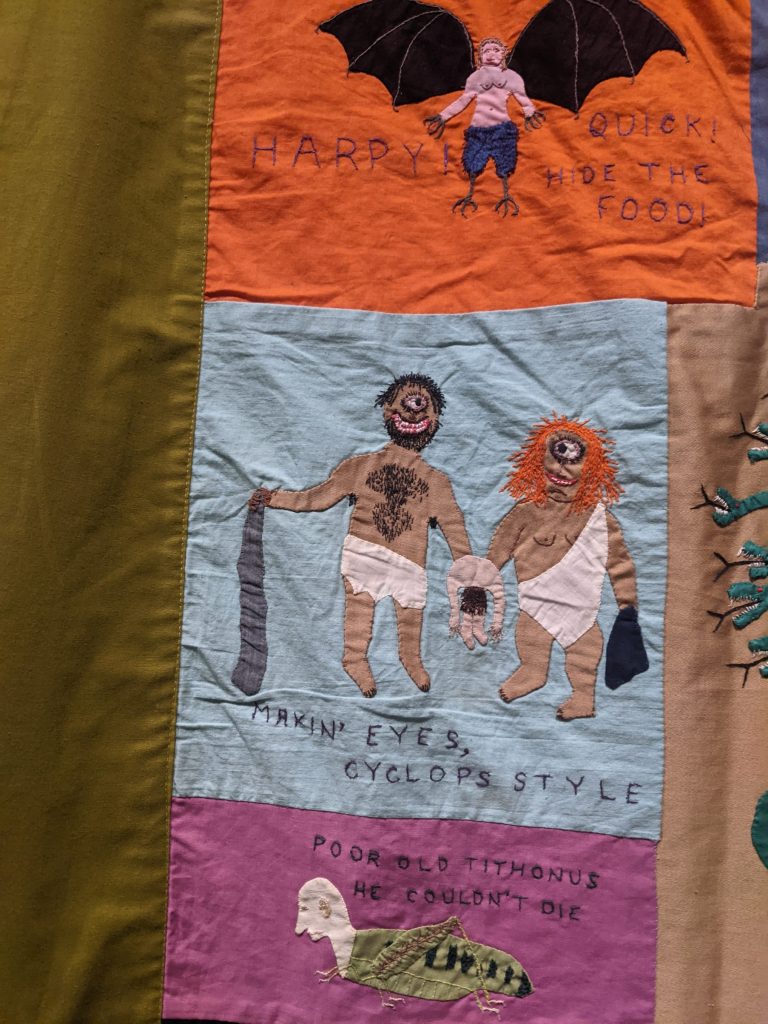
Quilt by a professor (?) of mythology with a sense of humor.
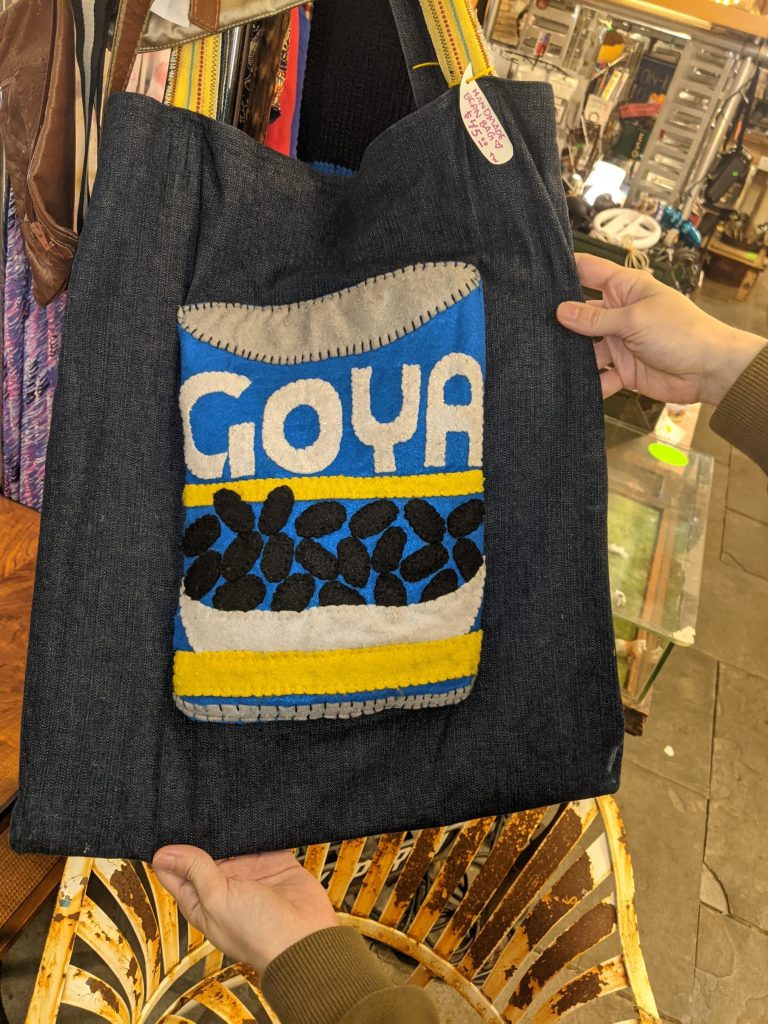
Seen at a thrift store, maybe Austin Creative Reuse. Black bean bag, anyone?
The front. I’m still not sure the green fabric was right for the border. It’s just a totally different look. I am glad I made the quilt bigger, though. It’s only just big enough for a twin bed as-is.
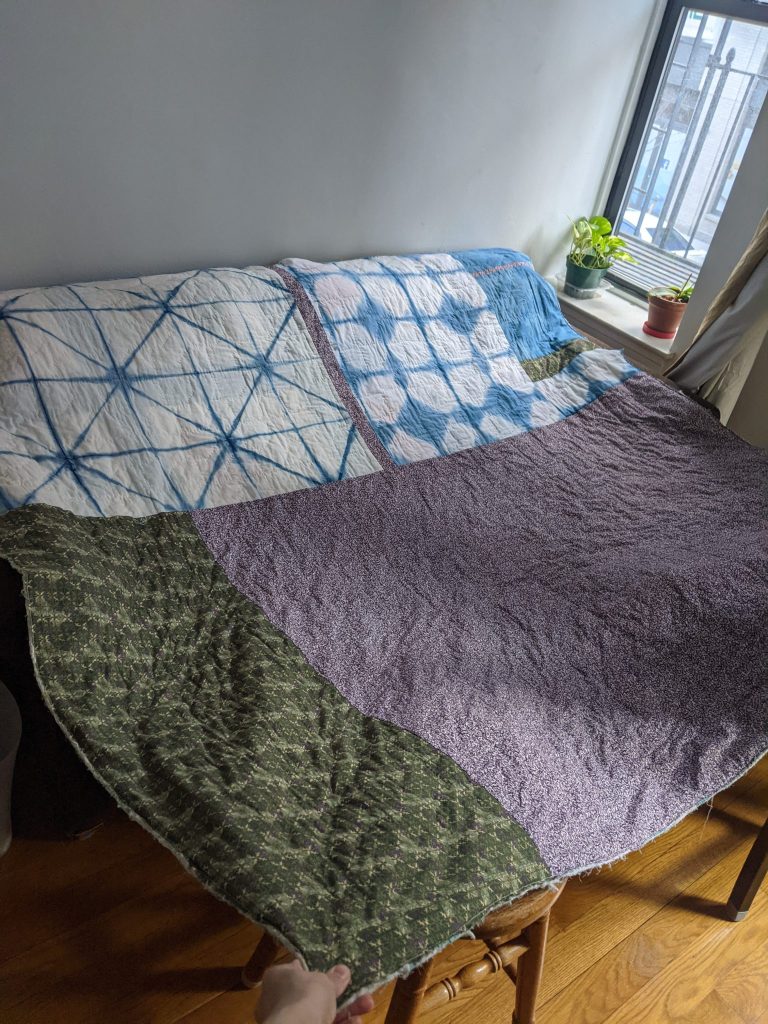
The back. Sibling C and I dyed the blue fabrics using indigo.
In use and with the edging sewn on! It looks good and it’s quite warm. I’ve been using it all winter.
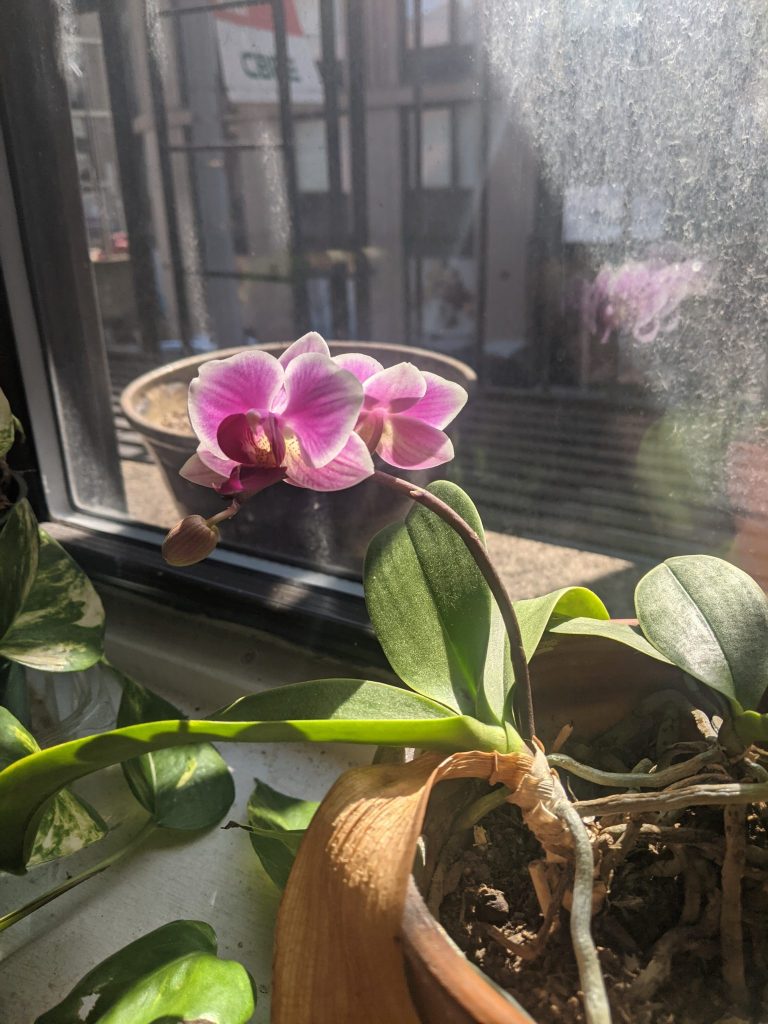
About a year and a half ago I found an orchid at our local free-swap shelf. It’s the common kind, Phalaenopsis, and shockingly one of the plants bloomed last year! The flowers last a LONG time — several months — so it’s very rewarding.
Last year’s flowers!
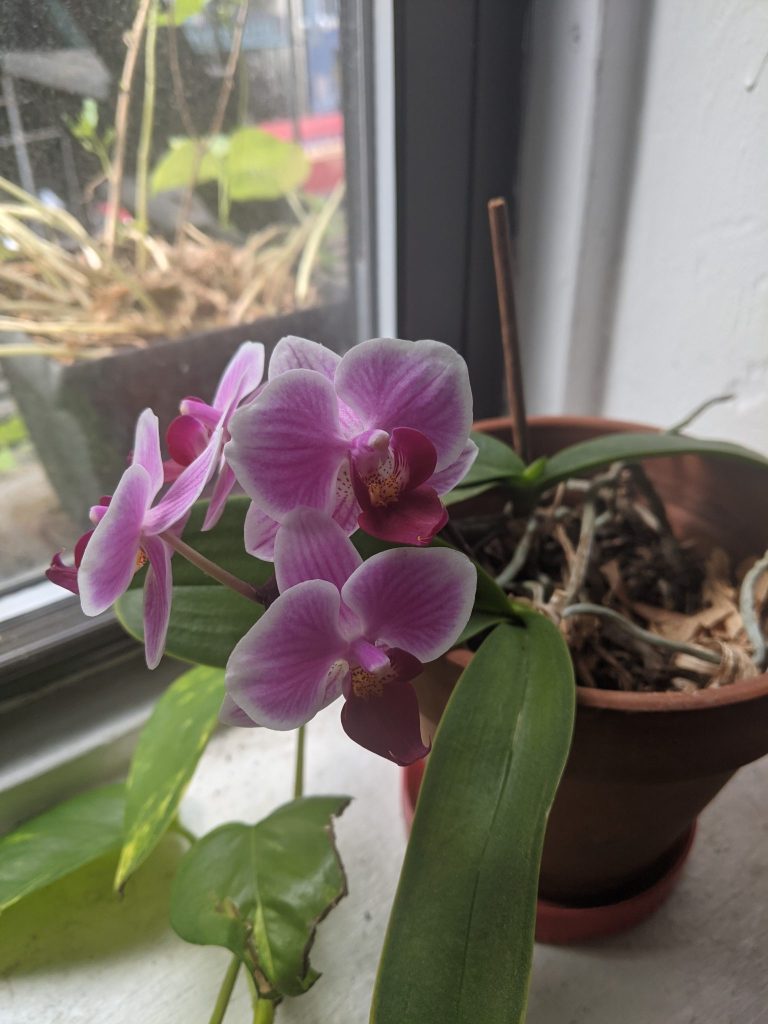
With more buds open.
It seems that the secret to getting Phalaenopsis orchids to bloom is that they have to be somewhat cold for a few weeks, especially at night. “Phalaenopsis are induced to flower when exposed to temperatures lower than 79 F (26 C), particularly during the day. Traditionally, growers use a 77 F/68 F day/night (25 C/20 C) temperature regimen for spike initiation” (Orchid Society document).
I did this accidentally (and well below 68°), because our 1900 apartment doesn’t have great insulation and my orchid is right by the window. But if you live in a well-insulated or very temperature-controlled place, you might have to go to some effort to get cold enough temperatures.
If you want to avoid the winter chill requirement, you can get Polychilos subgenus Phalaenopsis orchids. I’ve been reading a lot about orchids. The success with this one has been motivating.
In fact, both plants are gearing up to bloom this year. One has a head start of a month or so, so we should have flowers for a fair bit of the spring and summer.
This is the same one that bloomed last year. It seems happy!
This one is blooming for the first time. See the new spike coming in right below the crown? It’s shaped like a backwards C and purplish in color.
I coaxed this orchid to have 4 leaves. Both plants have been aborting the oldest leaf when they grow a new one. I thought maybe they were too dry, so I misted them just about every day. I guess it worked?
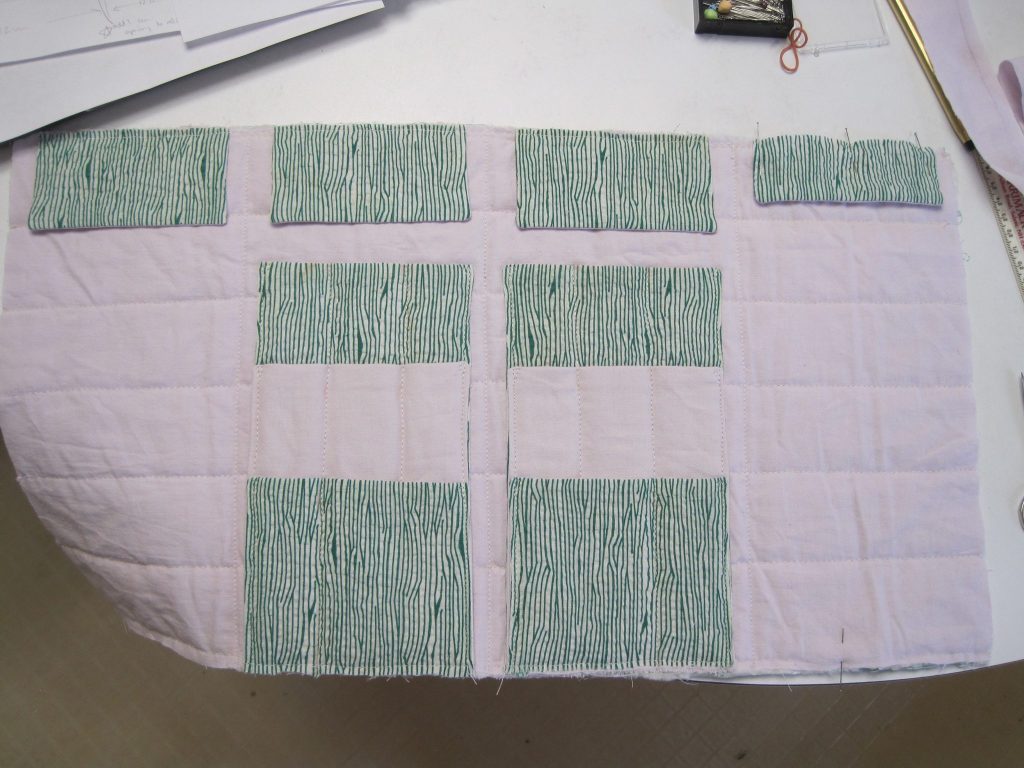
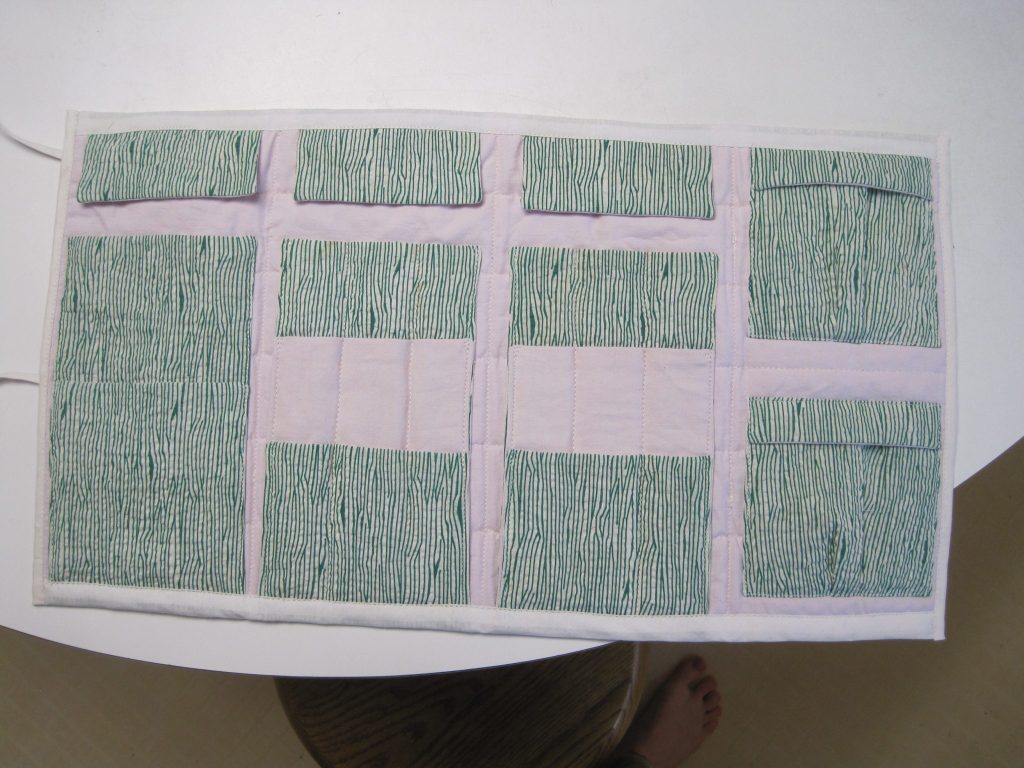
My knitting needles have been in an opaque pencil pouch for a while. It’s hard to see them and everything gets mixed together, so I’ve been wanting a new organizer for them for a while. Over the winter holidays, I made my own with some scrap fabric.
Basic layout (unfinished — pockets will be added on the far left and right sides). The purple fabric is from an old sheet from my grandparents, and the green seersucker fabric is scraps leftover from a maternity shirt my grandma made (that both she and my mom used).
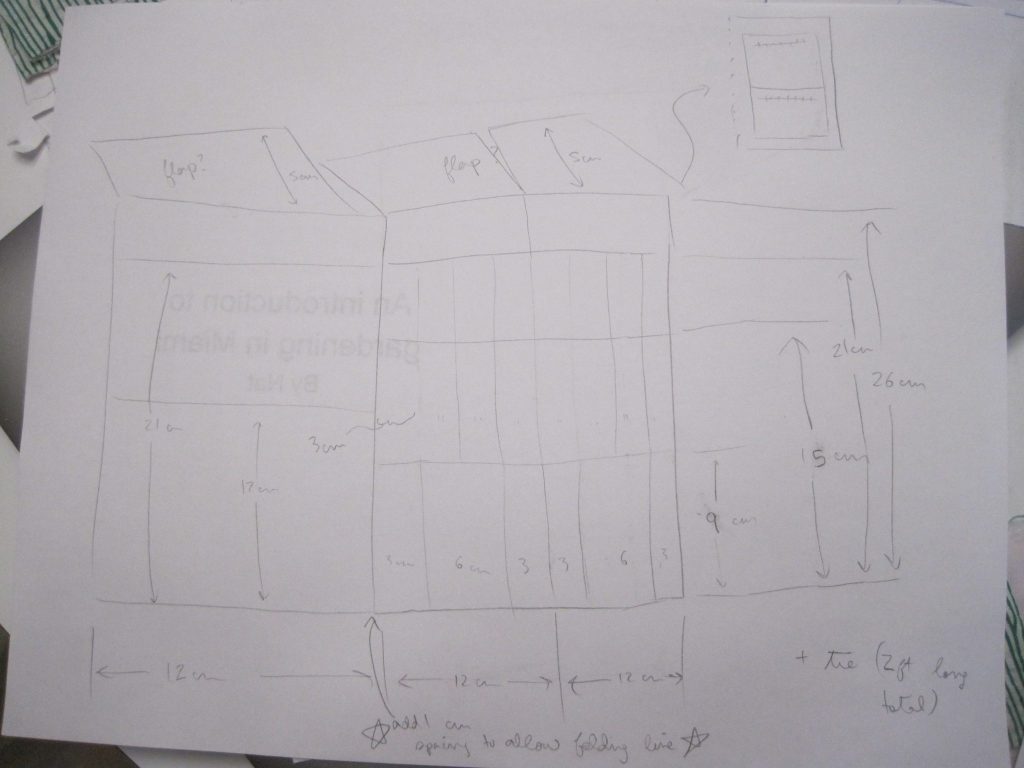
Rough design dimensions. I sewed it a little bigger than this, but it should’ve been even bigger! Some of my needles are too long and stick out.
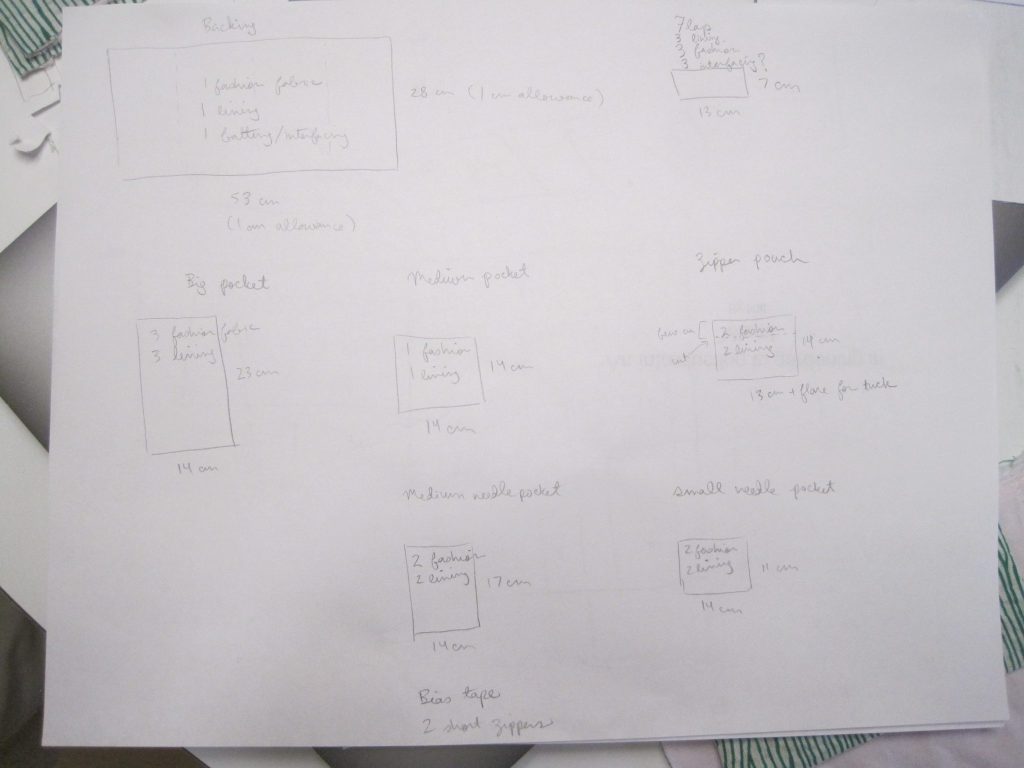
Sizes of pocket pieces to cut.
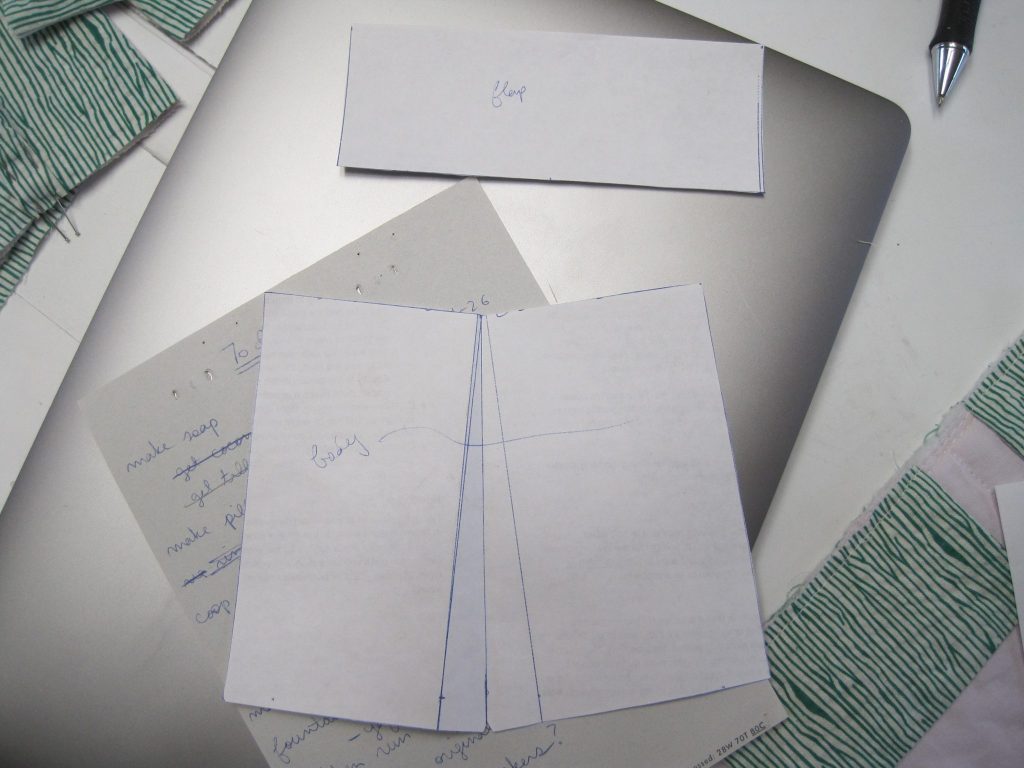
Pattern for closed-top pocket (pleated for extra volume).
Finished inside!
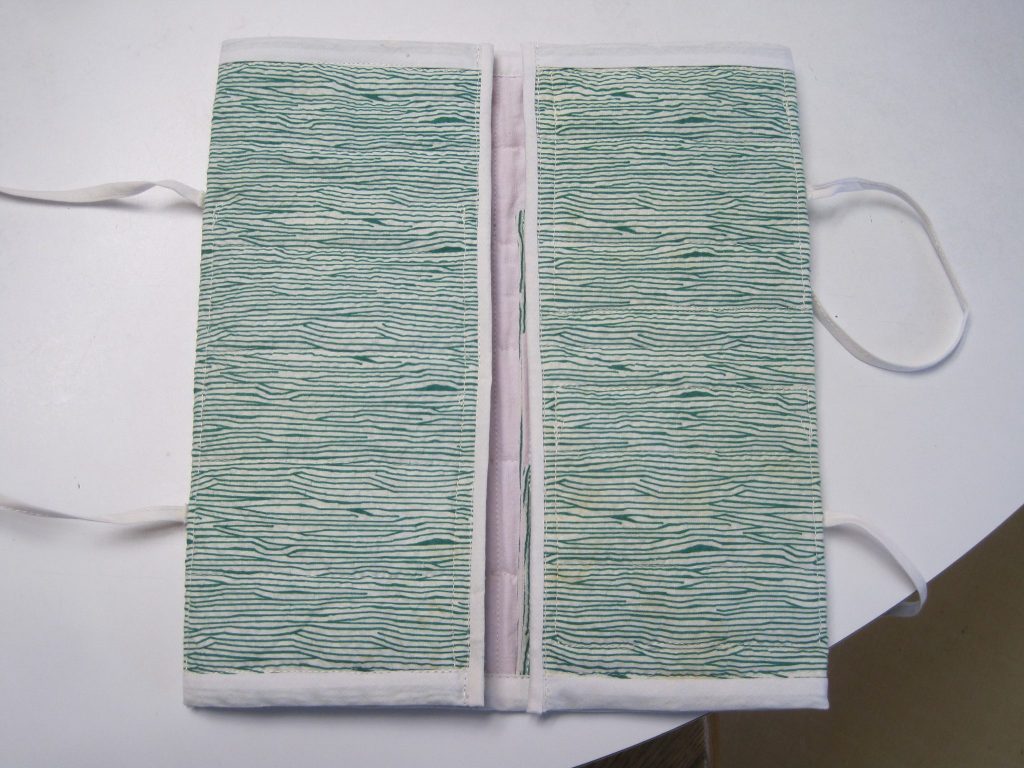
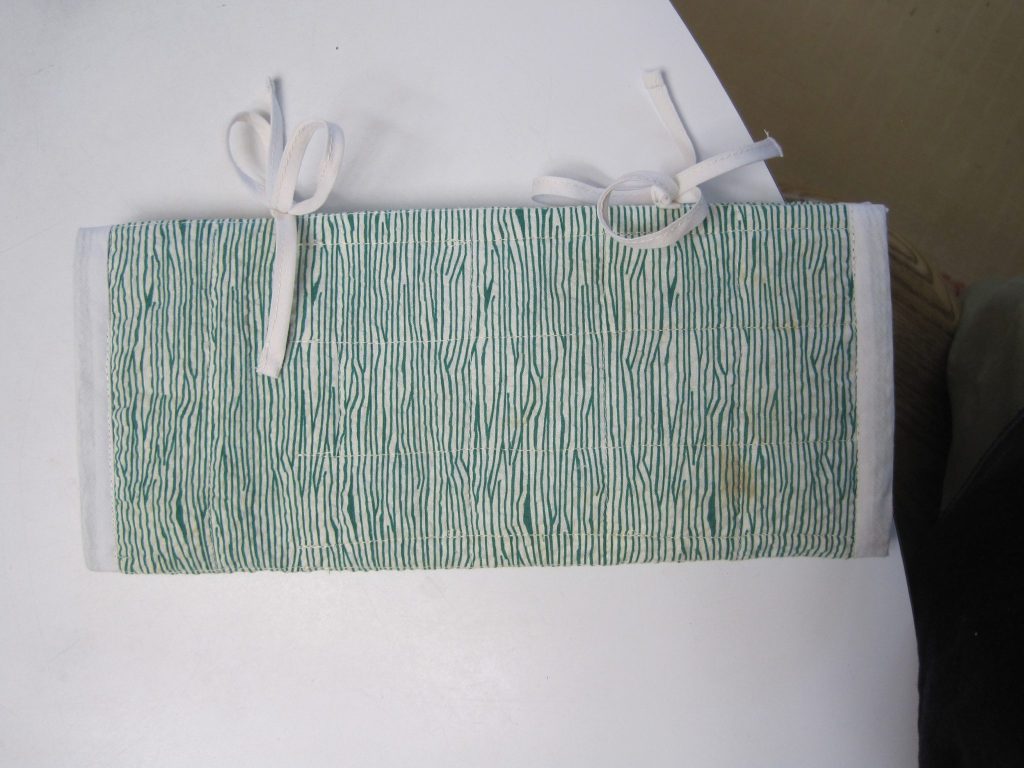
Finished outside!
It ties so if you fill it up a lot you can still close it.
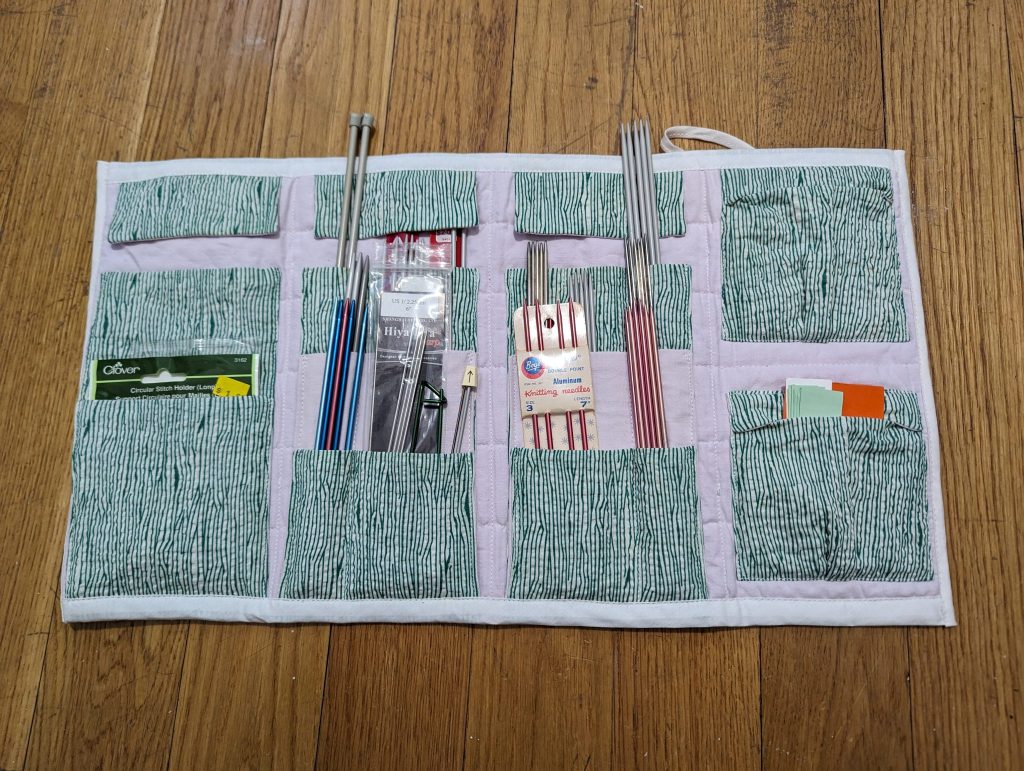
And with all my needles added! Besides some of my needles being too long, having multiple rows of needle pockets all on top of one another doesn’t actually work that well. The bulk builds up fast. It would be better to offset the pockets, just have one or two rows, and/or make each individual pocket wider. Definitely a step up from my old storage method, though!
J and I checked out a spot in the Hudson Yards LIRR train yard, near the convention center, that is going to hopefully have some visible construction work towards the new Hudson river train tunnels.
As part of the Gateway Program (construction info) to spiff up Northeast Corridor infrastructure between NYC and New Jersey, a new tunnel under the Hudson (map) is going to be built so that the existing tunnels can be fixed up and to eventually provide more rail capacity. The tunnels were damaged by Hurricane Sandy, as were many of the other tunnels into New York.
There’s supposed to eventually be a cut-and-cover section of the tunnel built right by the LIRR train yard. I wanted to see if work had started yet. J and I didn’t see anything, but there is a lot of equipment getting set up. We will check back soon!
It’s been a fair bit below freezing all week. That seems right for winter, but is a little unusual from my experience living here. In previous years, the temperature hasn’t stayed below freezing for very long, and if it snowed (rare), it would melt the next day.
It’s snowed and “iced” twice this week, which was exciting! And because of the temperatures, it’s stuck fairly well in places that don’t get salted. We have a big empty lot next to us that has a nice wintery atmosphere.
The snow from last week. It looked heavier in person.
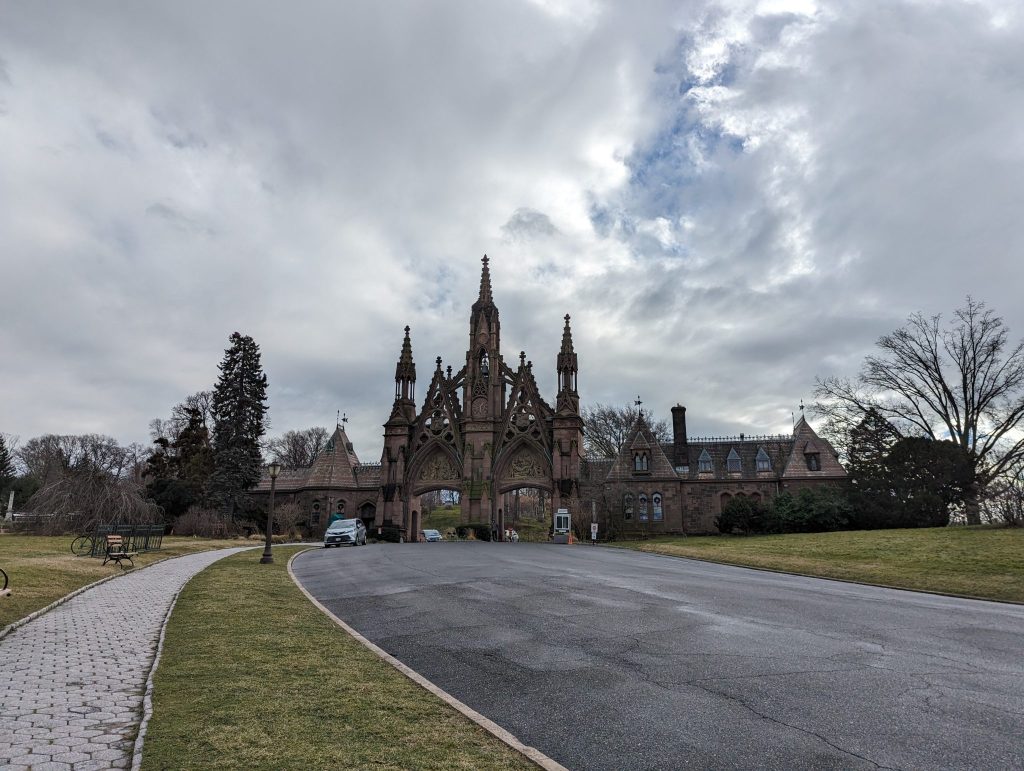
We walked around a big cemetery in Brooklyn last weekend (the main point of the trip was to eat Asian food in Sunset Park, but I’ve also wanted to go to the cemetery). There’s a Gothic revival entrance gate, with a huuuuge parakeet nest in the central tower.
Parakeets. Their noise gave them away before we could even see them.