I’m making a pair of pants for sibling C. We don’t have a lot of pants patterns around (and those that we do have are from a past era), so I drafted a pattern based on C’s measurements and Donald McCunn’s book How to make your own sewing patterns. (I have read another book of his that is slightly more useful for creating new designs from an existing pattern.)
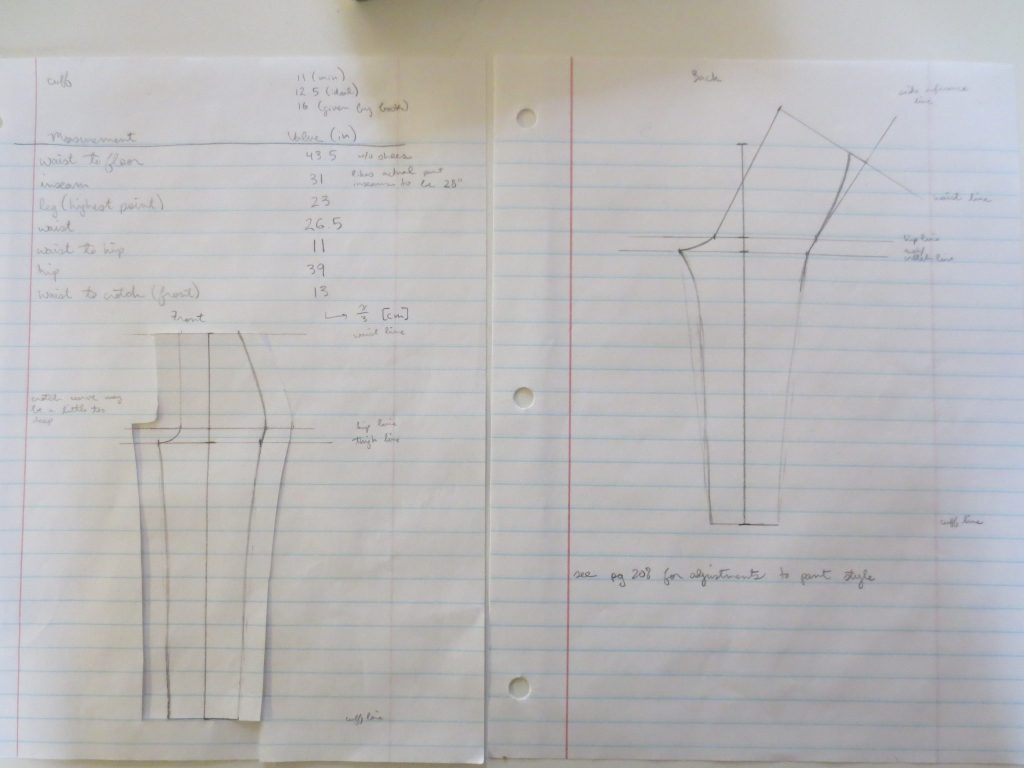
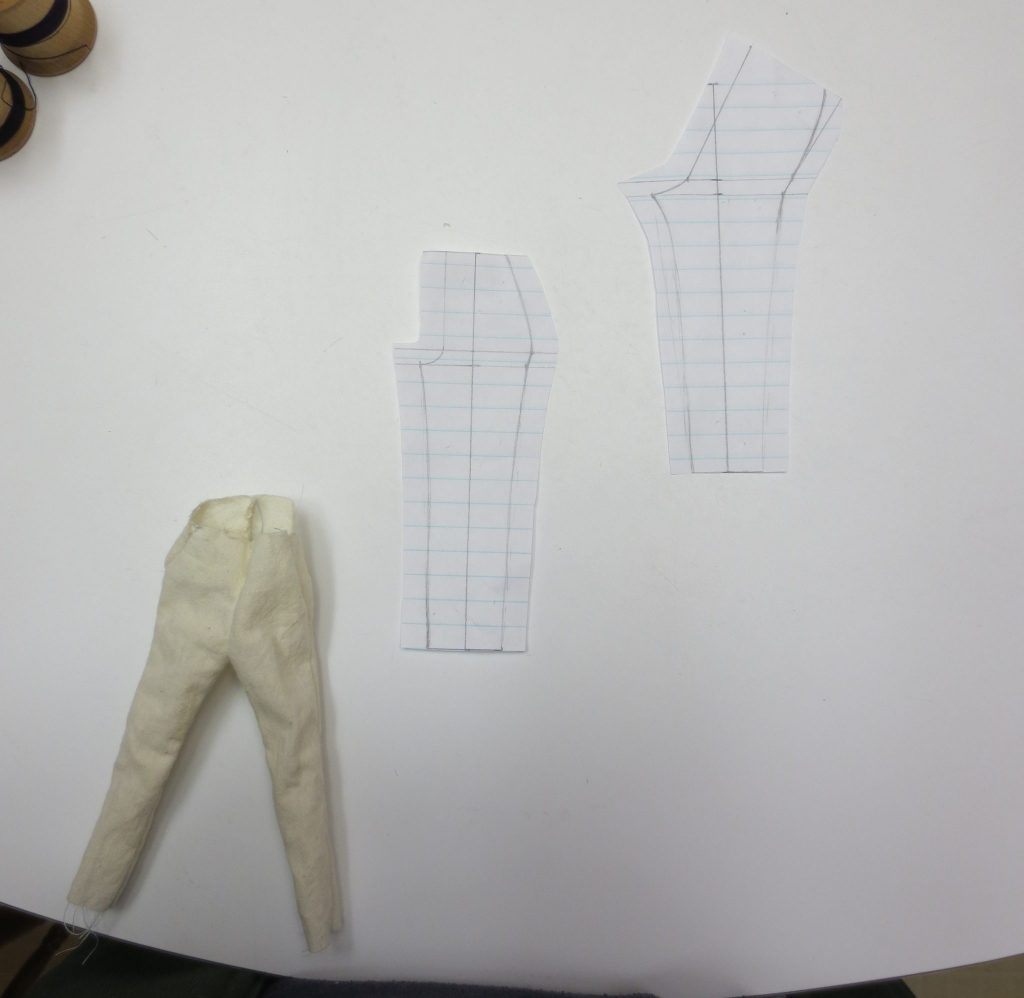
To make sure the pattern actually makes an item resembling a pair of pants, I mocked up a mini version about 15 cm long.
The pants will be made out of silk dupioni (or maybe it’s shantung? It was bought used from Austin Creative Reuse, so there is some question and I’m not well-versed in silk fabrics). C want them to have a drawstring closure – hopefully the fancy fabric will be able to pull them up to dress or party level! The pants will be lined with flannel, since C gets cold easily.
This will be my first time fitting a garment – wish me luck!